![]()
The Archean Wiki is a good resource for anyone looking to dive deep into the game, providing information on every component and mechanics available.
- This documentation is still under development, feel free to contact us if you have any questions or suggestions.
- Help us improve this documentation by submitting a pull request on our GitHub repository.
Game Overview
Archean invites you to unleash your creativity alone or with friends in a creative sandbox mode.
Design and build vehicles, bases, rockets, space stations and much more using customizable modular blocks.
Create unique configurations using components, program their behavior and explore an environment free of constraints.
Test your builds, refine your designs and defy the laws of physics.
Archean is a game in development focused on engineering and build.
Main Features
- Advanced Engineering System
Build ground bases, rovers, spacecrafts, space stations, motherships, airplanes... manage their systems, power, fuel, electronics...

- Open world
Do whatever you want, you’re not forced into any specific path.

- Space Sim
This is also a realistic space sim with orbital mechanics, proper space physics and seamless transitions between planets.

- Solo or Multiplayer
Play and build in solo, with your friends or on public servers.

- Ray-Tracing
Our renderer is fully ray-traced using modern RTX technologies.

- First person
This game is meant to be immersive, the optional third person view works fine but is mostly for screenshots.

- Creative mode
Build anything you can imagine, with unlimited resources. A survival mode is planned for the future.

- Ship interiors
Of course, you designed and built it. Please make it look nice!

- Space-legs anywhere
Walk inside your ship, walk on the surface of planets, or float in space.

- Realistic aerodynamics
Aerodynamic forces are realistically simulated based on the shape of your build.

- Realistic planet sizes and distances
You won't ever be able to explore the whole "map".

- Real-time orbital mechanics
Planets and moons orbit each other and you can orbit them at realistic velocities, even while docking on your friend's ship.

- Realistic gravity simulation
Want artificial gravity? You can use constant acceleration or centrifugal forces... just don't vomit in your helmet.

- Travel speeds up to 0.99 C
High relativistic speeds, no artificial limits, just keep accelerating... but don't forget to slow down before crashing into a planet.

- Per-server configuration
Each server make their own rules, star systems and enabled mods.

- Detailed procedural planet terrain
High resolution terrain with fully procedural rocks.

- Water and Oceans
You want to build a boat or a submarine, sure why not!?

- In-game coding
Our own in-game programming language and a more player-friendly Node-based visual programming system.

- Moddable out-of-the-box
If you’re good with C++, we will soon expose an SDK where anything is possible.
Installation
Minimum System Requirements
- NVIDIA RTX Graphics Card with the latest drivers
- Microsoft Windows 10 or 11 or a modern Linux distribution
Purchase and Play
The game is available for purchase on Steam. Simply search for "Archean" on the Steam store or visit our Steam page at https://store.steampowered.com/app/2941660/Archean/.
After purchasing, the game will be available in your Steam library for download.
Installation
Once downloaded through Steam, launch the game directly from your Steam library. Steam will automatically handle updates and file management.
AMD Graphics Cards
Archean can run with an AMD graphics card (RDNA2 architecture or newer - RX 6000 series and above). Performance may be lower compared to NVIDIA cards due to two factors:- NVIDIA's DLSS technology providing better optimization
- More mature ray-tracing driver support on NVIDIA cards
Some glitches and artifacts may appear with AMD cards. If you need help optimizing your settings with an AMD card, feel free to join our Discord community for assistance and additional information.
Intel ARC Graphics Cards
Intel ARC graphics cards are not compatible with Archean due to the lack of support for double precision floats in shaders (shaderfloat64).Bug Reports
Archean is under development, both in terms of the launcher and the game itself.
You may encounter bugs that vary in nuisance, and we pay close attention to fixing them.
To report any issues experienced, we strongly encourage you to do so in the #bug-reports channel on our Discord
Interfaces & Inventory Management
This page covers all the user interface systems in Archean, including inventory management, shortcuts, and window manipulation.
Avatar Inventories
The player has access to two personal inventories:
Belt
The belt is the quick-access toolbar at the bottom of the screen.
- Contains 9 slots for tools and items
- Select items using keys 1 through 9
- Rocks collected automatically go to the belt first, then overflow to the backpack
- Active item shows a green outline
Backpack
The backpack is your main inventory storage.
- Open/close with Tab
- In Adventure mode: 48 slots
- In Creative mode: unlimited slots with pre-filled items
- Has a search bar to filter items by name
- Mass of items affects your movement speed in Adventure mode
Hand System
The Hand is your currently selected/active item.
| Action | Description |
|---|---|
| Number keys (1-9) | Select belt slot as active |
| Double-click on any item | Select it as active (works from any open inventory) |
When a tool is in your hand, you can use it with:
- Left-click (primary function)
- Right-click (secondary function)
- Hold C to configure the tool
- Hold X for special mode
Component Interaction
Press F to interact with the component or screen you are aiming at (open inventories, press buttons, toggle switches, adjust levers, click on screens...).
Additionally, you can left-click on components directly:
| Condition | Behavior |
|---|---|
| Free mouse (no mouse look) | Click on any visible component to interact |
| Mouse look without active item | Click to interact with the component in your crosshair |
| Mouse look with active item | Left-click is used by the tool — component interaction is disabled |
Note: Left-click interaction allows you to press buttons or toggle switches without needing to put your tool away — simply free your mouse or empty your hand.
Item Manipulation
Drag & Drop
| Action | Description |
|---|---|
| Drag item | Move item between slots or inventories |
| Drop outside inventory | Drop item on the ground (creates a Box) |
Stacking & Splitting
While dragging an item stack:
| Action | Description |
|---|---|
| Right-click | Drop 1 item from the stack |
| Shift + Right-click | Drop half the stack |
| Drop on same item type | Stack items together (if space allows) |
Quick Transfer
| Action | Description |
|---|---|
| Shift + Left-click | Quickly move item to another open inventory |
This works between your backpack and any open container. Items will attempt to stack with existing items of the same type first.
Crafting
Open your backpack (Tab) to access the crafting interface on the left side.
Crafting Actions
| Mode | Available Buttons |
|---|---|
| Default | +1 and +10 |
| Hold Shift | +50 and +max (based on available resources) |
Click on an ingredient to expand and see sub-recipes (recursive crafting).
Crafting Requirements
- Solid ingredients must be in your backpack (or any open inventory)
- Fluids (H₂O, H₂, O₂) must be provided via canisters in the dedicated fluid slots at the bottom of the crafting window
- You can craft using resources from any open inventory - ingredients are automatically moved to your backpack
Item Processing Area
The Item Processing Area (1 slot) is used for processing items, not crafting. For example:
- Crushing rocks into ores (early game in Adventure mode)
Fluid Slots
At the bottom of the crafting window, you can see your fluid levels: Water, Hydrogen, and Oxygen.
- Your avatar has an integrated water tank that fills automatically when your feet touch water (ocean, lake)
- Electrolysis toggle converts water into hydrogen and oxygen for crafting recipes that require them
External Inventories (Containers)
Interact with a Container using F to open its inventory.
Using Tools from Containers
Some tools can operate directly from inside a container:
- Place the tool in the container
- Double-click the tool to activate it
- The tool will use resources from the container instead of your backpack
Tip: If you have an item from a container selected in your hand, pressing Tab will automatically open both your backpack and the source container.
This is especially useful when resources are too heavy to carry on your avatar:
- Constructor Tool - build using components stored in the container
- Destructor Tool - destroyed components go into the container
- Spool Tool - use cable spools from the container
- Blueprint Tool - spawn vehicles in Adventure mode with all required components in the container
- Rock Rake Tool - collected rocks go into the container
Distance Limits
Open inventories have a maximum interaction distance:
- Containers: 100 meters
- Dropped Boxes: 10 meters
When you move beyond the limit, items become grayed out and cannot be interacted with. The inventory window will automatically close if you move too far away.
Crafting from Open Inventories
When a container is open, the avatar's crafting system can pull ingredients from it automatically. This allows you to craft items using resources stored in containers without manually transferring them to your backpack.
Placing Components on the Ground
Some components can be placed directly on the terrain without needing an existing build structure.
- Select the component in your hand
- Aim at the ground (within 10 meters)
- Left-click to place it
| Action | Description |
|---|---|
| Left-click | Place the component |
| Hold Shift + Mouse wheel | Rotate the component |
The component will automatically align to the local gravity direction. A new build is created to hold the component.
Window Management
Pinning Inventory Windows
Many storage windows can be pinned to keep them open:
- Containers
- Computer (HDD Bay, IDE)
- Fission Reactor fuel slots
- Trash Cans
- Dropped item Boxes
| Action | Description |
|---|---|
| Click pin icon (📌) | Pin the window |
| Click X | Close and unpin the window |
| ESC | Hide all pinned windows |
| Tab | Bring back hidden pinned windows |
GetInfo Windows
Press V while aiming at a component to open its information window. This system works separately from inventory pinning:
| Action | Description |
|---|---|
| Click pin icon (📌) | Keep the window open |
| Click X | Close and unpin the window |
- Multiple GetInfo windows can be pinned simultaneously
- Pinned windows show real-time updated values
- ESC does not affect GetInfo windows
This is useful for monitoring multiple components at once (e.g., battery levels, tank pressures, sensor readings).
Game modes
In Archean, there are different game modes. Each game mode has its own rules and objectives based on the type of player you are.
Creative
In creative mode, you have access to all the blocks and items in the game directly in your inventory. You can freely build any structures and vehicles you want. Here are the specific characteristics of creative mode:
- Blueprints can be loaded without having the necessary components.
- The OwnerPad checkpoint system saves the state of batteries and tanks.
- The respawn shortcut accessible via
Shift+F10allows you to respawn without dropping the contents of your inventory. - Mining and crafting are available, but not necessary for building structures or vehicles.
- Fluid temperature can be set manually via GetInfo (V) on tanks and volumes.
You can reset your inventory using the RESET button available at the top of your inventory.
Adventure
In adventure mode, you start with an empty inventory and must collect resources to craft the necessary components for building structures and vehicles. Here are the specific characteristics of adventure mode:
- Blueprints cannot be loaded without having the necessary components in your inventory.
- The OwnerPad checkpoint system does not restore the state of batteries and tanks.
- The respawn shortcut accessible via
Shift+F10drops the contents of your inventory in a box at your location before the respawn. - Mining and crafting are necessary for building structures or vehicles.
- Avatar inventory is limited to 45 slots.
- Items in your inventory have mass, which affects your movement speed and the mass of any build you're aboard.
Survival
The survival mode is not yet available in the game. It will be added in a future update.
Changing the game mode of an existing world
You can change the game mode of an existing world at any time using the launcher.
- In the play solo menu, click the gear icon (⚙️) on the right side of the world entry
- Select Edit
- Change the game mode setting
- Save your changes
You can also rename or duplicate worlds from this menu.
Push & Pull
In Archean, items and fluids don't move by themselves. Every transfer between two components follows a Push/Pull model: one side must actively initiate the action, and the other side must accept it.
Understanding this system is essential to building functional setups. Each component's wiki page indicates its Push/Pull mode in the info table at the top.
The Three Roles
Initiate
A component that initiates an action actively starts the transfer. It will push items/fluids to whatever is connected to its output, or pull from whatever is connected to its input.
Accept
A component that accepts an action is passive. It can receive a push or respond to a pull, but it will never start a transfer on its own.
Forward
A component that forwards an action passes it through to the other side. It doesn't store anything — it simply relays the push or pull action from one port to the other.
Forwarders are transparent: if something pushes into one side of a Bridge, the Bridge pushes into whatever is on the other side. Same for pulls.
How It Works
- Push: The source sends items/fluids to the destination. The source decides what and when to send.
- Pull: The destination requests items/fluids from the source. The destination decides what and when to retrieve.
A connection only works when one side initiates and the other side accepts (or forwards to something that accepts). Two passive components connected together will never transfer anything.
A Common Mistake
Consider this setup: Mining Drill → Container → Crusher
The Drill initiates push, so rocks arrive in the Container. But the Container only accepts — it will never push anything out on its own. And the Crusher only accepts push — it won't pull from the Container either. Result: rocks pile up in the Container and nothing reaches the Crusher.
Solutions
Mining Drill → Crusher → Container The Drill pushes rocks to the Crusher, which accepts them, processes them, and pushes the resulting ores to the Container.
Mining Drill → Container → Item Conveyor → Crusher → Container The Item Conveyor is an initiator — it actively pulls from the first Container and pushes to the Crusher. This is useful when you want to buffer rocks or control the flow rate.
Reading Component Pages
Every component page shows its Push/Pull mode in the info table:
| Mode | Meaning |
|---|---|
Initiate Push | Actively pushes to its output |
Initiate Pull | Actively pulls from its input |
Initiate Push/Pull | Actively does both |
Accept Push | Passively receives pushes |
Accept Pull | Passively responds to pulls |
Accept Push/Pull | Passively does both |
Accept Push/Pull -> Forwards action to other side | Relays actions through |
Some components combine roles — for example, the Crusher accepts push on its input (rocks in) and initiates push on its output (ores out).
Pressurization
Pressurization in Archean allows you to create sealed compartments that can hold gases at different pressures than the surrounding environment. This is essential for building spacecraft cabins, submarines, airships, or custom fuel tanks.
How It Works
The Volume Component
The Volume component is the core of the pressurization system. When placed inside a build and scanned, it uses a voxel-based algorithm to detect the boundaries of the enclosed space.
- Scanning: Click the
Scanbutton on the Volume component to analyze the surrounding space - Propagation: The system expands in all directions (X, Y, Z) until it hits solid/airtight blocks
- Status:
- AIRTIGHT (green): The compartment is completely sealed
- LEAK (red): There's an opening to the outside
Each Volume component only detects the compartment it is placed in. You need separate Volume components for each isolated compartment.
Airtight Components
Not all components seal a volume. Only components marked as airtight act as walls for pressurization. These include:
| Category | Airtight Components |
|---|---|
| Joints | Small Hinge, Small Pivot, Linear Track |
| Bridges | Data Bridge, Fluid Bridge, Item Bridge, Low/High Voltage Bridge |
| Junctions | Fluid Junction, Item Junction |
| Storage | Container, Small Container |
| Docking | Dockable Door |
| Other | Passive Radiator, Aileron, Mini Router... |
Regular building blocks (frames, panels) are also airtight by default.
Joints and Pressurization
Joints (Small Hinge, Small Pivot, Linear Track) have a special behavior:
- When aligned (neutral position, value = 0): The joint is airtight and seals the volume
- When moved (any other position): The joint breaks the seal, causing a leak
This allows you to create functional doors and hatches:
- Build a door frame with blocks
- Place a Small Hinge or Small Pivot
- Build the door panel on the joint's movable part
- When the joint returns to position 0, the compartment seals
Important: When a joint moves, the Volume component automatically re-scans to detect if the seal is broken.
Dockable Doors
The Dockable Door has integrated pressurization management:
- Closed: Acts as an airtight seal
- Open: Allows gas transfer between:
- The inside compartment and outside environment (if not docked)
- Two docked compartments (if docked with another Dockable Door)
When two spacecraft dock and open their Dockable Doors, their atmospheres mix and equalize pressure.
Fluid Port - The Key Interface
The Fluid Port is the essential component for interacting with pressurized volumes. It's the only way to programmatically inject or extract fluids from a sealed compartment.
How It Works
The Fluid Port acts as a bridge between the fluid system (pumps, tanks, pipes) and a pressurized volume:
- Position matters: The port's nozzle must be physically inside the pressurized volume to interact with it
- Automatic detection: It automatically detects if it's inside a scanned volume or in the ambient environment
- Bidirectional: Can both push fluids into and pull fluids from a volume
Physical Limitations
The Fluid Port has hard-coded physical limits:
| Property | Value |
|---|---|
| Maximum flow rate | 1.0 m³/s |
| Flow calculation | Limited by min(requested_mass / density, 1.0 m³/s × deltaTime) |
This means:
- Dense fluids (liquids) transfer more mass per second than light fluids (gases)
- You cannot instantly fill or empty a volume - it takes time
- Multiple Fluid Ports can be used in parallel to increase total flow rate
Usage Scenarios
Filling a Custom Fuel Tank
- Build a sealed compartment with a Volume component
- Place a Fluid Port with its nozzle inside the volume
- Connect the Fluid Port to a Fluid Pump and a fuel source (tank, electrolyzer, etc.)
- The pump pushes fuel through the Fluid Port into your custom tank
Extracting from a Volume
- Place a Fluid Port inside the pressurized volume
- Connect it to a pump configured to pull
- The fluid composition inside the volume is extracted proportionally
Cabin Life Support
- Create a sealed cabin with a Volume component
- Place a Fluid Port inside for injecting breathable atmosphere
- Connect to an oxygen source and pump
- Use a second Fluid Port to vent CO2 or maintain pressure
Environment Detection
When the Fluid Port is not inside a pressurized volume, it interacts with the ambient environment:
- On Earth: Pulls atmospheric air (N2, O2 mix)
- In water: Pulls H2O
- In space: Nothing to pull (vacuum)
Press V on a Fluid Port to see:
- Current environment density (kg/m³)
- Environment composition (percentage by volume)
Gas Physics
The pressurization system simulates realistic gas behavior:
Properties Tracked
- Pressure (Pascals/kPa)
- Temperature (Kelvin)
- Density (kg/m³)
- Composition (O2, N2, H2, CH4, H2O, etc.)
- Liquid Level (for storing liquids)
Gas Transfer
- Gases flow from high pressure to low pressure
- Transfer rate depends on the pressure difference and opening size
- Temperature is averaged when gases mix
Leaks
When a compartment has a leak:
- Gas escapes to (or enters from) the environment
- The transfer continues until pressures equalize
- In space (vacuum), all gas will eventually escape
Building Tips
Creating a Sealed Cabin
- Build an enclosed space with blocks on all sides
- Place a Volume component inside
- Click
Scan- if it shows AIRTIGHT, you're done - If it shows LEAK, check for gaps in your structure
Common Leak Sources
- Missing blocks in corners or edges
- Joints that aren't at position 0
- Open Dockable Doors
- Components that aren't airtight placed in walls
Multiple Compartments
For complex builds with multiple sealed areas:
- Place one Volume component per compartment
- Each will track its own pressure and composition
- Connected volumes (sharing space) will automatically transfer gases between them
Using Volumes as Fuel Tanks
The Volume component can store any fluid, not just breathable air:
- Fill with liquid O2, H2, CH4, or H2O
- Use with Fluid Pumps to extract fuel
- The irregular shape of your build becomes your tank shape
Aerodynamics
Archean simulates aerodynamic forces that automatically apply to any vehicle moving through a fluid medium — whether it's air or water. These forces include drag (resistance to motion), lift (perpendicular force from thin surfaces), and buoyancy (upward force from fluid displacement). Understanding how these systems work is key to designing efficient aircraft, boats, submarines, and any other moving creation.
How It Works
Fluid Medium
The physics engine queries the environment at each relevant point on your vehicle to determine the local fluid properties:
| Property | Description | Example Values |
|---|---|---|
| Density (kg/m³) | Mass per volume of the fluid | Air at sea level: ~1.2, Water: ~1000 |
| Viscosity (kg/(m·s)) | Resistance to flow within the fluid | Used for water detection and damping |
- In air, density decreases with altitude. Higher altitude means less drag and lift.
- In water, density is roughly 800× greater than air — aerodynamic forces are dramatically stronger.
- In space (vacuum), density is 0 — no aerodynamic forces apply at all.
Aerodynamic forces only activate when a vehicle's speed exceeds 0.1 m/s. Below that threshold, forces are not computed.
Drag
Drag is the force that opposes a vehicle's motion through a fluid. It acts in the opposite direction of the velocity.
The drag force on each exposed surface follows the standard aerodynamic equation:
F = ½ × Cd × ρ × v² × A
| Symbol | Meaning | Value |
|---|---|---|
| Cd | Drag coefficient | 0.4 for block surfaces |
| ρ | Fluid density (kg/m³) | Depends on environment |
| v | Relative speed at the surface (m/s) | Vehicle speed + rotational speed at that point |
| A | Exposed frontal area (m²) | Perpendicular to velocity, scaled by occupancy ratio |
Key points:
- Drag grows with the square of speed — doubling your speed quadruples the drag
- Only exposed surfaces contribute to drag (see Occlusion)
- The force is computed per surface, at each surface's position, which means drag can also induce torque (rotation) if applied off-center
Lift
Lift is generated automatically by thin, flat structures — such as wings or fins — that the physics engine detects based on geometry.
A surface is classified as a lift surface when all of the following conditions are met:
| Condition | Threshold |
|---|---|
| Thickness (shortest dimension) | < 0.3 m |
| Width (medium dimension) | ≥ length / 4 |
| Length (longest dimension) | ≥ 4 m |
When a lift surface is detected:
- The lift coefficient depends on the angle of attack:
C_l = sin(|angle_of_attack| × π/2) - The drag coefficient is very low: only 0.01 (compared to 0.4 for regular surfaces)
- Lift force is perpendicular to the velocity, pushing the vehicle in the direction of the surface normal
To build wings that generate lift, use flat arrangements of blocks at least 4 meters long and less than 0.3 meters thick. Slopes can be used to shape the leading and trailing edges.
Buoyancy
Buoyancy is the upward force exerted on a submerged or partially submerged object. It opposes gravity and depends on how much fluid the vehicle's blocks displace.
Fbuoyancy = Vdisplaced × ρfluid × g
| Symbol | Meaning |
|---|---|
| Vdisplaced | Displaced volume (block volume × volumeDisplacementRatio) |
| ρfluid | Fluid density at sample point |
| g | Gravitational acceleration (opposing direction) |
- The engine samples at least 16 random points across all colliders to handle partial submersion smoothly
- Each block's contribution depends on its material's
volumeDisplacementRatio(see Materials) - Buoyancy is applied at each sample point, so a vehicle can tilt based on uneven submersion
Blocks and Shapes
Block Shapes
Different block shapes have different occupancy ratios, which directly affect drag calculations:
| Shape | Occupancy Ratio | Mass Multiplier |
|---|---|---|
| Cube | 1.0 | 1.0× |
| Slope | 0.5 | 0.5× |
| Corner | 0.5 | 0.5× |
| Pyramid | 0.5 | 0.5× |
| Inverse Corner | 0.5 | 0.5× |
The occupancy ratio scales the calculated drag area — a slope block facing the wind produces roughly half the drag of a cube in the same position.
Materials
Each block material has different physical properties that affect aerodynamics, buoyancy, and mass:
| Material | Mass (kg/block unit) | Volume Displacement Ratio | Friction |
|---|---|---|---|
| Composite | 0.25 | 0.20 × occupancy | 0.05 |
| Concrete | 10.0 | 0.25 × occupancy | 0.50 |
| Steel | 1.0 | 0.01 × occupancy | 0.20 |
| Aluminium | 0.5 | 0.01 × occupancy | 0.20 |
| Glass | 1.0 | 0.02 × occupancy | 0.10 |
| Lead | 150.0 | 1.00 × occupancy | 0.20 |
The volume displacement ratio determines how much a block contributes to buoyancy and how visible it is to the aerodynamic surface detection:
- Lead (1.0) fully displaces fluid — maximum buoyancy force but also very heavy, so it sinks
- Steel/Aluminium (0.01) barely displace fluid — they contribute almost no buoyancy
- Composite (0.2) offers a moderate balance between buoyancy and light weight
Occlusion and Exposed Surfaces
The aerodynamic system uses raycasting to determine which surfaces are actually exposed to the airflow:
- For each block collider, the engine identifies the surface facing the velocity direction
- A ray is cast from that surface outward in the velocity direction
- If the ray hits another block of the same vehicle, that surface is considered occluded and does not contribute to drag or lift
- Only truly exposed surfaces generate aerodynamic forces
This means:
- Internal blocks inside a hull add no drag — only the outer shell matters
- A compact vehicle with fewer exposed faces has less drag than a spread-out structure
- When a group of blocks has an occupancy ratio below 0.9, the system recursively examines the individual child blocks to find the actual exposed surfaces
This is an important optimization point: two vehicles with the same outer shape but different internal structures will experience the same aerodynamic drag. Fill interiors freely without worrying about added drag.
Frame Beams
Frame beams (the structural bars at the edges of frames) have a volume displacement ratio of 0. This means:
- They produce no drag
- They produce no lift
- They produce no buoyancy
- They only serve as structural collision geometry
Frame beams are aerodynamically invisible. Use them freely for internal structure without affecting your vehicle's aerodynamic performance.
Aerodynamic Components
Aileron
The Aileron is a control surface that deflects to create forces perpendicular to the airflow. It is used to steer aircraft and watercraft.
- Input: a value between
-1.0and+1.0through its data port, controlling rotation from -45° to +45° - Force: proportional to fluid density × speed² × deflection angle
- Does not compute occlusion — unlike blocks, the aileron always generates its full force regardless of surrounding geometry
Because ailerons ignore occlusion, you can hide them inside wings made of blocks. The blocks will have their surfaces occluded (reducing drag), while the ailerons still produce their full control force.
Propeller
The Propeller generates thrust by spinning blades through a fluid medium. It works in both air and water.
Key physics:
- Thrust = ½ × ρ × Adisc × veffective² × 0.4
- Drag on blades = ½ × ρ × viscosity × Adisc × veffective² × 10.0
- Ground effect: when a propeller is near the ground and pointing downward, thrust increases by up to +50% (within 3× blade radius of terrain)
- Gyroscopic precession: spinning propellers resist changes in orientation, creating a torque perpendicular to the rotation axis — just like real gyroscopes
- Maximum thrust is capped at 100,000 N
Thruster & RCS
Chemical Thrusters generate thrust through fuel combustion and are not affected by external aerodynamics for their thrust output — they work the same in atmosphere and in vacuum.
RCS (Reaction Control System) thrusters, however, experience atmospheric attenuation:
attenuation = max(e-ρ×4, 0.01)
| Environment | Density (ρ) | Attenuation | Effective Thrust |
|---|---|---|---|
| Vacuum | 0 | 100% | Full thrust |
| Air (sea level) | ~1.2 | ~99.2% | Nearly full |
| Water | ~1000 | ~1% | Almost no thrust |
RCS thrusters are designed for space maneuvering. In dense atmospheres or water, their effectiveness drops dramatically.
Water Physics
When a vehicle enters water, the physics engine applies additional damping effects beyond standard drag:
Water Detection
The engine detects water by measuring the environment's viscosity. A viscosity between 0.0000151 and 0.000999 kg/(m·s) is classified as water.
Water Damping Effects
| Effect | Description |
|---|---|
| Vertical velocity suppression | Vertical speed is reduced over time, simulating water resistance to vertical movement |
| Pitch & roll damping | Rotation around horizontal axes is dampened proportionally to how submerged the vehicle is |
| Yaw damping | Rotation around the vertical axis is dampened at half the rate of pitch/roll |
The submersion factor is calculated from the average viscosity: submerged = clamp(pow(viscosity × 1000, 0.1), 0.5, 1.0)
Water naturally stabilizes vehicles. A partially submerged vehicle will resist tipping over due to the pitch/roll damping. This makes boats inherently more stable than aircraft.
High-Speed Angular Stability
At speeds above 10 m/s, the physics engine applies an artificial angular damping that simulates pressure buildup on the vehicle's surfaces:
ω -= ω × min(1, ρ) × clamp(Δt × |v| / 25, 0, 0.025)
This means:
- Faster vehicles are more rotationally stable
- Denser fluids (water > air) provide stronger stabilization
- This prevents vehicles from tumbling uncontrollably at high speeds
- In water at high viscosity, an additional angular damping factor is applied
Design Tips
Reducing Drag
- Minimize exposed surface area — a compact, streamlined shape creates less drag
- Use slopes, corners, and bevels on leading edges and noses instead of flat cube faces
- Internal blocks don't add drag — only the outer shell matters, so fill interiors as needed
- Frame beams are aerodynamically invisible — use them freely for internal structure
Building Effective Wings
- Wings must be at least 4 meters long, less than 0.3 meters thick
- A wider wingspan (width ≥ length/4) ensures the surface is classified as a lift surface rather than a drag surface
Watercraft Design
- Composite blocks (ratio 0.2) offer the best buoyancy-to-weight balance for floating
- Steel and Aluminium (ratio 0.01) barely contribute to buoyancy — use them sparingly in boats
- Lead (ratio 1.0) displaces the most fluid, but at 150 kg per unit it will sink rapidly
- Water damping naturally stabilizes your vessel — wide, flat hulls are most stable
Propeller Placement
- Ground effect boosts thrust by up to 50% when close to terrain — useful for hovercraft designs
- Propellers generate gyroscopic torque — counter-rotating propeller pairs cancel this effect
- Propellers work in both air and water, adapting their thrust based on fluid density and viscosity
Mining
Mining in Archean is the process of locating, collecting, and processing mineral resources found in the terrain of celestial bodies. It is the foundation of the crafting system — without ores, you can't build anything.
The complete mining pipeline is: Scan → Collect → Crush → Craft.
Locating Ores
Before collecting rocks, you should first identify where valuable ores are concentrated.
The Ore Scanner Tool is a handheld device that displays a real-time graph of ore density in the direction you're facing. Just equip it and look around — it's the fastest way to scout a location.
For automated scanning, the Ore Scanner component can be controlled via XenonCode and returns composition data as key-value text objects.
Collecting Rocks
Rocks are small objects scattered on the surface of celestial bodies. They vary in size, and a bigger rock gives more material when picked up.
By Hand
Without any tool equipped, press LMB to pick up a rock. You must click again for each rock.
Rock Rake Tool
The Rock Rake is the recommended way to collect rocks manually:
- Hold
LMB: Continuously picks up rocks as you look at them RMB: Inspect a rock before picking it up — shows its composition and yield
Automated Mining — Mining Drill
The Mining Drill extracts rocks from the terrain automatically. It must be installed on an anchored build using a Ground Anchor.
The drill's efficiency decreases with depth — you should relocate it periodically when output drops. See the Mining Drill page for detailed specifications.
Rock Composition
Every rock has a composition — a set of elements with their respective densities, determined by its location on the terrain. Composition is represented as key-value text objects:
.Al{0.1500}.Fe{0.2000}.Si{0.6500} — meaning 15% Aluminium, 20% Iron, 65% Silicon.
Rocks with identical composition stack together in your inventory. Different compositions occupy separate slots.
Elements
| Symbol | Element | Symbol | Element |
|---|---|---|---|
| Al | Aluminium | Ni | Nickel |
| C | Carbon | Si | Silicon |
| Cr | Chrome | Ag | Silver |
| Cu | Copper | Sn | Tin |
| Au | Gold | Ti | Titanium |
| F | Fluorite | W | Tungsten |
| Fe | Iron | U | Uranium |
| Pb | Lead | Ch | ??? |
Processing Rocks
To turn rocks into usable ores, you need to crush them. There are two ways to do this:
Avatar Processing (Early Game)
Your backpack has a built-in Item Processing Area (1 slot) accessible from the crafting interface. Place rocks in this slot and click Crush to convert them into ores directly from your inventory. This is slow but requires no infrastructure — it's how you get your first ores in Adventure mode.
Crusher Component (Automated)
The Crusher is a placeable component for large-scale processing. It converts rocks into ores proportionally to their composition. For example, crushing 10 Kg of rock with 20% Iron yields 2000 g of Iron ore.
When concentrations are very low, the Crusher accumulates fractional amounts across multiple rocks until it can produce at least 1 unit — nothing is lost.
The Crusher does not pull from its input — rocks must be pushed to it. See the Push & Pull page for more details.
Resource Distribution
Ore distribution varies by celestial body, altitude, and proximity to volcanic features. See Earth and Moon for details.
| Rarity | Elements | Where to look |
|---|---|---|
| Common | Si, Fe, C, Cu, Sn | Everywhere / above sea level |
| Uncommon | Al, Ag | High altitude (mountains) |
| Rare | Ni, Cr, Ti, W | High altitude / very high altitude |
| Very Rare | Au, Pb, U, F | Deep sea / near volcanoes |
- Volcanoes boost Iron, Lead, and are the only source of Fluorite
Practical Tips
- Scout first: Use the Ore Scanner Tool to find a spot rich in the ores you need before placing infrastructure
- Typical setups: Mining Drill → Crusher → Container, or Mining Drill → Container → Conveyor → Crusher
- Sizing: 1 Crusher handles up to 4 Mining Drills at High Voltage
- Relocate drills when efficiency drops significantly
- Rock Rake for early game: Use it to gather your first Iron and craft your way to a Mining Drill
- Check composition: Right-click rocks with the Rock Rake to check what they contain before picking them up
N-Body Physics
Introduction
Archean supports two types of physics for entities located outside of a celestial body's atmosphere:
- Dominant Gravity Physics (Default): The celestial body with the greatest gravitational influence will affect the entity.
- N-Body Physics: All celestial bodies will affect the entity.
Why is N-Body Physics not enabled by default?
N-Body Physics offers a more realistic simulation, for players with advanced knowledge of space physics who want an extra challenge. In reality, space agencies rely on supercomputers to calculate satellite and probe trajectories and adjust them as needed. In Archean, players must perform these calculations manually, constrained by the limited computing power of a Xenoncode computer.
A unique problem in Archean is the proximity of the Moon to Earth during that era, making it nearly impossible to achieve a stable orbit around Earth without being heavily influenced by lunar gravity. However, with Dominant Gravity Physics, players can focus on the Earth's gravity and ignore the Moon's influence when in orbit around Earth.
Configuration
To enable N-Body Physics, you need to modify the file Archean-data/server/ARCHEAN_celestial.ini and set the value of nbody to yes.
Additional Information
When using N-Body Physics, we do not recommend using the NavInstrument which is designed to work natively with Dominant Gravity Physics. It is possible to use it with N-Body Physics, but it will return inaccurate information and your orbit will not be stable.
Sun
Celestial body parameters
[celestial]
base_radius = 650000000 ; meters
outer_radius = 670000000 ; meters
mass = 2e30 ; kg

[atmosphere]
density_at_surface = 1400 ; kg/m3
temperature_at_surface = 5000 ; kelvin ;

[atmosphere_composition]
; By mole fractions, given arbitrary number of molecules they will be automatically re-normalized to 100% by the engine
H = 75
He = 25
Earth
Resource distribution
| Full Element Name | Rarity | Distribution |
|---|---|---|
| Silicon (Si) | Common | Everywhere |
| Iron (Fe) | Common | Everywhere (+ near volcanoes) |
| Carbon (C) | Common | Above sea level |
| Copper (Cu) | Common | Above sea level |
| Tin (Sn) | Common | Above sea level |
| Aluminum (Al) | Uncommon | High altitude (Mountains) |
| Silver (Ag) | Uncommon | High altitude (Mountains) |
| Nickel (Ni) | Rare | High altitude (Mountains) |
| Chromium (Cr) | Rare | High altitude (Mountains) |
| Titanium (Ti) | Rare | Very high altitude |
| Gold (Au) | Very rare | Low altitude (Deep in the sea) |
| Lead (Pb) | Very rare | Low altitude (+ near volcanoes) |
| Tungsten (W) | Rare | Mixed (high and low altitude) |
| Uranium (U) | Very rare | Low altitude (Deep in the sea) |
| Fluorite (F) | Very rare | Near volcanoes only |
Celestial body parameters
[celestial]
orbit_distance = 1.5e11 ; meters
base_radius = 6200000 ; meters
outer_radius = 6400000 ; meters
mass = 6e24 ; kg
orbital_plane_tilt = 0 ; degrees
orbit_offset = 0 ; degrees
axial_tilt = -10 ; degrees
rotation_period = 43200 ; seconds
albedo = 0.2 0.2 0.25

[terrain]
height_variation = 15000 ; meters
hydrosphere = 0.2 ; as a ratio of terrain variation
module = ARCHEAN_celestial
continent_ratio = 0.5
continent_size = 2000 ; km
seed = 14182121141

[atmosphere]
density_at_surface = 1.3 ; kg/m3
mie_scattering_coefficient = 0.000001
g = -0.99
temperature_at_surface = 330 ; kelvin

[atmosphere_composition]
; By mole fractions, given arbitrary number of molecules they will be automatically re-normalized to 100% by the engine
N2 = 78.0
CO2 = 15.0
CH4 = 4.0
H2O = 2.5
O2 = 0.5
Moon
Resource distribution
Right now? We'll let you have the joy of discovering it yourself.
Celestial body parameters
[celestial]
orbit_distance = 26650000 ; meters
base_radius = 1737400 ; meters
outer_radius = 1800000 ; meters
mass = 7e22 ; kg
orbital_plane_tilt = 200 ; degrees
orbit_offset = -10 ; degrees
axial_tilt = 0 ; degrees
rotation_period = 400000 ; seconds
albedo = 0.1 0.12 0.15

[terrain]
height_variation = 20000 ; meters
module = ARCHEAN_moon

| Item | ConstructorTool |
|---|---|
| Module | ARCHEAN_build |
Description
The Constructor Tool is the primary tool used for building in Archean. It enables you to create new builds, add or remove frames, and place blocks of various shapes.
Build Modes
Press C to open the radial menu and select a build mode:
| Mode | Description |
|---|---|
| Frame | Create and modify the structural frame (steel beams) |
| Cube | Place cubic blocks |
| Slope | Place slope/ramp blocks |
| Corner | Place corner blocks |
| Pyramid | Place pyramid blocks |
| InvCorner | Place inverted corner blocks |
| Triangle | Place triangular mesh panels |
| Wall / Platform | Place flat wall or floor panels |
| Strut | Place thin structural steel beams |
Materials
When placing blocks (not frames), use the scroll wheel while holding C to select the material.
Material Masses
| Material | Mass per unit |
|---|---|
| Composite | 0.25 kg |
| Aluminium | 0.5 kg |
| Steel | 1 kg |
| Glass | 1 kg |
| Concrete | 10 kg |
| Lead | 150 kg |
Note: Steel Beams (frames) weigh 10 kg each.
How Block Mass is Calculated
The base unit is a 25×25×25 cm cube. A block's total mass depends on:
- Size: Larger blocks contain more units (e.g., a 50×50×50 cm block = 8 units)
- Shape: Non-cubic shapes (slopes, corners, pyramids, inverted corners) weigh 50% of their cubic equivalent since they occupy less volume
- Material: Each material has a different mass per unit (see table above)
Formula: Mass = units × shape_factor × material_mass
units= (size_x) × (size_y) × (size_z) in 25cm incrementsshape_factor= 1.0 for cubes and walls, 0.5 for slopes, corners, pyramids, and inverted corners. Triangles have a variable cost based on their area.
Why Masses Don't Match Reality
The masses are intentionally simplified:
- Values are rounded for readability
- Blocks are not 100% solid — they represent structural panels with internal framework, not solid chunks of material
Removing Elements
To remove any element (block, triangle, strut, or wall), aim at it while holding right-click, then quick press left-click. This works from any build mode.
Frame removal has its own controls (see Frame Mode below).
Usage
Frame Mode
Creating a New Build
Hold left-click for one second then release. A new build will be created with a single 3x3x3 metallic frame.
Tip: Hold Shift while creating to align the new frame with the ground and set it as static (anchored).
Creating a Build in Space
When in space near an existing build, you can create a new build that will spawn 5 meters in front of you. The new build is created as a child of the nearest root build. This also works with the Blueprint Tool.
Adding Frames
Aim at an existing frame face and quick press left-click.
Removing Frames
Aim at an existing frame face while holding right-click, then quick press left-click.
Adding Individual Beams
Aim at an existing frame where the beam would be while holding Shift, then quick press left-click.
Removing Individual Beams
Aim at an existing frame beam while holding Shift and right-click, then quick press left-click.
Block Modes (Cube, Slope, Corner, Pyramid, InvCorner)
Adding Blocks
- Aim at a block or beam
- Press left-click to place the block
- Use the scroll wheel to rotate it (except for cubes)
- Hold left-click and drag to resize
- Use the scroll wheel while holding left-click to resize in the other dimension
Pro Tip: The drag/resize plane is determined by the block face normal you're aiming at. The scroll wheel scales towards that normal, while dragging scales across the other two axes.
Tip: Hold Shift before pressing left-click to copy the block you're aiming at or logically add the next block.
Triangle Mode
Triangle mode allows you to place triangular mesh panels that snap to the build grid. These panels are useful for creating curved shapes, aerodynamic surfaces, or any non-rectangular geometry.
Placing Triangles
- Click on 3 grid points (vertices of existing blocks, triangles, or struts) to create a triangle
- Alternatively, click on an existing edge to start with 2 pre-selected vertices, then only one more click is needed
- Use the scroll wheel while placing to flip the normal direction (controls which side of the triangle faces outward)
- Hold Shift on an axis-aligned block face for sub-grid precision snapping to the full 25 cm grid
- Press right-click to undo the last placed vertex
Triangles snap to vertices of blocks, other triangles, and strut endpoints. Maximum span is 4 m per axis.
Materials
Hold C and use the scroll wheel to select the material. Triangles support all the same materials as blocks.
Smooth Shading
Press X while aiming at a triangle to toggle smooth shading on all connected triangles in the same group. Smooth shading is applied using a flood-fill algorithm: it propagates through shared edges to all adjacent triangles that form a continuous surface.
For smooth shading to work correctly:
- Triangle vertices must align exactly on the grid — neighboring triangles need to share the same vertex positions
- Separate groups of triangles (not connected by shared edges) are treated as independent smooth groups — toggling smooth on one group does not affect another
Smooth shading also respects symmetry mode.
Strut Mode
Struts are thin structural steel beams that connect two grid points. They are useful for creating trusses, antennas, scaffolding, or lightweight structural elements.
Placing Struts
- Click on 2 grid points to create a strut between them
- Struts snap to vertices of blocks, triangles, and other struts
- Press right-click to undo the first placed vertex
Maximum span is 4 m per axis. In adventure mode, struts require Steel Rod items.
Subdivision Snapping
Hold Shift while aiming at an existing strut to snap to subdivision points along it. Use the scroll wheel while holding Shift to change the subdivision step:
| Step sizes |
|---|
| 1 m |
| 50 cm |
| 25 cm (default) |
| 10 cm |
| 5 cm |
This allows placing new struts or triangles at precise intervals along an existing strut.
Wall / Platform Mode
Adding Walls
Aim at a frame face and quick press left-click.
Tip: Hold Shift to use the other logical frame face you're aiming at.
Tip: Hold Shift while placing to snap to the ground and create a static platform directly in front of you.
Symmetry Mode
The Constructor Tool supports symmetry building, allowing you to build mirrored structures automatically.
Symmetry can be enabled via the build's GetInfo menu (press V on any frame). When enabled:
- All frame and block operations are mirrored across the symmetry axis
- The symmetry axis position can be adjusted with 0.125m precision, allowing mirror placement at the center of blocks
Adventure Mode
In adventure mode, you need the required materials in your inventory:
- Steel Beams for frames
- Block items (Composite, Concrete, Steel, etc.) for blocks
The tool will show how many materials are required for each operation.
Tip: Enable tooltips through the F1 menu for context-sensitive help while using the Constructor Tool.

| Item | DestructorTool |
|---|---|
| Module | ARCHEAN_build |
Description
The destructor is a tool that, when equipped, allows the player to delete targeted components.
Usage
Hold Right click to activate the destruction mode.
Left click on the component to destroy it.
- You cannot destroy cables, blocks or beams with this tool.
- You cannot delete a seat if it is occupied by a player.
- If an OwnerPad had been added, you must have the
Buildpermission to destroy a component.

| Item | DashboardTool |
|---|---|
| Module | ARCHEAN_build |
Description
The Dashboard Tool is used to design dashboards with smaller components in a more flexible manner. It allows you to place screens, buttons, LEDs, labels, and other elements on surfaces to create custom control panels and displays.
Usage
Press C to open the radial menu and select the element you want to place.
Press V to open the GetInfo menu of an element and access additional options.
Available Elements
Screens
| Type | Resolution | Max Size |
|---|---|---|
| Standard Screen | 2 pixels/cm (200 px/m) | 4 m |
| HD Screen | 6 pixels/cm (600 px/m) | 50 cm |
HD Screens provide 3x higher pixel density for more detailed displays but are limited to 50 cm.
Screens update every 20 ms.
GetInfo options (V):
- Matte: Toggle between glossy and matte surface
Labels
Labels function like screens but with a resolution of 5 pixels/cm (500 px/m) and a maximum size of 1 m.
Labels update every 500 ms, making them better suited for static or slow-changing text displays.
GetInfo options (V):
- Text: Enter the text to display (multiline supported)
- Text Align: Center, Left, Right, Top, Bottom, Top Left, Bottom Left, Top Right, Bottom Right
- Text Size: 1 to 8
- Color picker: Set the text color
Buttons
PushButton
Sends a signal when pressed.
GetInfo options (V):
- Single Pulse: When enabled, sends only one pulse per press instead of continuous signal while held
ToggleButton
Switches between on/off states when clicked.
GetInfo options (V):
- Allow IO input: Accept input signals to control the state
- Horizontal: Toggle horizontal orientation
ArrowButton
Directional button with rotation options.
GetInfo options (V):
- Rotation: 0-3 (90° increments)
- Single Pulse: Same as PushButton
LED
LEDs can be clicked like push buttons and can display custom colors.
GetInfo options (V):
- Single Pulse (press): Send only one pulse per click
- Color From Input: Receive color value from data channel instead of using the configured color
- Color picker: Set the LED color
Trim
Trim is a decorative element that can be placed with a precision of 1 cm and resized in 1 cm increments up to 4 m. Useful for adding visual separation or borders to your dashboard layout.
Adding Components to Dashboards
Any component can be placed on a dashboard at arbitrary positions and orientations. This allows embedding instruments, sensors, or other components directly into your dashboard design.
Programming
For information on programming dashboard screens with XenonCode, see the Dashboard XenonCode documentation.

| Item | PaintTool |
|---|---|
| Module | ARCHEAN_build |
Description
The Paint Tool allows you to paint blocks, cables, labels and components with custom colors and surface finishes.
Usage
Controls
| Action | Control |
|---|---|
| Paint face | Left-click |
| Paint whole block (all faces) | Shift + Left-click |
| Pick color from block | Right-click |
| Replace color across entire build | X + Left-click |
Color Palettes
The Paint Tool uses a palette system to save and organize your colors.
Palette Management
- Create: Create a new empty palette
- Copy: Duplicate the current palette with a new name
- Delete: Remove the current palette
Adding Colors
Click the + button in the palette to add a new color slot.
Color Picker
The bottom section of the interface contains:
- RGB Color Picker: Select any color using the hue bar and saturation/value square
- Gamma Preview: Shows how the color will appear in-game with your gamma settings
Surface Materials
Each color can have a different surface finish:
| Material | Appearance |
|---|---|
| Matte | Rough, non-reflective surface |
| Glossy | Smooth, shiny surface |
| Metal | Rough metallic surface |
| Chrome | Mirror-like metallic surface |
| Transparent | See-through (for glass effects) |
Replace Color
Hold X and Left-click on any painted surface to replace that color across the entire build. This works on:
- Blocks: Replaces all blocks sharing the same color index
- Pipes/Cables: Replaces all pipes matching the same color
- Components: Replaces all components of the same type and material
Symmetry Painting
When the build has symmetry mode enabled, the Paint Tool automatically paints the mirrored block as well. This applies to:
- Single face painting
- Whole block painting (Shift)
If the block is on the symmetry plane, the mirrored face on the same block is painted instead.
Note: Replace color (X) always affects the entire build regardless of symmetry, so symmetry is not applied in that mode.
Notes
- Painting a block applies color per face (use Shift for all faces)
- Cables have additional customization options, see Spool

| Item | LabelTool |
|---|---|
| Module | ARCHEAN_build |
Description
The Label Tool is a tool for placing small plates on blocks to display information in the form of text.
Usage
Left clickon a block to place a new label.- You can edit the size and text of a label by targeting it and pressing the
Vkey.

| Item | RockRakeTool |
|---|---|
| Module | ARCHEAN_celestial |
Description
The RockRake tool is a tool that allows you to collect rocks on the ground faster than by hand. It is mainly used in adventure mode as an intermediate level between hand collection and mining drill.
Usage
The RockRake tool offers two main advantages over hand collection:
- Holding down the
left mouse buttonallows you to continuously pick up rocks, while the hand can only pick up one at a time. - The
right mouse buttonallows you to know the composition of the targeted rock.

| Item | BlueprintTool |
|---|---|
| Module | ARCHEAN_build |
Description
The Blueprint Tool allows you to save a copy of a build. Blueprints are saved in the (Client Settings)/blueprints folder in .json format, one per blueprint with its respective name.
With this system, you can transfer your builds to other worlds or servers, share them with friends or simply duplicate a build.
Usage
Scanning a Build
- Left-click to enter Scan Mode (range: 100 meters)
- Aim at the build you want to save
- Hold Left-click for one second to scan and save the blueprint
- Enter a name in the popup dialog
Updating an Existing Blueprint
To update an existing blueprint, simply enter the exact same name as an existing blueprint. The Create button will change to Update, allowing you to overwrite the previous version while preserving the Steam Workshop ID if published.
Spawning a Blueprint
- Right-click to open the blueprints interface
- Use the search bar to filter blueprints by name
- Select a blueprint from the Local or Steam Workshop tab
- Click Spawn to enter placement mode
Placement Controls
Free Placement (new build)
| Action | Control |
|---|---|
| Confirm spawn | Hold Left-click (2 seconds) |
| Rotate | Mouse wheel |
| Snap to ground and set static | Hold Shift |
| Cancel | Right-click |
On an Existing Build
When aiming at an existing build, quick press Left-click to attach the blueprint and enter Gizmo mode:
| Action | Control |
|---|---|
| Translate / Rotate | Gizmo handles (drag) |
| Toggle mouse look | Right-click |
| Confirm spawn | Hold Left-click away from gizmo (2 seconds), or Spawn button |
| Cancel | Right-click (when not in mouse look) |
Spawning in Space
When in space near an existing build, you can spawn blueprints the same way as creating a new build.
Steam Workshop
- Click Publish next to a local blueprint to upload it to Steam Workshop
- A built-in screenshot tool is available when publishing
Notes
- In Adventure mode, required items are displayed with their status (green = available, red = missing, orange = mod not active)
- If an OwnerPad has been added, you must have the "Build" permission to save a blueprint

| Item | SpoolTool |
|---|---|
| Module | ARCHEAN_build |
Description
The Spool Tool is used to place cables and pipes that connect components together, allowing the transfer of data, energy, items, or fluids between them.
Spool Types
Press C to open the spool selection menu. There are 5 types of spools available:


| Type | Color | Usage |
|---|---|---|
| Data Cable | Blue | Connect data ports for information transfer |
| Low Voltage Cable | Red | Connect low voltage power ports |
| High Voltage Cable | Orange | Connect high voltage power ports |
| Fluid Pipe | Gray | Connect fluid ports for liquid/gas transfer |
| Item Conduit | Dark Gray | Connect item ports for item transfer |
Each spool type can only connect compatible ports. Spools can be stacked in your inventory and the remaining length is displayed on each spool item.
Usage
Selecting Spool Type
Press C to open the spool selection menu and choose the type of cable you want to place.
Creating a Cable (Connecting Two Components)
- Aim at a component's connector and left-click to start the cable
- Click to add intermediate points to shape the cable path
- Aim at the destination connector and left-click to complete the connection
During cable creation:
- Right-click removes the last placed point (or cancels if no points exist)
- Scroll wheel cycles through alternative auto-path-finding routes
- Hold Shift to snap cables to component surfaces
- Hold X to place the cable on the inner face of blocks/components
Auto Path-Finding
The Spool Tool features automatic path-finding that suggests cable routes. Use the scroll wheel while placing to cycle through different route permutations.
Creating a Flexible Cable
To connect components on different builds:
- Start the cable on one build
- End it on another build's component
This creates a Flexible Cable that:
- Links the two builds together physically
- Is constrained by the physics engine
- Has no force limit (won't detach)
- Is affected by gravity
You can also create a flexible cable between two components of the same build by holding X.
Deleting a Cable
Hold right-click then quick press left-click on an existing cable to delete it.
Painting Cables
Use the Paint Tool to customize cable appearance:
- Normal painting changes cable color
- Hold Shift for a striped effect
- Hold X to replace color on all matching cables
- Combine both for transparent stripes
Tips:
- If a cable refuses to be created, you may not have enough length remaining in your spool
- Cables have no transfer limit or loss related to length
- Cables do not determine transfer direction
- A cable cannot be modified once placed - you must delete and recreate it
- Flexible cables affect performance more than normal cables - prioritize normal cables when possible
- Tools can use items from external containers by placing the tool inside that container

| Item | OreScannerTool |
|---|---|
| Module | ARCHEAN_celestial |
Description
The Ore Scanner Tool is a handheld device that displays mineral composition in the direction you're facing. It shows a real-time graph of ore density versus distance, allowing you to locate ore deposits before mining.
This tool is different from the OreScanner component - while the component is meant to be mounted on vehicles and controlled via XenonCode, the Ore Scanner Tool provides an immediate visual interface for the player.
Usage
Basic Operation
- Equip the Ore Scanner Tool from your inventory
- Point in the direction you want to scan
- The tool displays a graph showing ore concentrations along that direction
Interface
The scanner window shows:
- Distance selector: Choose scan range (100m, 250m, 500m, or 1000m)
- Ore checkboxes: Select which ores to display on the graph
- Graph: Shows ore density (Y-axis) vs distance (X-axis)
Ore Types
The scanner can detect the following ores:
| Symbol | Element | Color |
|---|---|---|
| Al | Aluminium | Silver/Light Gray |
| C | Carbon | Black |
| Cr | Chrome | Gray Metallic |
| Cu | Copper | Orange |
| Au | Gold | Yellow Gold |
| F | Fluorite | Purple |
| Fe | Iron | Rusty Brown |
| Pb | Lead | Dark Gray |
| Ni | Nickel | Greenish Gray |
| Si | Silicon | Dark Blue |
| Ag | Silver | Bright Silver |
| Sn | Tin | Grayish |
| Ti | Titanium | Blue-ish |
| W | Tungsten | Dark Gray |
| U | Uranium | Green |
Scanning Tips
- The scan direction is based on the horizontal component of your view direction
- The graph updates automatically as you move or change direction
- Select multiple ores to compare their locations
- Iron (Fe) is selected by default as it's the most common resource
Note: The Ore Scanner Tool requires being on a celestial body with terrain data. It won't function in space or in environments without terrain composition data.
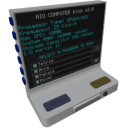
| Component | Computer |
|---|---|
| Module | ARCHEAN_computer |
| Mass | 10 kg |
| Size | 100 x 100 x 50 cm |
To learn how to use the computer's programming interface, visit the XenonCode IDE page.
Description
The computer is a component designed to run XenonCode programs to control other components or display various information on its screen.
It has characteristics that determine its power, storage, and memory. These information are visible on the BIOS as shown in the image below.

BIOS Information:
- Processor Type: The XPU64-AIO processor refers to this All-In-One computer component type.
- Frequency: The frequency is the speed at which the computer executes the code of the current program and will match the server's
updates_per_secondsetting (25 ticks per second by default). - Max IPC: This parameter is determined by a configuration file and is the maximum number of instructions per cycle before it "crashes" virtually.
- System RAM: In XenonCode programs, you can store values in volatile variables that reset when the computer restarts or when a program is reloaded. This parameter represents the maximum number of values for all variables of the currently running program.
- Storage Capacity: Similar to system RAM, there is a storage variable type that stores data on the hard drive permanently until modified. In this case, it is limited to a maximum of 256 values.
- I/O Ports: This parameter is determined by the components and simply indicates the number of data ports on the computer.
The BIOS is a program that is running by default on every computer when it boots.
In this case, its role is to indicate the characteristics of the computer as well as the list of programs available on the hard drive so that you can select one to execute.
It is possible to customize the BIOS by creating a new file named "main.xc" to modify its appearance or automatically load a program. Please refer to the XenonCode IDE documentation for more information.
Usage
Program:
When a program is created and saved, it will appear in the list of programs on the BIOS. You can select the program to execute using the F key.
Button:
The computer has two physical buttons, the "Code" button that opens the XenonCode IDE for developing your programs, and a "Reboot" button that restarts the computer and re-executes the main.xc program (BIOS).
Power:
To operate, the computer requires a low-voltage power supply. It consumes 30 watts when idle and its consumption can rise up to 500 watts depending on the ratio between the number of instructions executed by the currently running program and the current MAX IPC configured on the server.
HDD:
The Computer has a hard drive bay. You can have multiple HDD in the bay (only one active at a time), swap HDD with other computers or stash them in your inventory. This is useful when you want to move your computer somewhere else without losing your code.
- The resolution of the integrated screen is 200x160 pixels.
- The contents of HDDs (your code) is not lost if you destroy a Computer component by mistake. It will still exist in the server's files (or your own computer if you're playing solo). You can find it in (Server Settings)/worlds/(World Name)/ARCHEAN_computer/HDD-... You may even edit the code from there and it will reboot your computer live in the game, if you prefer using an external editor (VSCode actually has a XenonCode extension available)

| Component | MiniComputer |
|---|---|
| Module | ARCHEAN_computer |
| Mass | 5 kg |
| Size | 25 x 25 x 50 cm |
Description
The MiniComputer is a component designed to run XenonCode programs to control other components. It is a smaller variant of the Computer and does not have a built-in screen.
Usage
Being completely similar in terms of features to the Computer, its usage is almost identical.
The main difference is that the MiniComputer does not have a built-in screen and therefore cannot display a BIOS that lists the available programs.
If it contains only one program, it will be loaded automatically. If you want to have multiple programs, you must make a custom BIOS by creating a "main.xc" file to load the program of your choice.
main.xc:
init
	load_program("rover") ; this will load the file "rover.main.xc"

| Component | Router |
|---|---|
| Module | ARCHEAN_computer |
| Mass | 20 kg |
| Size | 100 x 100 x 25 cm |
Description
A router is a device used to connect different components to a network. Its main advantage is the ability to connect a practically unlimited number of components, all controllable by one or more computers on the network. In contrast, an individual computer's ability to connect to components is limited by its number of available ports.
Each router is equipped with 30 data ports. They can be chained to increase the total number of available ports, thus multiplying the ports by the number of routers connected together.
It requires a low-voltage power supply to operate and consumes 50 watts.
- It is not possible to have multiple separate router networks connected to different ports of the same computer. A computer can only interface with one unified router network, but this network may include an unlimited number of chained routers.
Usage
When the router is powered on and connected to components, it allows assigning aliases to components via a three-dimensional visual interface, which can later be used to identify these components from computer code.
You can open the router interface using the F key.
The interface appears as a 3D environment (see the image below) in which you can navigate while holding Mouse Right-Click, using the standard movement keys WASD, CONTROL/SPACE to go Down/Up, and Shift to accelerate movement.
The components are positioned at their actual 3D position relative to each other in the build, and will include all connected components from all routers in the chain.
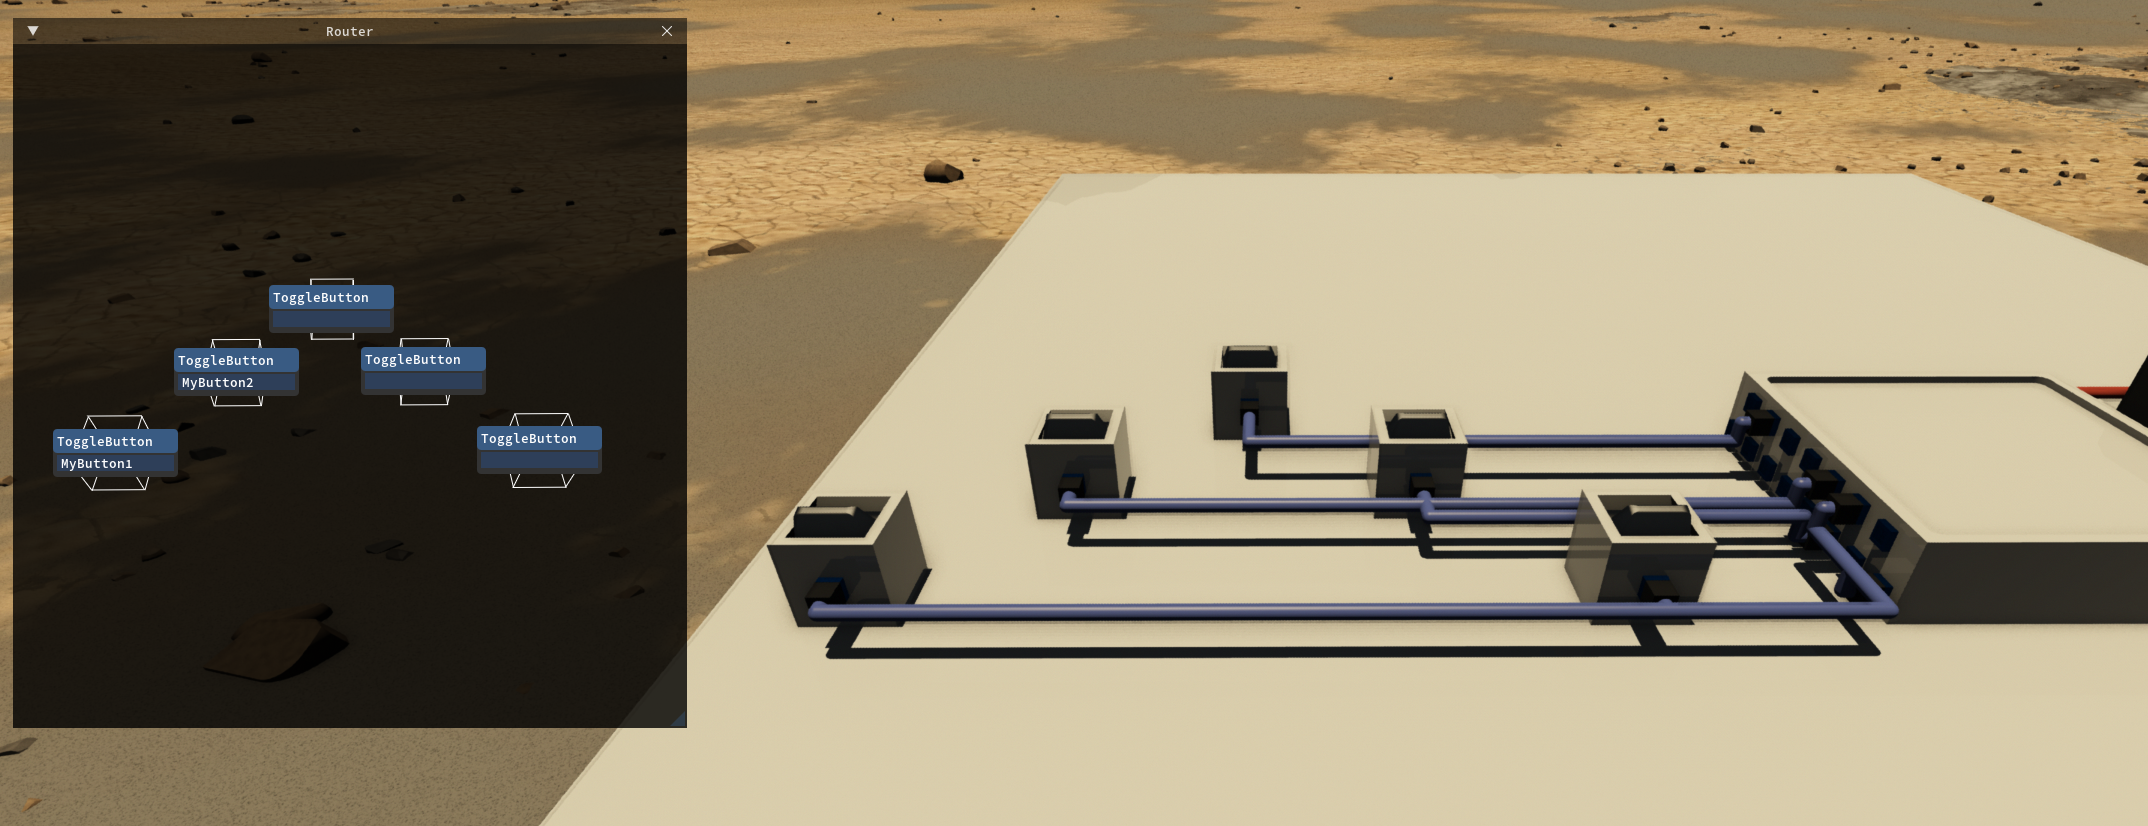
Each component displays a label where you can enter the alias that will be used later on a computer. To learn how to use aliases, refer to the XenonCode IDE page.
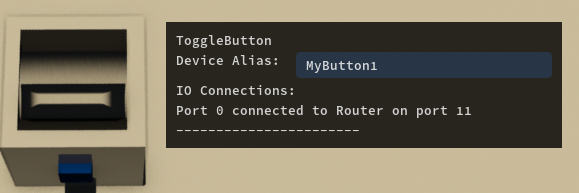
It is possible to assign an alias to a component directly by displaying its information window using the V key, as shown in the example below.
Controlling multiple components with a single alias
In certain situations, it can be practical to control multiple components serving the same purpose with a single alias. To do this, simply add an asterisk * at the end of the alias in nodes/Xenoncode. For example, if you are building an airplane and have four ailerons on the left wing, you can name them as follows:
leftAileron1leftAileron2leftAileron3leftAileron4
You can then control them using the alias leftAileron*. The asterisk * allows you to select all components whose alias begins with leftAileron.
Additional information:
-
The routers that communicate directly with a computer must be powered, other routers in the chain dont require power. This also allows to use a MiniRouter as if it was a Data Bridge (without power) but unlike the DataBridge it actually is capable of resolving aliases and screen references.
-
For data routing, a router must absolutely be connected to a computer or another router. You cannot have this kind of pattern
Computer > DataBridge/DataJunction > Router.
| Component | MiniRouter |
|---|---|
| Module | ARCHEAN_computer |
| Mass | 5 kg |
| Size | 25 x 25 x 50 cm |
Description
The Mini Router is a smaller variant of the Router that only has 14 data ports.
It requires a low-voltage power supply to operate and consumes 50 watts.
Like the standard Router, it allows assigning aliases to components and can be chained with other routers to expand the network.
The Mini Router that communicates directly with a computer must be powered. Other routers in the chain don't require power and can be used as a Data Bridge while still being capable of resolving aliases and screen references.
| Component | DataBridge |
|---|---|
| Module | ARCHEAN_junction |
| Mass | 1 kg |
| Size | 25 x 25 x 25 cm |
Description
The Data Bridge is a component that simply allows the relocation of a Data end point to another position.
The Data Bridge literally relocates the Data endpoint to the data bridge itself.
In order to reference said data, the Data Bridge should be referenced by Alias as opposed to the component you are attempting to read from.

| Component | DataJunction |
|---|---|
| Module | ARCHEAN_junction |
| Mass | 1 kg |
| Size | 25 x 25 x 25 cm |
Description
The data junction allows for the transmission of data from a single port to four different ports, to broadcast data to multiple components. It operates in a unidirectional manner, hence you cannot read back from it.
| Component | Keyboard |
|---|---|
| Module | ARCHEAN_hid |
| Mass | 2 kg |
| Size | 50 x 25 x 25 cm |
Description
The Keyboard is a component that provides a touch-sensitive keyboard for sending alphanumeric values to other components.
Usage
You can enter a alphanumerical value using the touch buttons of the keyboard by pressing the F key, and they will be displayed on the Keyboard screen but only become effective/updated when the confirm button (green) is pressed.
The yellow button allows you to delete the last entered character, while the red button allows you to clear everything.
^Allows switching between lowercase and uppercase!?Displays special characters- When the confirm button is pressed, a
1is sent to channel 1 for 1 tick, otherwise0is sent.
| Component | Numpad |
|---|---|
| Module | ARCHEAN_hid |
| Mass | 1 kg |
| Size | 25 x 25 x 25 cm |
Description
The Numpad is a component that provides a touch-sensitive numeric keypad for sending numerical values to other components.
Usage
You can enter a numerical value using the touch buttons of the numeric keypad by pressing the F key, and they will be displayed on the Numpad screen but only become effective/updated when the confirm button (green) is pressed.
The yellow button allows you to delete the last entered digit, while the red button allows you to clear everything.
- If the current value is negative, you can make it positive again by pressing the
-touch button.- When the confirm button is pressed, a
1is sent to channel 1 for 1 tick, otherwise0is sent.

| Component | PilotSeat |
|---|---|
| Module | ARCHEAN_avatar |
| Mass | 50 kg |
| Size | 75 x 75 x 175 cm |
Description
The Pilot Seat allows a player to control (send values on different channels) a component using the bound vehicle controls from a keyboard, controller, or joystick.
Usage
Press R to sit in the seat.
Press R to exit the seat.
You can enable Hold key to Exit Seat in the game settings if you prefer the old behavior of holding R for one second.
While seated, you can move to another nearby seat without needing to exit the current seat using the
Rkey. When exiting a seat, it remembers where you were relative to the build when you entered the seat, and that is where you will be when you exit it.
Configuration
In the Pilot Seat information window accessible with the V key:
| Option | Description |
|---|---|
| Smooth Controls | Smooths out keyboard inputs for players without a joystick |
| Emit user token on Channel 0 | Sends the user's token on Channel 0 instead of 1 (enabled by default) |
The user token can be used with a HUD Controller to identify which user is seated.
List of outputs
| Channel | Function | Range |
|---|---|---|
| 0 | Using | 1 or the token of the user seated in the Pilot Seat, otherwise 0 |
| 1 | Backward/Forward | -1.0 to +1.0 |
| 2 | Left/Right | -1.0 to +1.0 |
| 3 | Down/Up | -1.0 to +1.0 |
| 4 | Pitch | -1.0 to +1.0 |
| 5 | Roll | -1.0 to +1.0 |
| 6 | Yaw | -1.0 to +1.0 |
| 7 | Main Thrust | 0.0 to 1.0 |
| 8 | Aux 1 | 0 or 1 |
| 9 | Aux 2 | 0 or 1 |
| 10 | Aux 3 | 0 or 1 |
| 11 | Aux 4 | 0 or 1 |
| 12 | Aux 5 | 0 or 1 |
| 13 | Aux 6 | 0 or 1 |
| 14 | Aux 7 | 0 or 1 |
| 15 | Aux 8 | 0 or 1 |
| 16 | Aux 9 | 0 or 1 |
| 17 | Aux 0 | 0 or 1 |
If an OwnerPad is present, you must have the "
Sit" permission sit in the seat andInteractto use the controls.
| Component | PushButton |
|---|---|
| Module | ARCHEAN_hid |
| Mass | 1 kg |
| Size | 25 x 25 x 25 cm |
Description
The push button constantly sends a value of 1 while it is pressed otherwise 0.
Usage
The button is activated with the F key and will remain active as long as the key is held down.
Configuration
In the configuration menu accessible with the V key:
| Option | Description |
|---|---|
| Dual-Sided | Makes the button usable from both sides |
| Single Pulse | When enabled, the button sends 1 for a single tick then immediately resets to 0, instead of staying active while held |

| Component | ToggleButton |
|---|---|
| Module | ARCHEAN_hid |
| Mass | 1 kg |
| Size | 25 x 25 x 25 cm |
Description
The switch button constantly sends a value when activated or deactivated. By default, it sends 1 when on and 0 when off, but custom values can be configured.
Usage
The F key is used to toggle the Toggle Button.
Configuration
In the configuration menu accessible with the V key:
| Option | Description |
|---|---|
| Dual-Sided | Makes the button usable from both sides |
| Allow IO Input | Allows the button to be controlled from another component through its data port |
| Off Value | The value sent when the button is off (default: 0) |
| On Value | The value sent when the button is on (default: 1) |

| Component | ThrottleLever |
|---|---|
| Module | ARCHEAN_hid |
| Mass | 1 kg |
| Size | 25 x 25 x 50 cm |
Description
The Throttle Lever is a type of control that constantly sends an analog value depending on the position of the lever. The output value is mapped to a configurable range (default -1.0 to +1.0).
Usage
The lever is controlled with the mouse by holding the F key and moving the mouse up/down.
- There is resistance in the center of the lever to help find the precise center position.
- It is possible to configure the Min and Max values of the lever, as well as the snap-to-center feature from the configuration menu accessible with the
Vkey.- The throttle lever can be controlled from another component through its data port by enabling the "Allow IO Input" mode in the configuration menu.
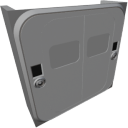
| Component | DockableDoor |
|---|---|
| Module | ARCHEAN_build |
| Mass | 400 kg |
| Size | 250 x 250 x 100 cm |
| Push/Pull Fluid | Accept Push/Pull -> Forwards action to other side |
Description
The Dockable Door is a large door that can dock to a similar door to connect two build together. Docking allows for the transfer of data, energy, and fluids between the connected build, but also constrains the two builds together in terms of physics. They are stuck together.
- Dockable Doors can only be installed on the face of frames.
- The Dockable Door can only be docked to another Dockable Door.
- This component is related to the pressurization of builds, please refer to the Pressurization page for more information.
Usage
To function properly, the Dockable Door needs to be powered via low voltage. It consumes 20 watts when inactive and up to 250 watts when the doors are in motion.
The interior side of the door has two panels for interacting with the door or transferring data, energy, or fluids through the docking port.
Here is an image illustrating the two panels.
- The panel in green is for interacting with the door, powering it, and controlling it remotely via a data port. (The table below indicates the inputs/outputs of the data port)
- The panel in blue is for connecting various cables that will transfer data, energy, or fluids to/from the other docked door.
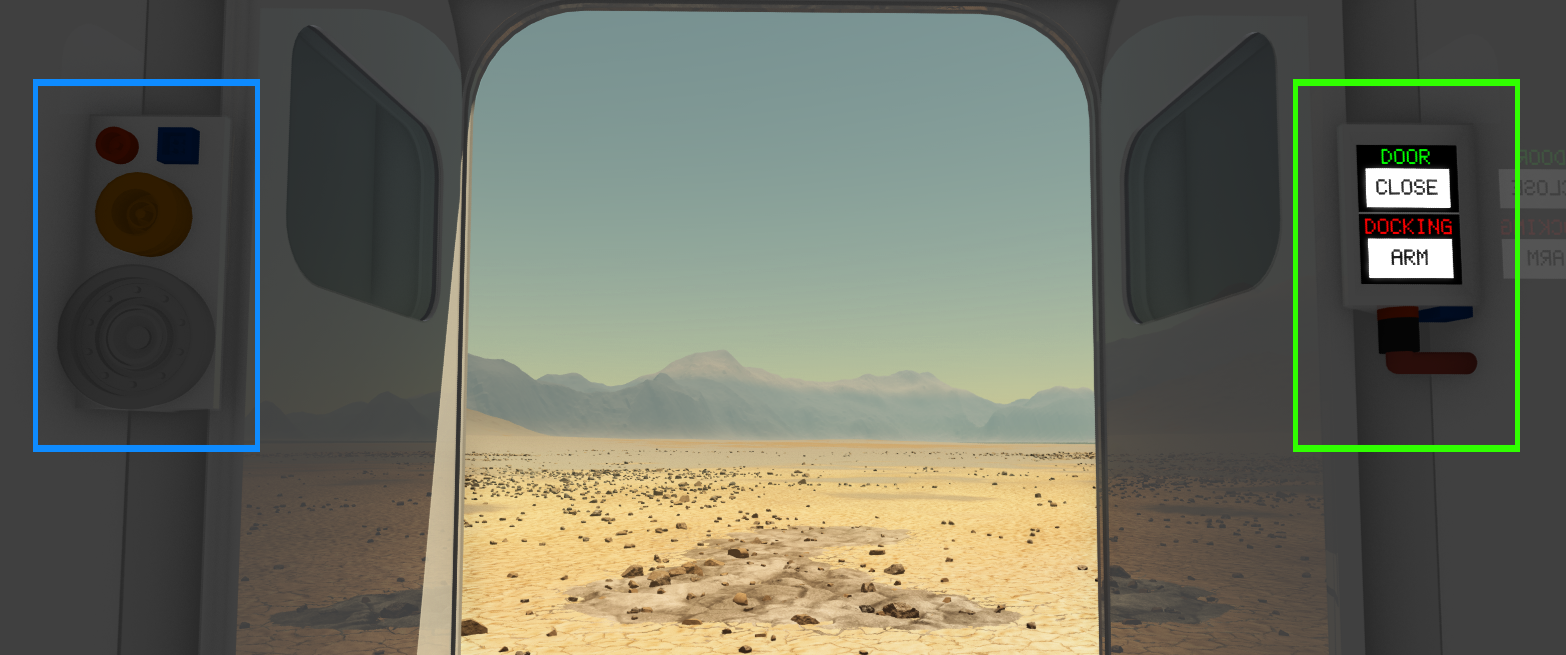
Usage with aliases
Using default aliases isn't possible for both ports simultaneously because the object will only display a single alias field in its information window (V). Similarly, the router only displays a single alias field per component.
To separately use data ports with aliases, you need to use a data bridge or data junction. This allows you to assign aliases to these objects instead of the docking ports.
List of inputs
| Channel | Function |
|---|---|
| 0 | Close/Open Door |
| 1 | Arm/Disarm Dock |
List of outputs
| Channel | Function |
|---|---|
| 0 | Door State |
| 1 | Dock State |
| Component | DockingPort |
|---|---|
| Module | ARCHEAN_build |
| Mass | 50 kg |
| Size | 50 x 50 x 50 cm |
| Push/Pull Fluid | Accept Push/Pull -> Forwards action to other side |
Description
The docking port is a component that allows two builds to be connected together. The connection enables the transfer of data, energy, fluids, and items between the connected builds, but it also physically constrains them together. They are stuck together.
Usage
The docking port does not need to be powered. The separate data connector allows controlling the docking port, while the other connectors allow connecting various cables that will transfer data, energy, or fluids to/from the other docking port.
Transfer Mode
The Docking Port can operate in two transfer modes, configurable via the GetInfo menu (V key):
- Fluid Mode (default): Transfers fluids between docked ports
- Item Mode: Transfers items between docked ports
Both docking ports must be set to the same mode for transfers to work.
The Docking Port can only be docked to another Docking Port.
Usage with aliases
Using default aliases isn't possible for both ports simultaneously because the object will only display a single alias field in its information window (V). Similarly, the router only displays a single alias field per component.
To separately use data ports with aliases, you need to use a data bridge or data junction. This allows you to assign aliases to these objects instead of the docking ports.
List of outputs
| Channel | Function |
|---|---|
| 0 | Is Docked |
List of inputs
| Channel | Function |
|---|---|
| 0 | Arm/Disarm Docking |

| Component | Hitch |
|---|---|
| Module | ARCHEAN_build |
| Mass | 10 kg |
| Size | 50 x 50 x 50 cm |
Description
The Hitch component connects two builds together at a fixed point, while allowing full rotational freedom around the joint. Once connected, the vehicles remain locked in position but are free to rotate relative to each other around the hitch.
Usage
The Hitch has a data port that controls its state.
When two Hitch components are activated (armed) and come into close proximity, they automatically connect.
The connection can be broken at any time by deactivating either component.
- For performance reasons, collisions are not processed between hitched builds. The game uses server-side physics, and continuously checking collisions between vehicles in close proximity would be too costly. A future update may allow players to define constraints across all hitch axes to simulate physical limits, for example, preventing a trailer from rotating beyond a certain angle to avoid clipping into its tractor.
List of inputs
| Channel | Function | value |
|---|---|---|
| 0 | Arm/Disarm Docking | 0 or 1 |
List of outputs
| Channel | Function | value |
|---|---|---|
| 0 | Is Docked | 0 or 1 |
| Component | LowVoltageBattery |
|---|---|
| Module | ARCHEAN_battery |
| Mass | 10 kg |
| Size | 50 x 50 x 50 cm |
Description
- Voltage: 44 to 52 volts depending on its current state of charge
- Current: 1000 amps per port
- Total capacity: 10 kWh
- Electrical ports: 4
- Data port: 1 port for battery status monitoring
Recycling: When crushed, this battery returns approximately 50% of its crafting cost in raw ores.
Usage
With the battery providing 1000 amps per port, you can get up to 52 kw on each port to power components.
List of outputs
| Channel | Function |
|---|---|
| 0 | Voltage |
| 1 | Max Capacity (Wh) |
| 2 | State of charge |
| 3 | Throughputs (watts) |

| Component | HighVoltageBattery |
|---|---|
| Module | ARCHEAN_battery |
| Mass | 100 kg |
| Size | 100 x 100 x 100 cm |
Description
- Voltage: 480 to 500 volts
- Current: 200,000 amps per port
- Total capacity: 120 kWh
- Electrical ports: 4
- Data port: 1 port for battery status monitoring
Recycling: When crushed, this battery returns approximately 50% of its crafting cost in raw ores.
Usage
With the battery providing 200,000 amps per port, you can get up to 100 MW on each port to power components.
List of outputs
| Channel | Function |
|---|---|
| 0 | Voltage |
| 1 | Max Capacity (Wh) |
| 2 | State of charge |
| 3 | Throughputs (watts) |

| Component | LowVoltageJunction |
|---|---|
| Module | ARCHEAN_junction |
| Mass | 1 kg |
| Size | 25 x 25 x 25 cm |
Description
The low voltage junction allows distributing energy to 4 ports to provide power to multiple components from a single power source.
- The low voltage junction does not allow combining energy by using it in reverse, it works in one direction only.
- The available power is distributed dynamically based on demand, allowing junctions to be chained freely to supply components as needed.
- You can monitor the power consumption of each port as well as the input power from the information window accessible with the
Vkey.

| Component | HighVoltageJunction |
|---|---|
| Module | ARCHEAN_junction |
| Mass | 1 kg |
| Size | 25 x 25 x 25 cm |
Description
The high voltage junction allows distributing energy to 4 ports to provide power to multiple components from a single power source.
- The high voltage junction does not allow combining energy by using it in reverse, it works in one direction only.
- The available power is distributed dynamically based on demand, allowing junctions to be chained freely to supply components as needed.
- You can monitor the power consumption of each port as well as the input power from the information window accessible with the
Vkey.
| Component | LowVoltageBridge |
|---|---|
| Module | ARCHEAN_junction |
| Mass | 1 kg |
| Size | 25 x 25 x 25 cm |
Description
The Low Voltage Bridge is a component that simply allows the relocation of a low voltage end point to another position.
| Component | HighVoltageBridge |
|---|---|
| Module | ARCHEAN_junction |
| Mass | 1 kg |
| Size | 25 x 25 x 25 cm |
Description
The High Voltage Bridge is a component that simply allows the relocation of a High voltage end point to another position.

| Component | LowVoltageRelay |
|---|---|
| Module | ARCHEAN_junction |
| Mass | 1 kg |
| Size | 25 x 25 x 25 cm |
Description
The low voltage relay is a device that powers a component by allowing the current to flow only if a non-zero signal value is sent to its data port.
The face with two ports is intended for connecting the power source and the data port.
The energy output is located on the face with a single port.
| Component | HighVoltageRelay |
|---|---|
| Module | ARCHEAN_junction |
| Mass | 1 kg |
| Size | 25 x 25 x 25 cm |
Description
The high voltage relay is a device that powers a component by allowing the current to flow only if a non-zero signal value is sent to its data port.
The face with two ports is intended for connecting the power source and the data port.
The energy output is located on the face with a single port.

| Component | PowerConverter |
|---|---|
| Module | ARCHEAN_junction |
| Mass | 5 kg |
| Size | 25 x 25 x 25 cm |
Description
The power converter is a device that converts high voltage energy to low voltage energy and vice versa.
This device is useful, for example, to power a computer from a high voltage battery if ports are available and to avoid adding a low voltage battery. However, if you want to power a high voltage component from a low voltage battery, you will of course still be limited in terms of total power output based on the low voltage battery's output.
| Component | FissionReactor |
|---|---|
| Module | ARCHEAN_nuclear |
| Mass | 1000 kg |
| Size | 300 x 300 x 275 cm |
| Push/Pull Fluid | Accept Push / Initiate Push |
Description
The Fission Reactor is a component that produces heat from the nuclear fission of uranium rods.
Usage
General Operation
The reactor heats water (H₂O) using the energy generated by nuclear fission.
Water has a dual role:
- Cooling the reactor core.
- Producing steam for turbines.
Required Resources
The reactor requires:
- A continuous low-voltage power supply of 1000 W.
- A supply of cold water.
- Uranium rods placed in all 4 internal zones of the reactor.
It is highly recommended to have at least one uranium rod per zone.
A reactor with empty zones will operate very poorly or not at all.
Inventory and Zones
The reactor has 40 slots, divided into 4 independent zones.
Each zone influences its local power and temperature based on the number and type of uranium rods placed.
Control Rods
Each zone has an adjustable Control Rod:
- 0% retracted (fully inserted) → Reaction stopped.
- 100% retracted → Maximum reaction.
Reaction Startup
A manual neutron injection is required via the data port.
Up to 1000 neutrons per second can be sent during startup (up to 250 neutrons per second per zone).
- Even with uranium at 100% U235, an initial neutron supply is necessary.
- With low-enriched uranium (10% U235), startup may require a few minutes of continuous neutron injection.
Chain Reaction Behavior
Although each zone of the reactor has its own uranium rods, temperature, and neutron population, the reactor is designed to simulate a realistic chain reaction across the entire core.
- Zones are not completely isolated.
- Neutrons produced in one zone can partially spread to neighboring zones.
- This behavior improves the stability of the reaction and helps weaker zones sustain fission.
A highly active zone can support a less active one, but having all zones properly fueled remains essential for maximum efficiency.
Cooling and Steam Production
When used with Steam Turbines, the ideal water output temperature is 650 K.
- Below → Reduced energy production.
- Above → Loss of efficiency (no additional gain).
An excessively high water flow can overcool the reactor and limit the power output.
Reactor States
| State | Meaning |
|---|---|
| IDLE | Reactor is off. |
| STARTING | Startup in progress (neutron injection). |
| ACTIVE | Active nuclear reaction (neutrons are being produced). |
| COOLDOWN | Cooling in progress (no neutrons produced). |
| HOT | Reactor is hot, please increase fluid flow. |
| SCRAM | Emergency shutdown triggered (Control Rods locked down to 0% retracted). |
| CRITICAL | The reactor core is severely overheating, meltdown imminent. |
| MELTDOWN | Core meltdown. Reactor unusable without manual reset. |
Safety and Meltdown
- Above 1200 K → Enters CRITICAL state - meltdown imminent.
In MELTDOWN:
- Steam flow stops - no energy can be produced.
- The reactor becomes unusable until manually reset.
Reset Meltdown
Via the reset button in the reactor interface (key V).
- In creative mode, this button is always available.
- In adventure mode, it's only available when the reactor has entered meltdown.
Uranium Rod Wear
Uranium rods degrade slowly over time as they participate in the nuclear reaction.
Isotope Consumption
- U235 is gradually consumed to sustain fission.
- U238 can also partially transform into plutonium.
Fission Products
During operation, rods automatically accumulate fission products:
- Xenon (Xe)
- Plutonium (Pu)
These elements directly appear in the rod's composition as it ages.
It is important to note that these fission products currently have no use in the game. To obtain plutonium for crafting the RTG, you must use the plutonium manufacturing process described on the RTG page RTG.
Depleted Rod
When a uranium rod's U235 concentration drops below 4.45%, it becomes depleted.
A depleted rod can no longer sustain a chain reaction, even with an external neutron supply.
Wear Factors
The lifespan of uranium rods depends entirely on:
- Their initial U235 enrichment rate.
- The actual power produced by the reactor (thus the neutron flux).
→ The lower the enrichment and the higher the power extraction, the faster the rod will wear out.
→ Conversely, a highly enriched uranium rod operating at moderate power can last for an extremely long time.
List of inputs
| Channel | Function | Value |
|---|---|---|
| 0 | Control Rod Zone 1 | 0.0 to 1.0 |
| 1 | Control Rod Zone 2 | 0.0 to 1.0 |
| 2 | Control Rod Zone 3 | 0.0 to 1.0 |
| 3 | Control Rod Zone 4 | 0.0 to 1.0 |
| 4 | Neutrons Injection | 0 to 1000 |
| 5 | SCRAM (Emergency Shutdown) | 0 or 1 |
List of outputs
| Channel | Function | Value |
|---|---|---|
| 0 | Zone 1 Temperature (Kelvin) | Number |
| 1 | Zone 2 Temperature (Kelvin) | Number |
| 2 | Zone 3 Temperature (Kelvin) | Number |
| 3 | Zone 4 Temperature (Kelvin) | Number |
| 4 | Control Rod Position Zone 1 | 0.0 to 1.0 |
| 5 | Control Rod Position Zone 2 | 0.0 to 1.0 |
| 6 | Control Rod Position Zone 3 | 0.0 to 1.0 |
| 7 | Control Rod Position Zone 4 | 0.0 to 1.0 |
| 8 | Neutron Flux Zone 1 | Number |
| 9 | Neutron Flux Zone 2 | Number |
| 10 | Neutron Flux Zone 3 | Number |
| 11 | Neutron Flux Zone 4 | Number |
| 12 | Input Water Temperature (Kelvin) | Number |
| 13 | Output Water Temperature (Kelvin) | Number |
| 14 | Water Flow Rate (kg/s) | Number |
| 15 | Reactor Status | "IDLE", "STARTING", "ACTIVE", "COOLDOWN", "HOT", "SCRAM", "CRITICAL", "MELTDOWN" |
| 16 | Lifetime | Estimated remaining time in seconds |
Uranium Rod Manufacturing
Low Enriched Uranium (LEU)
| Step | Inputs | Outputs | Temperature |
|---|---|---|---|
| Crusher (Uranium Powder) | Uranium Ore : 1000 g | Uranium powder (U235 : 10%, U238 : 90%) : 1000 g | - |
| ChemicalFurnace (Yellow Cake (U₃O₈)) | Uranium powder : 0.714 g, Oxygen (O₂) : 0.128 g | Yellow Cake (U₃O₈) : 0.842 g | 750K - 950K |
| ChemicalFurnace (Uranium Dioxide (UO₂)) | Yellow Cake (U₃O₈) : 0.842 g, Hydrogen (H₂) : 0.004 g | Uranium dioxide (UO₂) : 0.810 g, Water (H₂O) : 0.036 g | 850K - 1050K |
| Crafter (Uranium Rod LEU (UO₂)) | Uranium dioxide (UO₂) : 1000 g | Uranium rod LEU (UO₂, U235 : 10%, U238 : 90%) : 1 | - |
Highly Enriched Uranium (HEU)
UF₆ (Gas) Production
| Step | Inputs | Outputs | Temperature |
|---|---|---|---|
| Crusher (Fluorite powder (F₂)) | Fluorite Ore: 1000 g | Fluorite powder (F₂) : 1000 g | - |
| ChemicalFurnace (Hydrogen Fluoride (HF)) * | Fluorite powder (F₂) : 0.038 g, Hydrogen (H₂) : 0.002 g | Hydrogen fluoride (HF) : 0.040 g | 300K - 400K |
| ChemicalFurnace (Uranium Tetrafluoride (UF₄)) | Hydrogen fluoride (HF) : 0.080 g, Uranium dioxide (UO₂) : 0.270 g | Uranium tetrafluoride (UF₄) : 0.314 g, Water (H₂O) : 0.036 g | 750K - 950K |
| ChemicalFurnace (Uranium Hexafluoride (UF₆)) | Uranium tetrafluoride (UF₄) : 0.314 g, Fluorite powder (F₂) : 0.038 g | Uranium hexafluoride (UF₆) : 0.352 g | 550K - 750K |
* The production of Hydrogen Fluoride (HF) triggers a highly exothermic reaction. In this specific case, the resulting temperature, even if the chemical furnace displays values around 3000K, does not affect the chemical reaction. However, in subsequent processes, you will need to cool down HF before it can be used, typically with an Active Radiator or a similar cooling device.
Enrichment Centrifuge Usage
| Characteristic | Value |
|---|---|
| Power consumption | 1000 W |
| Input flow | 0.1 kg/s |
| Internal capacity | 10 kg |
Operation:
- The first centrifuge receives uranium hexafluoride (UF₆) from the top.
- The heavy output (bottom) can be discarded as it will only contain U238.
- The lighter output can be sent to another centrifuge for further processing.
Typically, achieving a high U235 concentration requires a chain of 8 to 10 centrifuges.
Back to Solid State and Uranium Rod HEU Assembly
| Step | Inputs | Outputs | Temperature |
|---|---|---|---|
| ChemicalFurnace (Uranyl Fluoride (UO₂F₂)) | Uranium hexafluoride (UF₆) : 0.352 g, Water (H₂O) : 0.036 g | Uranyl fluoride (UO₂F₂) : 0.308 g, Hydrogen fluoride (HF) : 0.080 g | 300K - 350K |
| ChemicalFurnace (Uranium Dioxide (UO₂)) | Uranyl fluoride (UO₂F₂) : 0.308 g, Hydrogen (H₂) : 0.002 g | Uranium dioxide (UO₂) : 0.270 g, Hydrogen fluoride (HF) : 0.040 g | 750K - 850K |
| Crafter (Uranium Rod HEU (UO₂)) | Enriched uranium dioxide (UO₂) : 1000 g | Uranium rod HEU (UO₂, U235 content depends on enrichment) : 1 | - |
| Component | RTG |
|---|---|
| Module | ARCHEAN_rtg |
| Mass | 50 kg |
| Size | 50 x 50 x 100 cm |
Description
The radioisotope thermoelectric generator (RTG) generates low-voltage energy. It can provide a continuous power depending on the cooling ability of the environment.
Usage
Connect the RTG to the component that requires low-voltage energy to function.
The RTG has two electrical ports, which allows you to connect two components simultaneously or chain multiple RTGs to increase the total power output.
List of outputs
| Channel | Function |
|---|---|
| 0 | Generated Power (Watts) |
| 1 | Output Power (Watts) |
The RTG can generate up to 12 kW of power. Its actual output depends on the cooling capacity of the environment (reduced to ~6 kW in the vacuum of space). It does not have any harmful effects on the player or the environment.
If you are using the RTG to power two components, the total power distributed across the two ports cannot exceed the RTG's available output power.
If one of the two components wants to consume the entire available power from the RTG, it may prevent the other component to use any power at all. It is better to use power junctions in this case, to make sure all components get fed with power equally.
How to produce Plutonium
Plutonium Production Process
| Step | Inputs | Outputs | Temperature |
|---|---|---|---|
| Crusher | Uranium Ore: 1000 g | Uranium Powder (U) : 1000 g (U235 : 10%, U238 : 90%) | - |
| ChemicalFurnace (Yellow Cake - U₃O₈) | Uranium Powder (U) : 0.714 g, O₂ : 0.128 g | Yellow Cake (U₃O₈) : 0.842 g | 750K - 950K |
| ChemicalFurnace (Uranium Dioxide - UO₂) | Yellow Cake (U₃O₈) : 0.842 g, H₂ : 0.004 g | Uranium Dioxide (UO₂) : 0.810 g, H₂O : 0.036 g | 850K - 1050K |
| Crafter | Uranium Dioxide (UO₂) : 1000 g | Uranium Rod (U235 : 10%, U238 : 90%) : 1 | - |
| Crusher | Uranium Rod | Plutonium Dioxide (PuO₂) : 1 g (Pu : 100%) | - |
| Crafter | Plutonium Dioxide (PuO₂) : 5000 g | Plutonium Pellet : 1 | - |
It is recommended to use low-enriched uranium (LEU) for plutonium production. The enrichment level has no effect on the amount of plutonium obtained.
Additional Information
In reality, processing plutonium from spent nuclear fuel is an extremely complex and demanding industrial operation, requiring advanced infrastructure and specialized facilities. For this reason, plutonium recovery and reprocessing are not currently supported in Archean.Instead, RTGs use a simplified form of plutonium specifically produced for energy generation. While this alternative remains easier to handle than real-world plutonium, its production is intentionally more challenging than in previous versions of the game, making RTGs less trivial to obtain while still accessible to advanced players.
| Component | SolarPanel |
|---|---|
| Module | ARCHEAN_celestial |
| Mass | 25 kg |
| Size | 200 x 200 x 25 cm |
Description
The solar panel generates low voltage energy. It has an efficiency of 99.9% and a surface area of 4 square meters (2x2 meters). The power output will be limited based on its distance and orientation to the sun(s). With the default solar system configuration in Archean, the sun is only about 25% as bright as our actual sun. On Archean's Earth inside the atmosphere in the best circumstances, you might be able to generate up to ~ 980 watts per panel.
Usage
Connect the solar panel to the component that requires low voltage energy to function.
The solar panel has two electrical ports, which allows you to connect two components simultaneously or chain multiple solar panels in series to increase the total available power.
List of outputs
| Channel | Function |
|---|---|
| 0 | Generated Power (Watts) |
| 1 | Output Power (Watts) |
If you are using the solar panel to power two components, the total power distributed across the two ports cannot exceed the panel's output power.
If one of the two components wants to consume the entire available power from the panel, it may prevent the other component to use any power at all. It is better to use power junctions in this case, to make sure all components get fed with power.
| Component | SmallSteamTurbine |
|---|---|
| Module | ARCHEAN_machines |
| Mass | 100 kg |
| Size | 75 x 75 x 150 cm |
| Push/Pull Fluid | Accept Push / Initiate Push |
Description
The Small Steam Turbine component is a compact version of the Steam Turbine, designed to convert the thermal energy of hot steam into electrical energy.
Usage
It operates by injecting hot water steam into its fluid input. The hotter the steam and the higher the flow rate, the more energy it can produce.
At full capacity, it can deliver up to approximately 270 kilowatts.
As with any steam turbine, a fluid output connection is required to evacuate the steam. Without it, the turbine will not produce any energy.
- Minimum operating temperature: 373 K
- Maximum effective temperature: 650 K (optimal operation)
- Maximum flow rate: 1 kg/s
The generated energy is directly delivered to a high-voltage electrical output.
When the power is not fully consumed, it will automatically bypass the turbine to keep it at a maximum rotation rate. This effect will cause the output fluid to not cool down as much.
List of outputs
| Channel | Function | Type |
|---|---|---|
| 0 | Potential Energy output (watts) | number |
| Component | SteamTurbine |
|---|---|
| Module | ARCHEAN_machines |
| Mass | 500 kg |
| Size | 150 x 200 x 200 cm |
| Push/Pull Fluid | Accept Push / Initiate Push |
Description
The Steam Turbine component converts the thermal energy of hot steam into electrical energy.
Usage
It operates by injecting hot water steam into its fluid input. The hotter the steam and the higher the flow rate, the more energy it can produce.
At full capacity, it can deliver up to approximately 27 megawatts.
A fluid output connection is required. Without it, the turbine won't be able to expel the steam and will not produce any energy.
- Minimum operating temperature: 373 K
- Maximum effective temperature: 650 K (optimal operation)
- Maximum flow rate: 100 kg/s
The generated energy is directly delivered to a high-voltage electrical output.
When the power is not fully consumed, it will automatically bypass the turbine to keep it at a maximum rotation rate. This effect will cause the output fluid to not cool down as much.
List of outputs
| Channel | Function | Type |
|---|---|---|
| 0 | Potential Energy output (watts) | number |

| Component | SmallFluidTank |
|---|---|
| Module | ARCHEAN_tank |
| Mass | 30 kg |
| Size | 50 x 50 x 100 cm |
| Push/Pull Fluid | Initiate Push, accept Push/Pull |
Description
The small fluid tank is a component that allows storing all types of fluids.
Total capacity: 0.20 m³
List of output
| Channel | Function | Value |
|---|---|---|
| 0 | Fluid level | 0.0 to 1.0 |
| 1 | Fluid content | Key-value |
| 2 | Fluid temperature | Kelvin |
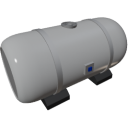
| Component | FluidTank |
|---|---|
| Module | ARCHEAN_tank |
| Mass | 200 kg |
| Size | 100 x 100 x 200 cm |
| Push/Pull Fluid | Initiate Push, accept Push/Pull |
Description
The fluid tank is a component that allows storing all types of fluids.
Total capacity: 1.50 m³
List of output
| Channel | Function | Value |
|---|---|---|
| 0 | Fluid level | 0.0 to 1.0 |
| 1 | Fluid content | Key-value |
| 2 | Fluid temperature | Kelvin |
| Component | BigFluidTank |
|---|---|
| Module | ARCHEAN_tank |
| Mass | 1000 kg |
| Size | 250 x 250 x 250 cm |
| Push/Pull Fluid | Initiate Push, accept Push/Pull |
Description
The big fluid tank is a component that allows storing all types of fluids.
Total capacity: 14 m³
List of output
| Channel | Function | Value |
|---|---|---|
| 0 | Fluid level | 0.0 to 1.0 |
| 1 | Fluid content | Key-value |
| 2 | Fluid temperature | Kelvin |
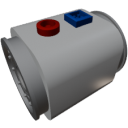
| Component | FluidPump |
|---|---|
| Module | ARCHEAN_thruster |
| Mass | 10 kg |
| Size | 25 x 25 x 25 cm |
| Push/Pull Fluid | Initiate Push/Pull |
Description
The Fluid Pump is a component used to transfer fluid up to 1 kg per second. Unlike turbo pumps, it operates on low-voltage power and reacts instantly to control inputs, allowing for highly responsive fluid management.
Usage
Power Supply
To use the pump, it needs to be powered by low-voltage. It consumes up to 1 kW when running at full speed.
Data
The data port allows controlling the pump speed by sending a value between -1 and 1.
When the pump is connected to a computer, it can also retrieve the current flow rate.
When sending a negative value, the pump will effectively run in reverse.
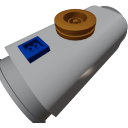
| Component | SmallTurboPump |
|---|---|
| Module | ARCHEAN_thruster |
| Mass | 25 kg |
| Size | 25 x 25 x 50 cm |
| Push/Pull Fluid | Initiate Push/Pull |
Description
The Small Turbo pump is a component used to transfer high-density fluid up to 10 kg per second.
Usage
Power Supply
To use the pump, it needs to be powered by high-voltage. It consumes up to 10 kw when running at full speed.
Data
The data port allows controlling the pump speed by sending a value between -1 and 1.
When the pump is connected to a computer, it can also retrieve the current flow rate.
When sending a negative value, the pump will effectively run in reverse.
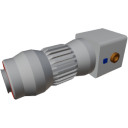
| Component | BigTurboPump |
|---|---|
| Module | ARCHEAN_thruster |
| Mass | 200 kg |
| Size | 50 x 50 x 150 cm |
| Push/Pull Fluid | Initiate Push/Pull |
Description
The Big Turbo pump is a component used to transfer high-density fluid up to 100 kg per second.
Usage
Power Supply
To use the pump, it needs to be powered by high-voltage. It consumes up to 100 kw when running at full speed.
Data
The data port allows controlling the pump speed by sending a value between -1 and 1.
When the pump is connected to a computer, it can also retrieve the current flow rate.
When sending a negative value, the pump will effectively run in reverse.
| Component | PassiveRadiator |
|---|---|
| Module | ARCHEAN_machines |
| Mass | 25 kg |
| Size | 100 x 100 x 25 cm |
| Push/Pull Fluid | Accept Push -> Forwards action to other side |
Description
The Passive Radiator is a component used to slowly cool down fluids by exchanging heat with the environment or radiating it out into space. It does not require any power.
Usage
Its cooling efficiency depends on:
- The ambient temperature
- The density of the surrounding environment
Heat exchange happens through conduction (improved with higher density) and radiation.
When a fluid flows through it, its temperature tends to equalize with the component's temperature.
List of outputs
| Channel | Function | Type |
|---|---|---|
| 0 | Temperature (K) | number |
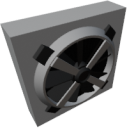
| Component | ActiveRadiator |
|---|---|
| Module | ARCHEAN_machines |
| Mass | 40 kg |
| Size | 100 x 100 x 25 cm |
| Push/Pull Fluid | Accept Push -> Forwards action to other side |
Description
The Active Radiator is a component designed to cool down fluids flowing through it. It is equipped with a fan that greatly improves heat exchange with the environment when activated.
Usage
The radiator requires:
- An electrical power supply
- A data input to activate its fan.
Without power, its cooling ability is very limited. When powered and activated, it slowly equalizes temperature between the circulating fluids and the environment.
It continuously consumes 100 Watts when powered.
List of outputs
| Channel | Function | Type |
|---|---|---|
| 0 | Temperature (K) | number |
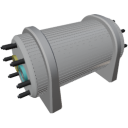
| Component | Electrolyser |
|---|---|
| Module | ARCHEAN_chemical |
| Mass | 500 kg |
| Size | 100 x 100 x 200 cm |
| Push/Pull Fluid | Initiate Push/Pull |
Description
The electrolyser is a component that allows the dissociation of water into hydrogen and oxygen.
Usage
The electrolyser requires high voltage energy input and up to 10 kW during operation and will produce linearly proportional according to the amount of available power up to a maximum of 1 kg of water per second with 10 kW of power.
To start the electrolysis process, simply connect a water source to its blue input port. This source can come from a fluid port submerged in water to directly extract water from the sea, for example, or a tank containing water.
The produced hydrogen and oxygen can then be collected respectively from the yellow (H2) and cyan (O2) output ports.
Production
The electrolyser can process up to 1 kg of water per second, providing approximately 0.9 kg of oxygen and 0.1 kg of hydrogen per second.
| Component | FluidBridge |
|---|---|
| Module | ARCHEAN_junction |
| Mass | 1 kg |
| Size | 25 x 25 x 25 cm |
| Push/Pull Fluid | Accept Push/Pull -> Forwards action to other side |
Description
The Fluid Bridge is a component that simply allows the relocation a fluid end point to another position.
| Component | FluidJunction |
|---|---|
| Module | ARCHEAN_junction |
| Mass | 20 kg |
| Size | 25 x 25 x 100 cm |
| Push/Pull Fluid | Accept Push/Pull -> Forwards action to other side |
Description
The Fluid Junction is a component that allows for the separation or combination of fluids.
Usage
The Fluid Junction transfers fluids with the logic shown in the example image below. The ports on the face that contains 4 ports only communicate with the port on the face that contains only one.
When fluid enters through the single bottom port, it is distributed among the four top ports based on the acceptance capacity of the connected components. If all ports are open, the fluid is evenly divided. However, if one or more ports are closed (e.g., due to a fluid valve), the total amount of fluid is redistributed only among the remaining ports that can still receive the flow.

| Component | FluidPort |
|---|---|
| Module | ARCHEAN_chemical |
| Mass | 1 kg |
| Size | 25 x 25 x 25 cm |
| Push/Pull Fluid | Accept Push/Pull |
Description
The fluid port is a device that allows for the suction or ejection of fluids.
This component is related to the pressurization of builds, please refer to the Pressurization page for more information.
When pulling in fluid, it will draw in the composition of the surrounding environment. For example, if it is submerged in water, it can fill a fluid tank with H2O, and if it is in the open air, it will draw in the composition of the atmosphere.
When pushing out fluid, it can purge fluid tanks of their contents.
Usage
The fluid port acts as a bridge between a fluid container and the composition of the surrounding environment.
To operate, it needs to be connected to any component capable of holding or processing fluids.
Below is an example illustrating how it could be connected.
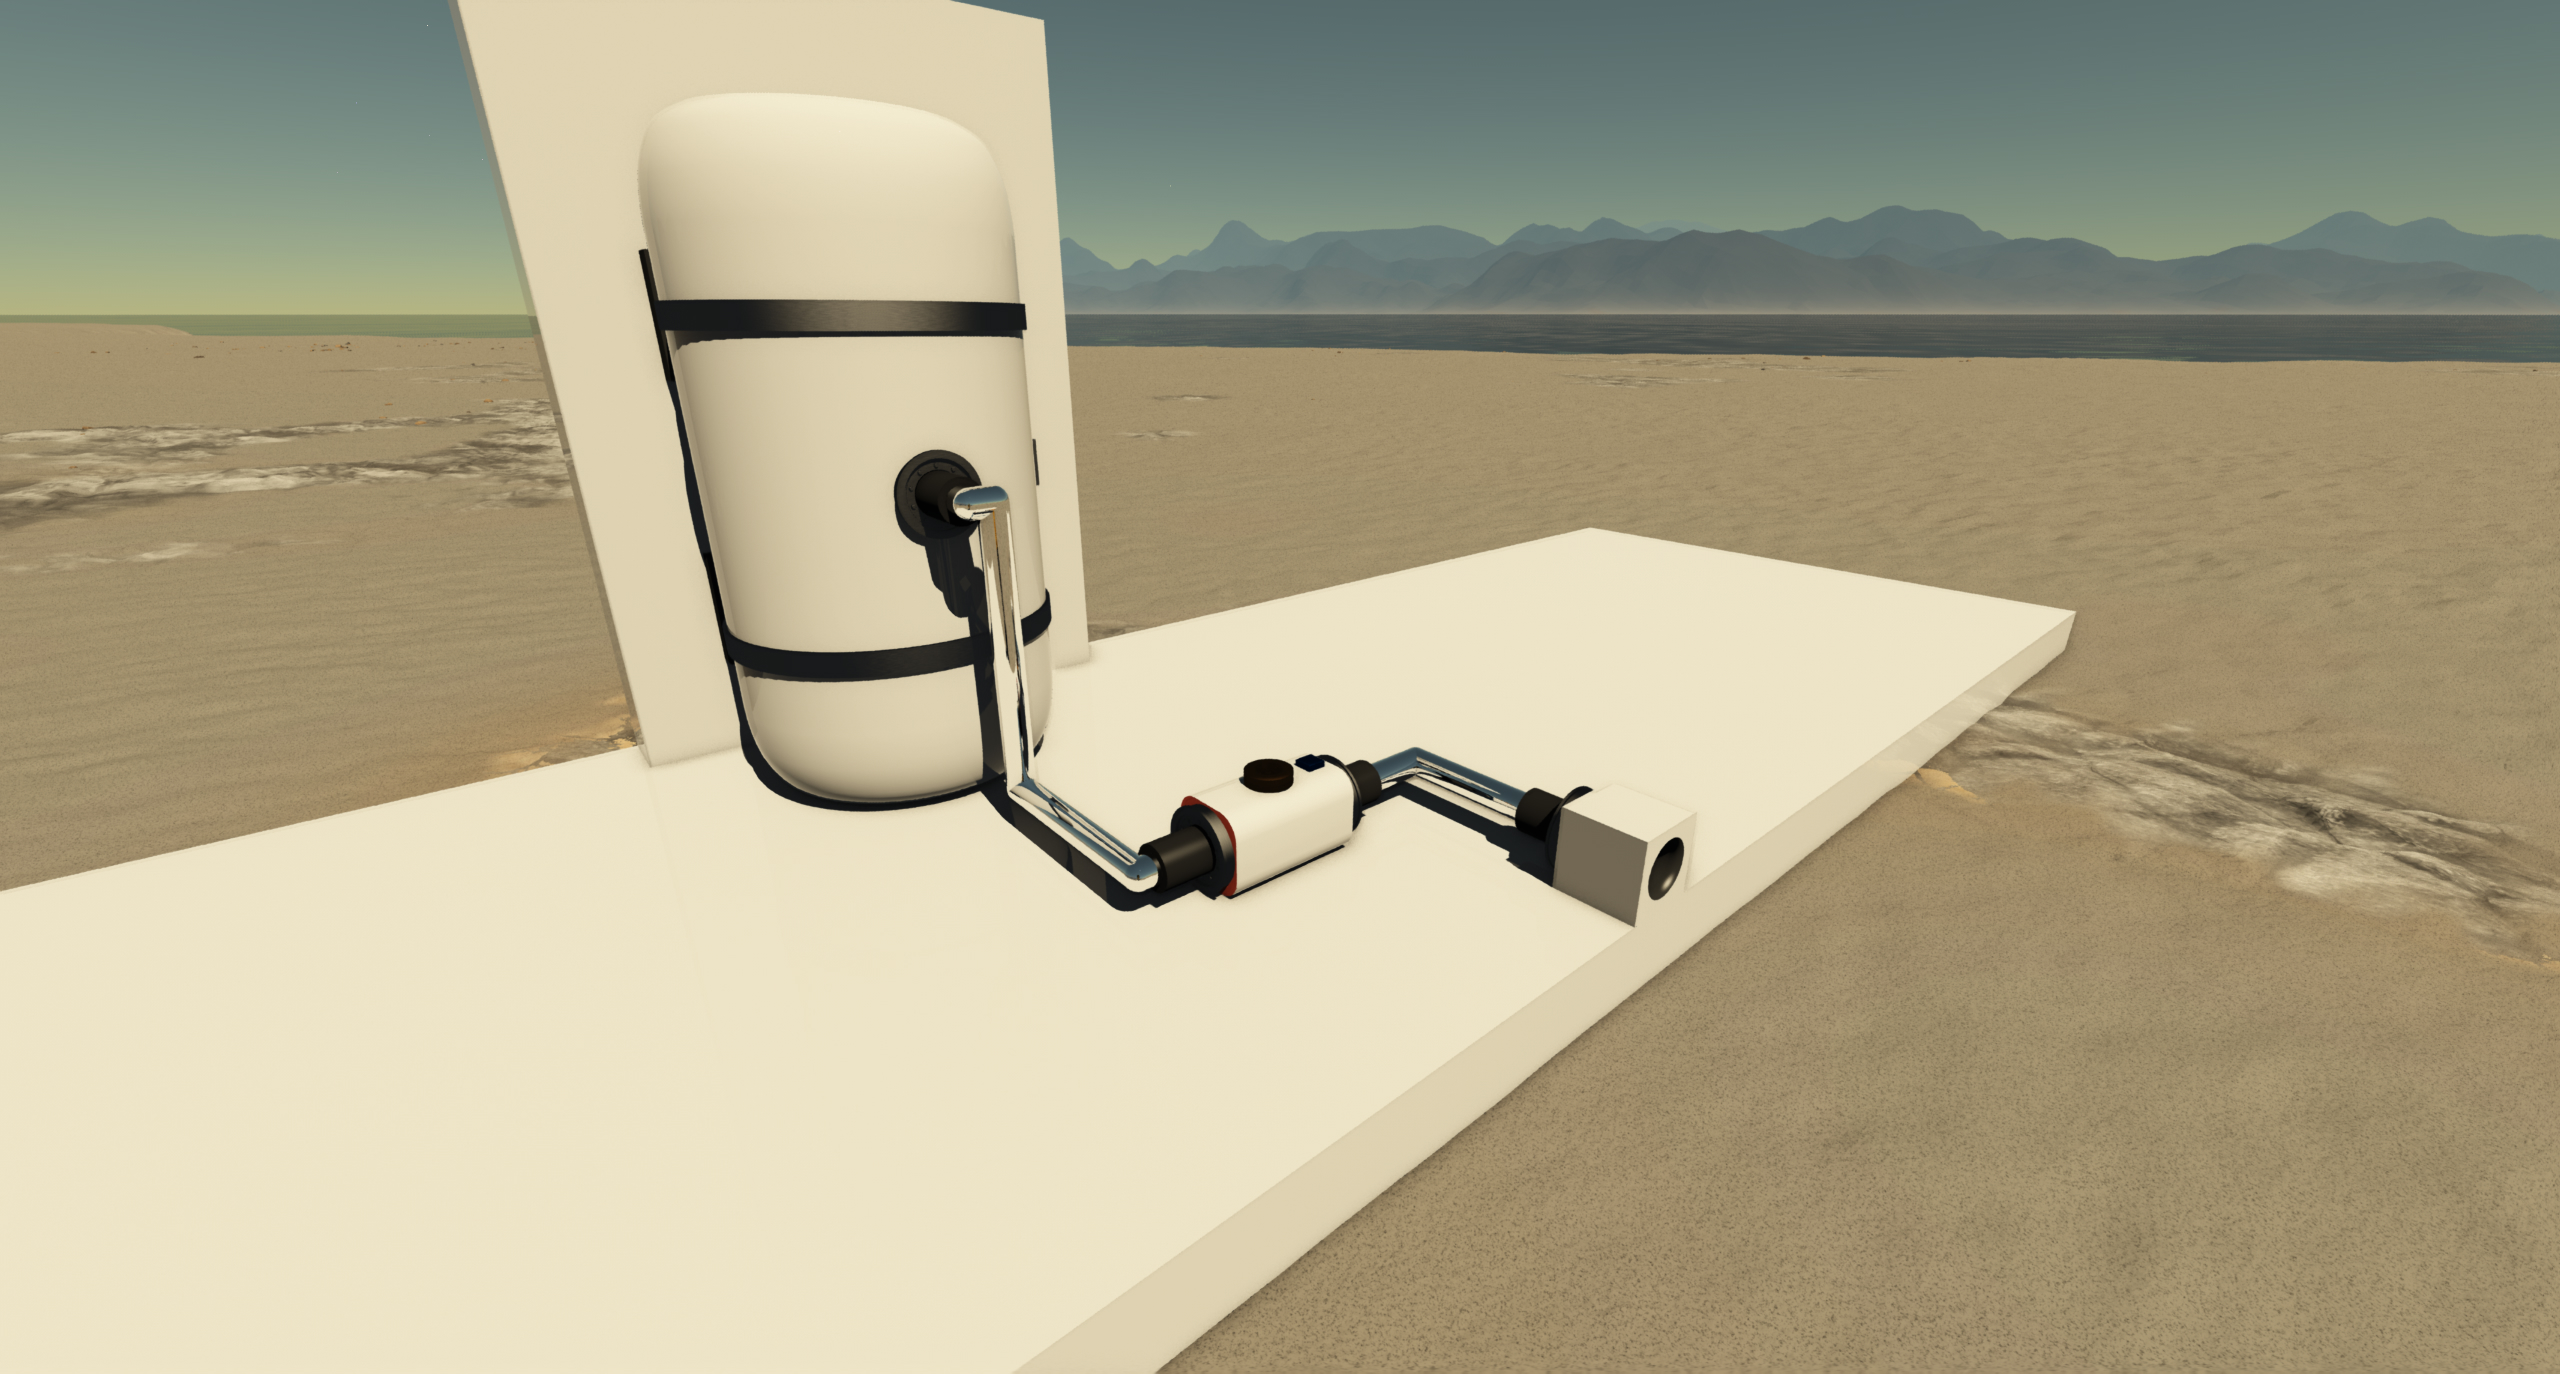
Flow Rate Limit
The Fluid Port has a maximum flow rate of 1.0 m³/s (volume-based, not mass-based).
Since the limit is volumetric, the actual mass transferred depends on the fluid density:
- Dense fluids (liquids like H2O, liquid O2) transfer more mass per second
- Light fluids (gases, high-altitude atmosphere) transfer less mass per second
- In vacuum (density = 0), nothing can be transferred
For example:
- Water (~1000 kg/m³): up to 1000 kg/s
- Sea-level air (~1.2 kg/m³): up to 1.2 kg/s
- High-altitude air (~0.4 kg/m³): up to 0.4 kg/s
Placement
When placing a Fluid Port, make sure the nozzle opening is oriented toward the area you want to interact with. You can mount it flush on a wall with the opening facing inward - as long as the nozzle points into the compartment, it will work correctly.
Information Window
Press V on a Fluid Port to display:
- Environment density (kg/m³): The density at the sampling point
- Environment Composition: The fluid composition by volume percentage
If the sampling point is inside a pressurized volume, it will show the volume's contents. Otherwise, it shows the ambient environment (atmosphere, water, etc.).
| Component | FluidValve |
|---|---|
| Module | ARCHEAN_junction |
| Mass | 1 kg |
| Size | 25 x 25 x 25 cm |
| Push/Pull Fluid | accept Push/Pull -> forwards action to other side |
Description
The fluid valve is a component that allows control of the flow of fluid passing through it.
Usage
By default, the valve is closed and blocks the fluid from passing through. To control the fluid flow, send a data signal between 0 (Closed) and 1 (Open).
The valve outputs the temperature of the fluid flowing through it on channel 0.
| Component | GeothermalExchanger |
|---|---|
| Module | ARCHEAN_celestial |
| Mass | 200 kg |
| Size | 100 x 100 x 200 cm |
| Push/Pull Fluid | Initiate Push/Pull |
Description
The Geothermal Exchanger is a component designed to harness the natural heat of deep underground to warm up a fluid.
Usage
The Geothermal Exchanger is intended to be used exclusively on stationary builds. Once placed on a build and powered with low voltage (consuming 1000 watts continuously), it will automatically anchor itself to the ground and completely prevent the structure from moving.
Warning:
- The Geothermal Exchanger locks the build in place. To restore mobility, it must first be destroyed.
- If the structure remains static after destroying the Geothermal Exchanger, simply place a Ground Anchor temporarily to refresh its state and allow it to become active again.
The Geothermal Exchanger must be placed very close to the ground. If its base is more than 0.5 meter above the ground, it will remain inactive.
Once operational:
- It slowly drills down to a maximum depth of 1000 meters.
- The deeper it goes, the hotter the circulating fluid becomes (up to a maximum of 650K).
- It starts pumping the fluid once it reaches 373K.
It is primarily used to produce energy by circulating the fluid through a Steam Turbine.
Additional Information
- The Geothermal Exchanger works exclusively with water (H₂O).
- Maximum flow rate: 0.1 kg/s.
A Small Steam Turbine can generally be supplied effectively by up to 10 Geothermal Exchangers, allowing for a theoretical maximum output power of about 270 kW.
List of Outputs
| Channel | Function | Value |
|---|---|---|
| 0 | Depth | meters |
| 1 | Temperature | Kelvin |
| Component | SabatierReactor |
|---|---|
| Module | ARCHEAN_chemical |
| Mass | 200 kg |
| Size | 100 x 100 x 200 cm |
| Push/Pull Fluid | Accept Push/Initiate Push |
Description
The Sabatier reactor is a component that allows the conversion of carbon dioxide (CO2) and hydrogen (H2) into methane (CH4).
Usage
The Sabatier reactor requires high voltage energy input and up to 10 kW during operation. It captures CO2 directly from the ambient air around it, which means it must be placed in an environment containing CO2 to function.
To start the conversion process, simply connect a hydrogen source to its yellow input port. The produced methane can then be collected from the red output port.
Production
The Sabatier reactor can process up to 0.1 kg of hydrogen per second, providing 0.2 kg of methane per second.
The Sabatier reactor releases water (H2O) into its environment during the reaction. This water is usually not visible, but in a sealed volume, it will start to accumulate.
| Component | Volume |
|---|---|
| Module | ARCHEAN_build |
| Mass | 1 kg |
| Size | 25 x 50 x 50 cm |
Description
The Volume component, when added to a build, automatically calculates and defines the volume it occupies. This feature can be used to:
- Design custom-shaped fuel tanks.
- Ensure cabin pressurization for specific environments (e.g., submarines, rockets).
- Create airships...
- ...
This component is related to the pressurization of builds, please refer to the Pressurization page for more information.
Usage
The Volume component is easy to use and requires no special configuration. Simply add it to a build and click the Scan button to automatically detect the volume of the sealed compartment where it is placed. Note that it calculates only the volume it is located in, not the entire build. You will need to add a separate Volume component for each compartment you want to pressurize.
This component can display two states:
Airtight: The state turns green if the compartment is completely sealed.Leak: The state turns red if the compartment is not airtight.
The Volume screen only displays the volume of the sealed compartment in cubic meters (m³). For more detailed information, you can access its information window by pressing the V key. The available data includes:
Volume capacity (m³): The total capacity of the sealed volume.Contents Mass (kg): The total mass of the contents present in the volume.Pressure (kPa): The pressure inside the sealed compartment.Liquid Level (%): The percentage of liquid fill.Composition: The distribution of different fluids as normalized percentages.
In Creative mode, additional buttons appear to allow filling or emptying the volume.
List of outputs
| Channel | Function | Value |
|---|---|---|
| 0 | Level | 0 to 1 |
| 1 | Volume (m³) | number |
| 2 | State | text |

| Component | ItemBridge |
|---|---|
| Module | ARCHEAN_junction |
| Mass | 1 kg |
| Size | 25 x 25 x 25 cm |
| Push/Pull Item | Accept Push/Pull -> Forwards action to other side |
Description
The Item Bridge is a component that simply allows the relocation of an item end point to another position.
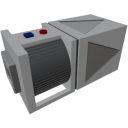
| Component | ItemConveyor |
|---|---|
| Module | ARCHEAN_machines |
| Mass | 50 kg |
| Size | 50 x 50 x 100 cm |
| Push/Pull Item | Initiate Push/Pull |
Description
The item conveyor is a component that allows moving items from one point to another. It operates by pulling items at the input and pushing them at the output. It can be used, for example, to transport items from one container to another.
Usage
The item conveyor requires low voltage power, with power consumption directly proportional to the flow rate of items being moved.
It can be configured either through its information window (accessible with the V key) or through its data port.
The available configuration options are:
| Option | Value | Description |
|---|---|---|
| Pull n items/sec | 1 to 1000 | Maximum number of items to move per second |
| Pull x kg/sec | 0 to 1000 kg | Maximum mass of items to move per second |
| Filter | text | Allows whitelisting a specific type of item. For example, if "Wire" is specified, only wires will be allowed to pass |
- The item conveyor can only filter one type of item at a time. If you need to move multiple types of items, you will need to use multiple conveyors.
- The filter is case-sensitive.
List of inputs
| Channel | Function | Value |
|---|---|---|
| 0 | ON | 0 or 1 |
| 1 | Pull n items/second | 1 to 1000 |
| 2 | Filter | text |
| 3 | Pull x kg/second | 0 to 1000 |
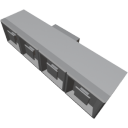
| Component | ItemJunction |
|---|---|
| Module | ARCHEAN_junction |
| Mass | 20 kg |
| Size | 25 x 25 x 100 cm |
| Push/Pull Item | Accept Push/Pull -> Forwards action to other side |
Description
The item Junction is a component that allows for the distribution or aggregation of items. Will not affect stacking.
Usage
The item Junction transfers items with the logic shown in the example image below. The ports on the face that contains 4 ports only communicate with the port on the face that contains only one.
When items enter through the bottom port of this component, they use round robin logic to distribute.
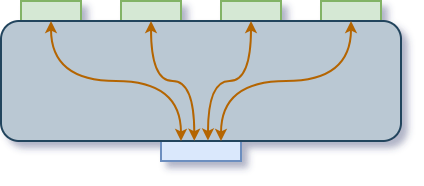
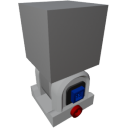
| Component | SmallHinge |
|---|---|
| Module | ARCHEAN_build |
| Mass | 10 kg |
| Size | 25 x 25 x 50 cm |
Description
The Small Hinge is a component that includes a buildable block on a hinge.
This component is related to the pressurization of builds, please refer to the Pressurization page for more information.
Usage
The Small Hinge only operates in servo mode.
When using V to open the information interface, there are two configurations possible:
Max Rotation Speedwhich determines the maximum rotation speed in rotations per second.Accelerationwhich determines the rate (in rotations per second per second) at which the hinge will accelerate to reach its Max Rotation Speed before slowing down to reach its target position.
The device rotates to a precise position determined by the data received through its data port. It accepts normalized values between -1.0 and +1.0, which correspond to rotations of -90° and +90°, respectively.
- Builds installed on a moving part cannot collide with a parent or sibling build. They can only collide with the terrain or other separate builds.
- To destroy the Small Hinge, you must absolutely remove all the child blocks/components it contains.
List of outputs
| Channel | Function | Value |
|---|---|---|
| 0 | Angle | -1.0 to +1.0 |
| 1 | Speed | rot/s |
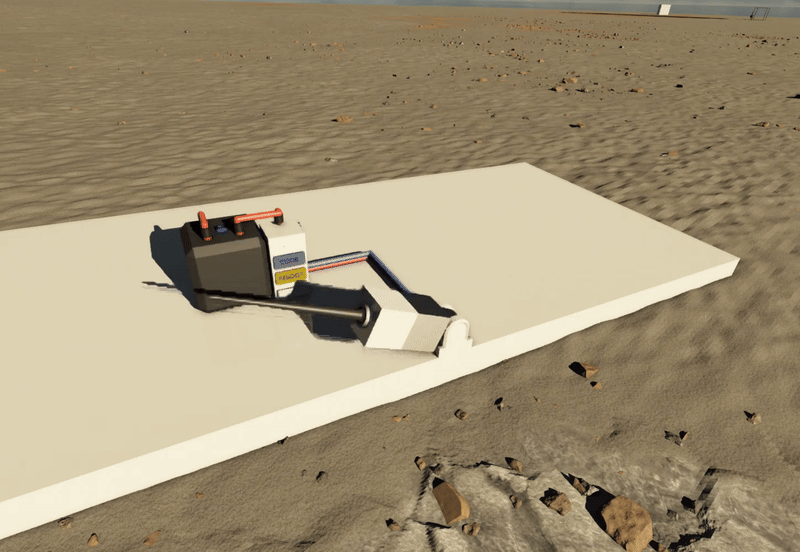
| Component | SmallPivot |
|---|---|
| Module | ARCHEAN_build |
| Mass | 10 kg |
| Size | 25 x 25 x 50 cm |
Description
The Small Pivot is a component that includes a buildable rotating block. It is designed to allow rotation of objects on a build.
This component is related to the pressurization of builds, please refer to the Pressurization page for more information.
Usage
The Small Pivot can operate in two modes: Servo (default) and Velocity. To switch between modes, press the V key to open the component's information interface.
In this interface, there are two additional configurations possible:
Max Rotation Speedwhich determines the maximum rotation speed in rotations per second.Accelerationwhich determines the rate (in rotations per second per second) at which the pivot will accelerate to reach its Max Rotation Speed.
Servo Mode
In servo mode, the device rotates to a precise position determined by the data received through its data port. It accepts normalized values between -1.0 and +1.0, which correspond to rotations of -360° and +360°. This effectively means that the values 0.0, -1.0 and +1.0 will result in the same servo position.
Velocity Mode
In velocity mode, the device operates continuously in the direction indicated by the data from its port, accepting values between -1.0 to +1.0 to determine it's speed and rotation direction. 1.0 means Max Rotation Speed.
- Builds installed on a moving part cannot collide with a parent or sibling build. They can only collide with the terrain or other separate builds.
- To destroy the Small Pivot, you must absolutely remove all the child blocks/components it contains.
List of outputs
| Channel | Function | Value |
|---|---|---|
| 0 | Angle | -1.0 to +1.0 |
| 1 | Speed | rot/s |
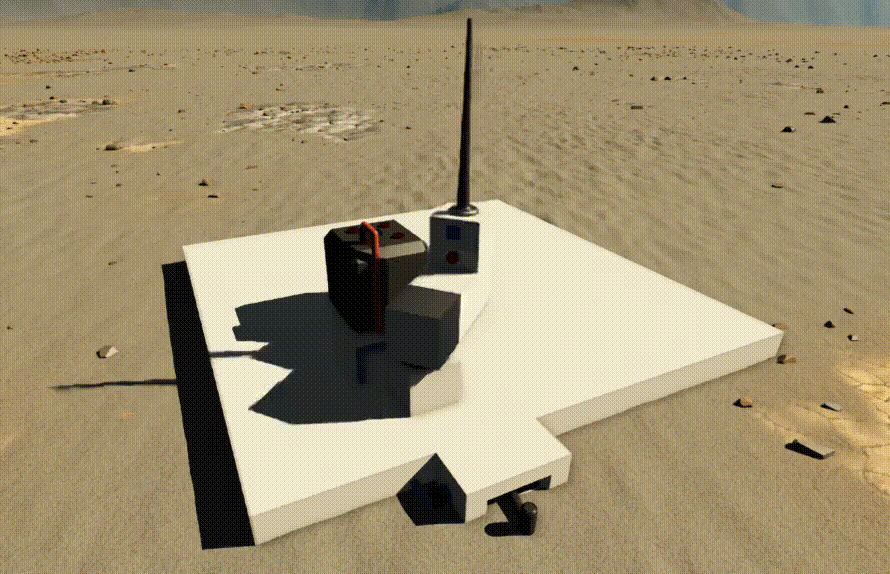

| Component | LinearTrack |
|---|---|
| Module | ARCHEAN_build |
| Mass | 10 kg |
| Size | 25 x 25 x 50 cm |
Description
The Linear Track is a component that includes a buildable moving block. It is designed to allow linear translation of objects on a build. It can only Translate along a track automatically created on the movement axis of the block.
This component is related to the pressurization of builds, please refer to the Pressurization page for more information.
Usage
The Linear Track can operate in two modes: Servo (default) and Velocity. To switch between modes, press the V key to open the component's information interface.
In this interface, there are additional configurations possible:
Max Speedwhich determines the maximum speed in meters per second.Accelerationwhich determines the rate at which the linear track will accelerate to reach its Max Speed.Override limitswhen enabled, allows you to manually set the minimum and maximum position limits instead of using the automatically calculated values based on available track space.
Tracks
The tracks for the Linear Track component are automatically created and updated along its axis. They are created on top of normal blocks of any type. To end the track the line has to be broken. For example with another block on top or by leaving a hole along the track.
Servo Mode
In servo mode, the device rotates to a precise position determined by the data received through its data port. It accepts all values and will react accordingly in the range between min and max. So if a number greater or smaller is received it will move into the according min/max position.
Velocity Mode
In velocity mode, the device operates continuously in the direction indicated by the data from its port, accepting values between -1.0 to +1.0 to determine its speed and moving direction. 1.0 means Max Speed.
- Builds installed on a moving part cannot collide with a parent or sibling build. They can only collide with the terrain or other separate builds.
- To destroy the Linear Track, you must absolutely remove all the child blocks/components it contains.
- The Linear Track has a maximum travel range of -250m to +250m (500m total).
List of outputs
| Channel | Function | Value |
|---|---|---|
| 0 | Position | meters |
| 1 | Speed | m/s |
| 2 | Minimum Position | meters |
| 3 | Maximum Position | meters |


| Component | Lamp |
|---|---|
| Module | ARCHEAN_light |
| Mass | 1 kg |
| Size | 25 x 50 x 50 cm |
Description
The lamp is a component that allows to illuminate a large area with a maximum angle of 170°. It is particularly suitable to place on ceiling for lighting rooms or work areas.
Usage
The lamp must be powered by low voltage and consumes up to 1000 W depending on the power set in its information menu accessible via the V key.
The colors of the lamp can be changed via the lamp's information menu or via its data port.
List of inputs
| Channel | Function | Range |
|---|---|---|
| 0 | Off/On | 0 or 1 |
| 1 | Red | 0 to 255 |
| 2 | Green | 0 to 255 |
| 3 | Blue | 0 to 255 |

| Component | SpotLight |
|---|---|
| Module | ARCHEAN_light |
| Mass | 1 kg |
| Size | 25 x 25 x 25 cm |
Description
The spotlight is a component that allows to illuminate a large area with a maximum angle of 120°. It is particularly suitable to place on vehicles as a headlight.
Usage
The spotlight must be powered by low voltage and consumes up to 1000 W depending on the power set in its information menu accessible via the V key.
The colors of the spotlight can be changed via its information menu or via its data port.
List of inputs
| Channel | Function | Range |
|---|---|---|
| 0 | Off/On | 0 or 1 |
| 1 | Red | 0 to 255 |
| 2 | Green | 0 to 255 |
| 3 | Blue | 0 to 255 |

| Component | SlopeLight |
|---|---|
| Module | ARCHEAN_light |
| Mass | 1 kg |
| Size | 25 x 25 x 25 cm |
Description
The SlopeLight is a compact lighting component designed to fit on slopes. It emits light with a default beam angle of 120°.
Usage
The SlopeLight must be powered by low voltage and consumes up to 1000 W depending on the power set in its information menu accessible via the V key.
The color and angle of the light can be configured via the information menu (V key) or via its data port.
List of inputs
| Channel | Function | Range |
|---|---|---|
| 0 | Off/On | 0 or 1 |
| 1 | Red | 0 to 255 |
| 2 | Green | 0 to 255 |
| 3 | Blue | 0 to 255 |
V key configuration
- Max Power: Adjustable from 0 to 1000 W (default: 200 W)
- Angle: Adjustable from 20° to 120°
- RGB: Color picker for the light color
| Component | Crusher |
|---|---|
| Module | ARCHEAN_machines |
| Mass | 400 kg |
| Size | 100 x 100 x 200 cm |
| Push/Pull Item | Accept Push, Initiate Push |
Description
The Crusher is a component that allows for the rapid crushing of rocks to obtain ores.
It can also be used to recycle any craftable item back into its raw materials. The recycling process returns 100% of the primary resources used to craft the item, by recursively decomposing the crafting recipe.
Note: Batteries have a special recycling recipe that only returns approximately 50% of their crafting cost. This prevents exploiting the recycling system to get free recharges by crushing and re-crafting depleted batteries.
Usage
The Crusher requires high voltage power and consumes 10 kW.
To use the Crusher, simply send rocks to be crushed through its item input port. It will not pull from its input but it is capable of pushing the obtained ores into any container that accepts items.
The Crusher is capable of processing 400 kg of rocks per second, matching the output of 4 Mining Drills operating at full power.
When the composition of rocks contains a low concentration of certain ores, the Crusher will accumulate the ores at a low concentration until it is possible to produce at least one unit of the ore.

| Component | MiningDrill |
|---|---|
| Module | ARCHEAN_celestial |
| Mass | 400 kg |
| Size | 200 x 200 x 100 cm |
| Push/Pull Item | Initiate Push |
Description
The Mining Drill is a component that allows drilling the terrain to extract rocks that can be crushed to obtain ores.
Usage
To function, it needs to be installed on a build that must be anchored to the ground using a Ground Anchor. You need to connect it to a Container or anything else that takes in Items, to collect the mined rocks.
Depending on the energy type, it can extract rocks at different speeds.
| Energy | Power required | Speed | Depth |
|---|---|---|---|
| Low Voltage | 10 kw | Up to 10 rocks per second | 0.01 meter per second |
| High Voltage | 100kw | Up to 100 rocks per second | 0.1 meter per second |
Data retrieval
The Mining Drill allows retrieving information about the composition at its position at any time.
The returned value is a Key-Value objects that is presented in the following format, for example: .C{0.12}.Fe{0.05}.Si{0.03}.Cu{0.80}.
This means that the position contains 12% carbon, 5% iron, 3% silicon, and 80% copper.
Efficiency & depletion
The mined area is not unlimited, it gradually depletes as it goes deeper and the efficiency decreases accordingly.
You will have to relocate it once in a while.
List of outputs
| Channel | Function |
|---|---|
| 0 | Composition |
| 1 | Depth |
| 2 | Efficiency |
| 3 | MiningRate |
| 4 | DrillingRate |
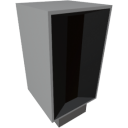
| Component | OreScanner |
|---|---|
| Module | ARCHEAN_celestial |
| Mass | 5 kg |
| Size | 50 x 25 x 25 cm |
Description
The ore scanner is a component that allows you to retrieve the composition of the terrain at one or more positions (by distance) in the direction of its sensor. It only works on planets and moons and is mainly used to find ores for use in the crafting system.
Usage
From a technical point of view, the scanner is very simple. You send it a number in channel 0 that corresponds to the distance in meters at which you want to scan the terrain horizontally, and the scanner will return a text object corresponding to the composition at that distance in the direction of the sensor.
Its strength lies in the ability to send it multiple distances in different channels to scan multiple points simultaneously on each server tick (25 times per second by default).
Never point it down/up, it works best when scanning horizontally.
Example
To scan the terrain at a distance of 10m, you need to send the value 10 in input channel 0. The scanner will return a text object that corresponds to the composition at 10m distance in the corresponding output channel.
To scan the terrain at distances of 10m and 20m, you need to send the value 10 in input channel 0 and the value 20 in input channel 1, for example. The scanner will then return a text object that corresponds to the composition at 10m distance in output channel 0 and another text object for 20m distance in output channel 1.
With these possibilities, you can, for example, use a XenonCode loop to scan all compositions within a range of 100m with a step of 10m and display them in the console.
	repeat 10 ($i)
		output_number($scanner_io, $i, $i*10)
		print(input_text($scanner_io, $i))
Keep in mind that there will be a 1 tick delay between sending to the output and retrieving from the input. Basically, the Scanner will give you the results based on the values you sent it in the previous tick, so don't shuffle your distance values between channels and don't use any random values, try to keep them consistent accross multiple ticks.
Data retrieval
When you have performed a scan, you can retrieve the composition information, which will be in the form of a key-value text object.
For example, if you have scanned the terrain at a distance of 10m, you can retrieve a text object in the form .C{0.12}.Fe{0.05}.Si{0.03}.Cu{0.80}, which means that the terrain at a distance of 10m contains 12% carbon, 5% iron, 3% silicon, and 80% copper.
You can easily parse this to retrieve the data you are interested in using the key-value system implemented in XenonCode.
Go further
The ore scanner scans the terrain in the direction of its sensor. You can install it on a small pivot to, for example, rotate it and create a composition map around its position using a XenonCode program and the in-game screens.
Energy
The ore scanner consumes low voltage energy to function. Its consumption is directly proportional to the number of channels you use. The more positions you scan in a single tick, the more energy you consume, which is 100 watts per channel per tick.
![]()
| Component | Beacon |
|---|---|
| Module | ARCHEAN_beacon |
| Mass | 2 kg |
| Size | 25 x 25 x 25 cm |
Description
The beacon is a component that allows for transmitting and/or receiving data to/from other beacons.
Usage
To function, a beacon needs to be powered by low-voltage energy and will consume 10 watts during operation.
It can be configured to transmit and/or receive data using the data ports or its configuration interface accessible via the V key.
When placing a beacon, an arrow appears on the hologram to indicate the localize direction of the beacon.
Configuration Interface
Transmit Data: Allows sending anumber/textdata.Transmit Frequency: Allows adjusting transmission frequency.Receive Frequency: Allows adjusting reception frequency.
Informations
Last Received Distance: Displays the distance in meters from the last beacon it received data from.Last Received Direction: Displays the direction (x,y,z) from the last beacon it received data from.Last Received Data: Displays the last received data.Is Receiving: Displays if the beacon is currently receiving data.
Data Port
The beacon has a data port that allows it to be used from a computer or other components.
List of outputs
| Channel | Function | Range |
|---|---|---|
| 0 | Data | number or text |
| 1 | Distance | number (meters) |
| 2 | Direction X | -1.0 to +1.0 |
| 3 | Direction Y | -1.0 to +1.0 |
| 4 | Direction Z | -1.0 to +1.0 |
| 5 | Is Receiving | 0 or 1 |
List of inputs
| Channel | Function | Range |
|---|---|---|
| 0 | Transmit Data | number or text |
| 1 | Transmit Frequency | number or text |
| 2 | Receive Frequency | number or text |
Informations:
- There is no distance limit for communications between beacons, although the closest will have precedence if multiple beacons broadcast on the same frequency.
- The signal of a beacon is not affected by obstacles.
Hints:
- The beacon can only transmit a single data at a time, either a number or text. But you can use the Key-Value objects system to transmit as much data as needed.
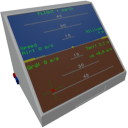
| Component | NavInstrument |
|---|---|
| Module | ARCHEAN_celestial |
| Mass | 10 kg |
| Size | 75 x 75 x 100 cm |
Description
The NavInstrument is a navigation aid component. It offers three operating modes:
- Flight: Navigation in the environment of a celestial body.
- Orbit: Navigation in orbit.
- Locator: Locate object or celestial body.
Usage
The NavInstrument requires low-voltage power and consumes 200 watts.
Each mode has a unique display on the NavInstrument screen. To switch between modes, simply click on the screen with the F key.
List of inputs
| Channel | Function | Value |
|---|---|---|
| 0 | Locate Celestial | text |
| 1 | Locate Distance | number |
| 2 | Locate Direction X | number |
| 3 | Locate Direction Y | number |
| 4 | Locate Direction Z | number |
| 5 | Forward vector config | 0 = forward, +1 = up, -1 = down |
| 6 | Set mode | 0 = Off, 1 = Flight, 2 = Orbit, 3 = Locator |
List of outputs
| Channel | Function | Value |
|---|---|---|
| 0 | Forward Airspeed (m/s) | number |
| 1 | Vertical Speed (m/s) | number |
| 2 | Altitude (meters from sea level) | number |
| 3 | Above terrain (meters) | number |
| 4 | Horizon Pitch | -1.0 to +1.0 |
| 5 | Horizon Roll | -1.0 to +1.0 |
| 6 | Heading | 0.0 to 360 |
| 7 | Course | 0.0 to 360 |
| 8 | Latitude (degrees from -90 to +90) | -90 to +90 |
| 9 | Longitude | -180 to +180 |
| 10 | Ground Speed (m/s) | number |
| 11 | Ground Speed forward (m/s) | number |
| 12 | Ground Speed right (m/s) | number |
| 13 | Celestial | text |
| 14 | Celestial inner radius | number |
| 15 | Celestial outer radius | number |
| 16 | Orbital Speed (m/s) | number |
| 17 | Periapsis (meters) | number |
| 18 | Apoapsis (meters) | number |
| 19 | Prograde Pitch | -1.0 to +1.0 |
| 20 | Prograde Yaw | -1.0 to +1.0 |
| 21 | Retrograde Pitch | -1.0 to +1.0 |
| 22 | Retrograde Yaw | -1.0 to +1.0 |
| 23 | Locator Distance (meters) | number |
| 24 | Locator Pitch | -1.0 to +1.0 |
| 25 | Locator Yaw | -1.0 to +1.0 |
| 26 | Orbital Inclination | -180 to +180 |
| 27 | Orbit target Speed (m/s) | number |
| 28 | Orbit target altitude (meters from sea level) | number |
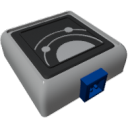
| Component | MiniNavInstrument |
|---|---|
| Module | ARCHEAN_celestial |
| Mass | 1 kg |
| Size | 25 x 25 x 25 cm |
Description
The MiniNavInstrument is a compact version of the NavInstrument. It provides the same navigation functionality in a smaller form factor, ideal for dashboards, small vehicles, or when space is limited.
Unlike the full-size NavInstrument, the MiniNavInstrument does not have an "OFF" mode - it defaults to Flight mode when no mode is specified.
Usage
The MiniNavInstrument requires low-voltage power (200 W). It offers the same three operating modes as the NavInstrument:
- Flight: Navigation in the environment of a celestial body
- Orbit: Navigation in orbit
- Locator: Locate object or celestial body
To switch between modes, send a mode value on channel 6 via the data port.
List of inputs
| Channel | Function | Value |
|---|---|---|
| 0 | Locate Celestial | text |
| 1 | Locate Distance | number |
| 2 | Locate Direction X | number |
| 3 | Locate Direction Y | number |
| 4 | Locate Direction Z | number |
| 5 | Forward vector config | 0 = forward, +1 = up, -1 = down |
| 6 | Set mode | 1 = Flight, 2 = Orbit, 3 = Locator |
List of outputs
| Channel | Function | Value |
|---|---|---|
| 0 | Forward Airspeed (m/s) | number |
| 1 | Vertical Speed (m/s) | number |
| 2 | Altitude (meters from sea level) | number |
| 3 | Above terrain (meters) | number |
| 4 | Horizon Pitch | -1.0 to +1.0 |
| 5 | Horizon Roll | -1.0 to +1.0 |
| 6 | Heading | 0.0 to 360 |
| 7 | Course | 0.0 to 360 |
| 8 | Latitude (degrees from -90 to +90) | -90 to +90 |
| 9 | Longitude | -180 to +180 |
| 10 | Ground Speed (m/s) | number |
| 11 | Ground Speed forward (m/s) | number |
| 12 | Ground Speed right (m/s) | number |
| 13 | Celestial | text |
| 14 | Celestial inner radius | number |
| 15 | Celestial outer radius | number |
| 16 | Orbital Speed (m/s) | number |
| 17 | Periapsis (meters) | number |
| 18 | Apoapsis (meters) | number |
| 19 | Prograde Pitch | -1.0 to +1.0 |
| 20 | Prograde Yaw | -1.0 to +1.0 |
| 21 | Retrograde Pitch | -1.0 to +1.0 |
| 22 | Retrograde Yaw | -1.0 to +1.0 |
| 23 | Locator Distance (meters) | number |
| 24 | Locator Pitch | -1.0 to +1.0 |
| 25 | Locator Yaw | -1.0 to +1.0 |
| 26 | Orbital Inclination | -180 to +180 |
| 27 | Orbit target Speed (m/s) | number |
| 28 | Orbit target altitude (meters from sea level) | number |
See the NavInstrument documentation for detailed information about each output.
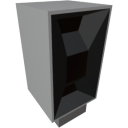
| Component | TerrainScanner |
|---|---|
| Module | ARCHEAN_celestial |
| Mass | 5 kg |
| Size | 50 x 25 x 25 cm |
Description
The terrain scanner is a component that allows you to retrieve the altitude of the terrain at one or more positions (by distance) in the direction of its sensor. It only works on planets and moons.
Usage
From a technical point of view, the scanner is very simple. You send it a number in channel 0 that corresponds to the distance in meters at which you want to scan the terrain horizontally, and the scanner will return a number corresponding to the altitude at that distance in the direction of the sensor.
The returned altitude in the case of Earth is relative to the sea level.
Its strength lies in the ability to send it multiple distances in different channels to scan multiple points simultaneously on each server tick (25 times per second by default).
Never point it down/up, it works best when scanning horizontally.
Example
To scan the terrain at a distance of 10m, you need to send the value 10 in input channel 0. The scanner will return a number that corresponds to the altitude at 10m distance in the corresponding output channel.
To scan the terrain at distances of 10m and 20m, you need to send the value 10 in input channel 0 and the value 20 in input channel 1, for example. The scanner will then return a number that corresponds to the altitude at 10m distance in output channel 0 and another number for 20m distance in output channel 1.
With these possibilities, you can, for example, use a XenonCode loop to scan all altitudes within a range of 100m with a step of 10m and display them in the console.
    repeat 10 ($i)
        output_number($scanner_io, $i, $i*10)
        print(input_number($scanner_io, $i))
Keep in mind that there will be a 1 tick delay between sending to the output and retrieving from the input. Basically, the Scanner will give you the results based on the values you sent it in the previous tick, so don't shuffle your distance values between channels and don't use any random values, try to keep them consistent accross multiple ticks.
Go further
The terrain scanner scans the terrain in the direction of its sensor. You can install it on a small pivot to, for example, rotate it and create a heightmap around its position using a XenonCode program and the in-game screens.
Energy
The terrain scanner consumes low voltage energy to function. Its consumption is directly proportional to the number of channels you use. The more positions you scan in a single tick, the more energy you consume, which is 100 watts per channel per tick.
| Component | EnrichmentCentrifuge |
|---|---|
| Module | ARCHEAN_chemical |
| Mass | 200 kg |
| Size | 75 x 75 x 275 cm |
| Push/Pull Fluid | Accept Push/Pull / Initiate Push/Pull |
Description
The Enrichment Centrifuge component separates a mixture of molecules into two distinct flows based on their molecular mass.
Usage
It requires:
- A continuous electrical power supply of 1,000 Watts.
- A data input to activate it.
Fluid is injected through a port located at the very top of the component. At the bottom, the lighter molecules exit through a port positioned higher, while the heavier molecules exit through a lower port directly beneath it.
Both output ports must be properly connected to ensure correct operation.
| Component | ChemicalFurnace |
|---|---|
| Module | ARCHEAN_chemical |
| Mass | 500 kg |
| Size | 150 x 200 x 200 cm |
| Push/Pull Fluid | Accept Push / Initiate Push |
| Push/Pull Item | Accept Push / Initiate Push |
Description
The Chemical Furnace component heats up fluids and items, usually to perform chemical reactions.
Usage
It requires electrical power to operate. Its power consumption varies depending on the target temperature and the content being heated, and can reach up to 5 MW in the most demanding conditions.
The Chemical Furnace is also equipped with a touchscreen allowing:
- To display the current temperature
- To set a target temperature manually
List of inputs
| Channel | Function | Range |
|---|---|---|
| 0 | Target Temperature (K) | number |
| 1 | Purge | 0 or 1 |
List of outputs
| Channel | Function | Type |
|---|---|---|
| 0 | Current Temperature (K) | number |
| Component | SmallThruster |
|---|---|
| Module | ARCHEAN_thruster |
| Mass | 50 kg |
| Size | 25 x 50 x 50 cm |
| Push/Pull Fluid | Accept Push |
Description
The small thruster generates thrust through the combustion of liquid fuel with liquid oxygen. It can handle both CH4 (methane) and H2 (hydrogen) as its fuel. It uses a radial aerospike nozzle and it's very efficient at converting combustion energy directly to thrust. It can produce up to 180 KN of thrust from a flow rate of 10 Kg/s LOX and 1.25 Kg/s H2.
Usage
Connect high flow oxidizer and fuel to the fluid ports, high voltage for ignition, and send 1 in the data port to ignite.
Initial ignition will only occur when the flow rate is between 1 g/s and 5 kg/s, for either the fuel or the oxydizer.
When the fuel is H2, the optimal flow ratio is 8:1 (LOX:H2) and ratio of < 1:1 may result in a flame out (no combustion). When the fuel is CH4, the optimal flow ratio is 4:1 (LOX:CH4) and ratio of < 1:1 may result in a flame out (no combustion).
The igniter does not need to be kept on once combustion has begun, although it's a good idea to leave it on in case of a flame out. Ignition consumes 1000 watts continuously when on.
The small thruster's nozzle can gimbal with a variation of -10 to +10 degrees in two axes.
List of inputs
| Channel | Function | Range |
|---|---|---|
| 0 | Ignition | 0 or 1 |
| 1 | Gimbal X | -1.0 to +1.0 |
| 2 | Gimbal Z | -1.0 to +1.0 |
List of outputs
| Channel | Function | Unit |
|---|---|---|
| 0 | Thrust | Newtons |
| 1 | Burned flow | kg/s |
| 2 | Unburned flow | kg/s |
If your fuel tank is pre-mixed, you don't need to use both fluid ports.

| Component | BigThruster |
|---|---|
| Module | ARCHEAN_thruster |
| Mass | 400 kg |
| Size | 100 x 100 x 100 cm |
| Push/Pull Fluid | Accept Push |
Description
The big thruster generates thrust through the combustion of liquid fuel with liquid oxygen. It can handle both CH4 (methane) and H2 (hydrogen) as its fuel. It uses a radial aerospike nozzle and it's very efficient at converting combustion energy directly to thrust. It can produce up to 1.8 MN of thrust from a flow rate of 100 Kg/s LOX and 12.5 Kg/s H2.
Usage
Connect high flow oxidizer and fuel to the fluid ports, high voltage for ignition, and send 1 in the data port to ignite.
Initial ignition will only occur when the flow rate is between 1 g/s and 50 kg/s, for either the fuel or the oxydizer.
When the fuel is H2, the optimal flow ratio is 8:1 (LOX:H2) and ratio of < 1:1 may result in a flame out (no combustion). When the fuel is CH4, the optimal flow ratio is 4:1 (LOX:CH4) and ratio of < 1:1 may result in a flame out (no combustion).
The igniter does not need to be kept on once combustion has begun, although it's a good idea to leave it on in case of a flame out. Ignition consumes 1000 watts continuously when on.
The big thruster's nozzle can gimbal with a variation of -10 to +10 degrees in two axes.
List of inputs
| Channel | Function | Range |
|---|---|---|
| 0 | Ignition | 0 or 1 |
| 1 | Gimbal X | -1.0 to +1.0 |
| 2 | Gimbal Z | -1.0 to +1.0 |
List of outputs
| Channel | Function | Unit |
|---|---|---|
| 0 | Thrust | Newtons |
| 1 | Burned flow | kg/s |
| 2 | Unburned flow | kg/s |
If your fuel tank is pre-mixed, you don't need to use both fluid ports.
| Component | MiniThruster |
|---|---|
| Module | ARCHEAN_thruster |
| Mass | 10 kg |
| Size | 25 x 25 x 25 cm |
| Push/Pull Fluid | Accept Push |
Description
The mini thruster generates thrust through the combustion of liquid fuel with liquid oxygen.
It can handle both CH4 (methane) and H2 (hydrogen) as its fuel, but it requires a pre-mixed fuel-oxidizer combination.
It can produce up to 18 KN of thrust from a flow rate of 1 Kg/s of pre-mixed LOX and H2.
Usage
Connect high flow oxidizer and fuel to the fluid ports, low voltage for ignition, and send 1 in the data port to ignite.
When the fuel is H2, the optimal flow ratio is 8:1 (LOX:H2) and ratio of < 1:1 may result in a flame out (no combustion). When the fuel is CH4, the optimal flow ratio is 4:1 (LOX:CH4) and ratio of < 1:1 may result in a flame out (no combustion).
The igniter does not need to be kept on once combustion has begun, although it's a good idea to leave it on in case of a flame out. Ignition consumes 100 watts continuously when on.
List of inputs
| Channel | Function | Range |
|---|---|---|
| 0 | Ignition | 0 or 1 |
List of outputs
| Channel | Function | Unit |
|---|---|---|
| 0 | Thrust | Newtons |
| 1 | Burned flow | kg/s |
| 2 | Unburned flow | kg/s |
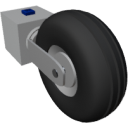
| Component | SmallWheel |
|---|---|
| Module | ARCHEAN_wheel |
| Mass | 20 kg |
| Size | 25 x 25 x 25 cm |
Description
The small wheel is a simple wheel that can only brake and steer and does not have suspension. It does not require any energy to operate.
Usage
The wheel can be connected to a computer or other device for control.
List of inputs
| Channel | Function | Range |
|---|---|---|
| 0 | Brake | 0.0 to 1.0 |
| 1 | Steer | -1.0 to +1.0 |
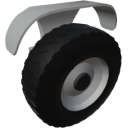
| Component | Wheel |
|---|---|
| Module | ARCHEAN_wheel |
| Mass | 100 kg |
| Size | 50 x 75 x 100 cm |
Description
The wheel is a component that allows a build to accelerate forward/backward as well as turn and brake. It includes a configurable suspension and gearbox.
Usage
It can be configured through its configuration interface accessible via the V key.
Configuration Interface
It provides information about the wheel and allows for configuration.
Information
Motor Rotation Speed: Motor rotation speed in rotations per second.Wheel Rotation Speed: Wheel rotation speed in rotations per second.Power: Power consumption in watts.Brake: Wheel braking value.Ground Speed: Wheel speed relative to the ground in m/s.Gear Ratio: Wheel speed ratio.
Configuration
Mudguard: Show/Hide the mudguard.Reverse: Reverse the wheel's rotation direction.Grip: Adjusts the wheel's grip.Suspension: Adjusts the wheel's suspension.
Energy
The wheel has a low-voltage energy port and a high-voltage energy port.
Low-Voltage Energy
In this configuration, the wheel consumes up to 20 kw.
High-Voltage Energy
In this configuration, the wheel consumes up to 200 kw.
- You can reverse the wheel's rotation direction from the configuration menu accessible with the
Vkey. This also adjusts the model's orientation, including the tread pattern. This setting does not change the wheel's direction.
List of inputs
| Channel | Function | Value |
|---|---|---|
| 0 | Accelerate | -1.0 to +1.0 |
| 1 | Steer | -1.0 to +1.0 |
| 2 | Regen | 0 or 1 |
| 3 | Brake | 0.0 to 1.0 |
| 4 | Gearbox | -1.0 to +1.0 |
List of outputs
| Channel | Function | Value |
|---|---|---|
| 0 | Wheel Rotation Speed | rot/s |
| 1 | Ground Friction | 0 to 1 |
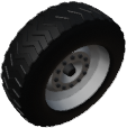
| Component | BigWheel |
|---|---|
| Module | ARCHEAN_wheel |
| Mass | 400 kg |
| Size | 50 x 100 x 100 cm |
Description
The big wheel is a component that allows a build to accelerate forward/backward as well as turn and brake. It includes a configurable suspension and gearbox.
Usage
It can be configured through its configuration interface accessible via the V key.
Configuration Interface
It provides information about the wheel and allows for configuration.
Information
Motor Rotation Speed: Motor rotation speed in rotations per second.Wheel Rotation Speed: Wheel rotation speed in rotations per second.Power: Power consumption in watts.Brake: Wheel braking value.Ground Speed: Wheel speed relative to the ground in m/s.Gear Ratio: Wheel speed ratio.
Configuration
Reverse: Reverse the wheel's rotation direction.Grip: Adjusts the wheel's grip.Suspension: Adjusts the wheel's suspension.
Energy
The big wheel can only be powered by high voltage unlike the Wheel. It will consume up to 400 kW at full power.
- You can reverse the wheel's rotation direction from the configuration menu accessible with the
Vkey. This also adjusts the model's orientation, including the tread pattern. This setting does not change the wheel's direction.
List of inputs
| Channel | Function | Value |
|---|---|---|
| 0 | Accelerate | -1.0 to +1.0 |
| 1 | Steer | -1.0 to +1.0 |
| 2 | Regen | 0 or 1 |
| 3 | Brake | 0.0 to 1.0 |
| 4 | Gearbox | -1.0 to +1.0 |
List of outputs
| Channel | Function | Value |
|---|---|---|
| 0 | Wheel Rotation Speed | rot/s |
| 1 | Ground Friction | 0 to 1 |
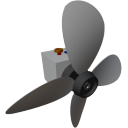
| Component | Propeller |
|---|---|
| Module | ARCHEAN_propeller |
| Mass | 100 kg |
| Size | 50 x 50 x 50 cm |
Description
The propeller is a component that generates thrust using rotating blades. It is used to propel vehicles in the air or in water.
Usage
It can be configured through its configuration interface accessible via the V key.
Configuration Interface
It provides information about the propeller and allows for configuration.
Information
Input Voltage: Input voltage in volts.Power: Power consumption in Watts.Thrust: Thrust generated in Newtons.Rotation Speed: Rotation speed in rotations per second.Pitch: Normalized Pitch angle.
Configuration
Radius: Propeller radius in meters.Twist: Propeller twist angle (normalized).Blades: Number of blades.
Energy
The propeller has a low-voltage energy port and a high-voltage energy port, which allow for more or less control over the supplied power.
Low-Voltage Energy
In this configuration, the propeller consumes up to 50 kw.
High-Voltage Energy
In this configuration, the propeller consumes up to 500 kw.
List of inputs
| Channel | Function | Range |
|---|---|---|
| 0 | Speed | -1.0 to +1.0 |
| 1 | Pitch | -1.0 to +1.0 |
List of outputs
| Channel | Function | Value |
|---|---|---|
| 0 | Rotation Speed | rot/s |
| 1 | Thrust | Newtons |
| Component | RCS |
|---|---|
| Module | ARCHEAN_rcs |
| Mass | 10 kg |
| Size | 25 x 50 x 50 cm |
| Push/Pull Fluid | Accept Push |
Description
The reaction control system (RCS) consists of cold gas thrusters primarily used to control the orientation and position of a spacecraft. It is also used for fine adjustments during spacecraft docking. The RCS consists of several small thrusters that can be individually and quickly turned on/off to provide precise control.
Usage
The RCS can be powered by various fluids, which will affect its performance depending on their density and pressure. It can be controlled by a computer or another device to adjust the thrust and direction.
It does not perform any kind of combustion.
List of inputs
| Channel | Function | Range |
|---|---|---|
| 0 | Nozzle 0 (Center) | 0.0 to 1.0 |
| 1 | Nozzle 1 | 0.0 to 1.0 |
| 2 | Nozzle 2 | 0.0 to 1.0 |
| 3 | Nozzle 3 | 0.0 to 1.0 |
| 4 | Nozzle 4 | 0.0 to 1.0 |
| Component | AltitudeSensor |
|---|---|
| Module | ARCHEAN_sensor1 |
| Mass | 1 kg |
| Size | 25 x 25 x 25 cm |
Description
The altitude sensor sends the altitude between the sensor's position and the ground or the center of the celestial body through its data port.
Usage
Once placed on your build, it can be connected to a computer, for example, to retrieve the altitude in meters. The orientation of the altitude sensor has no impact on its operation.
List of outputs
| Channel | Function |
|---|---|
| 0 | Absolute Altitude |
| 1 | Above Terrain |
- In "Above Terrain" mode, water is not considered as terrain.
- The altitude sensor only works in the environment of a celestial body.
| Component | AngularVelocitySensor |
|---|---|
| Module | ARCHEAN_sensor1 |
| Mass | 1 kg |
| Size | 25 x 25 x 25 cm |
Description
The angular velocity sensor is a component that measures the angular velocity on 3 axes (X, Y, Z) in rotations per second.
Usage
Once placed on your build, the sensor can be connected to a computer to retrieve the angular velocity.
List of outputs
| Channel | Function | Value |
|---|---|---|
| 0 | Angular velocity X | rot/s |
| 1 | Angular velocity Y | rot/s |
| 2 | Angular velocity Z | rot/s |
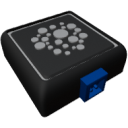
| Component | DensitySensor |
|---|---|
| Module | ARCHEAN_sensor1 |
| Mass | 1 kg |
| Size | 25 x 25 x 25 cm |
Description
The density sensor is a component that measures the density and composition of the environment in which it is placed.
Usage
Once placed on your build, it can be connected to a computer, for example, to retrieve the density and composition of the environment. The composition is given as a key-value string.
List of outputs
| Channel | Function | value |
|---|---|---|
| 0 | Density (kg/m³) | number |
| 1 | Composition | text |

| Component | DistanceSensor |
|---|---|
| Module | ARCHEAN_sensor1 |
| Mass | 2 kg |
| Size | 25 x 25 x 25 cm |
Description
The distance sensor is a laser rangefinder that measures the distance to the nearest surface (terrain or build). It can detect both terrain and other builds' colliders within a configurable range.
Usage
Once placed on your build, it requires a low voltage power connection and a data connection to operate. The sensor fires a ray along its front face. When the "Show Laser" input is enabled, a visible red laser beam is displayed up to the detected surface.
Range & Multi-tick Scanning
The default range is 1000m (single tick, instant result). The range can be extended up to 25,000m via the "Max Range" input channel. When the range exceeds 1000m, the terrain scan is split across multiple server ticks (128 terrain steps per tick):
| Range | Ticks | Delay |
|---|---|---|
| 1,000 m | 1 | instant |
| 5,000 m | 5 | ~200 ms |
| 10,000 m | 10 | ~400 ms |
| 25,000 m | 25 | ~1 s |
Entity detection (builds) is always instant regardless of range. Only terrain tracing is split across ticks.
List of inputs
| Channel | Function | Value |
|---|---|---|
| 0 | On/Off | number (≠ 0 = on) |
| 1 | Show Laser | number (≠ 0 = on) |
| 2 | Max Range | number (meters, 1000-25000, default 1000) |
List of outputs
| Channel | Function | Value |
|---|---|---|
| 0 | Distance | number (meters, -1 if out of range) |
- When inactive or out of range, the output is -1.
- The sensor does not detect its own build.
- The sensor can detect avatars.
| Component | LinearVelocitySensor |
|---|---|
| Module | ARCHEAN_sensor1 |
| Mass | 1 kg |
| Size | 25 x 25 x 25 cm |
Description
The Linear Velocity Sensor is a component that measures linear velocity on 3 axes (X, Y, Z) in meters per second.
Usage
Once placed on your build, the sensor can be connected to a computer to retrieve the linear velocity.
List of outputs
| Channel | Function | value |
|---|---|---|
| 0 | Linear Velocity X | m/s |
| 1 | Linear Velocity Y | m/s |
| 2 | Linear Velocity Z | m/s |
| Component | PlayerSensor |
|---|---|
| Module | ARCHEAN_sensor1 |
| Mass | 1 kg |
| Size | 25 x 25 x 25 cm |
Description
The PlayerSensor detects players within a configurable 3D bounding box relative to the sensor's position and orientation. It outputs information about detected players as a key-value text object.
Usage
Once placed on your build, the PlayerSensor will detect any player entering its detection zone. The detection zone is a 3D box that can be configured via the V key menu.
The sensor outputs player information on channel 0 as a key-value text object containing:
- Player ID
- Username
- Distance from the sensor
V key configuration
- box_min: Minimum coordinates of the detection box (X, Y, Z) - Default: -10, -10, -10
- box_max: Maximum coordinates of the detection box (X, Y, Z) - Default: +10, +10, +10
The detection box coordinates are relative to the sensor's position and orientation.
List of outputs
| Channel | Function | Value |
|---|---|---|
| 0 | Detected players | key-value text |
Output format
The output is a key-value text object: .p<playerID>{.username{<name>}.distance{<meters>}}
| Component | SolarSensor |
|---|---|
| Module | ARCHEAN_celestial |
| Mass | 1 kg |
| Size | 25 x 25 x 25 cm |
Description
The solar sensor is a component that measures the angle of incidence of the sun and the potential solar power.
Usage
Once placed on your build, the sensor can be connected to a computer to retrieve a normalized value of the angle of incidence, typically indicating the position of the sun relative to the sensor's position. The sensor also allows retrieving the potential value of received solar power in watts/m².
- It is possible to make a solar panel track the sun without using a computer by connecting these sensors directly to hinges.
List of outputs
| Channel | Function | Value |
|---|---|---|
| 0 | Normalized Angle | -1.0 to +1.0 |
| 1 | Solar Power | W/m² |
| Component | SpeedSensor |
|---|---|
| Module | ARCHEAN_sensor1 |
| Mass | 1 kg |
| Size | 25 x 25 x 25 cm |
Description
The speed sensor allows you to send the relative speed to the parent object (Planet, mothership...) through its data port.
Usage
Once placed on your build, it can be connected to a computer, for example, to retrieve your speed in meters per second. The orientation of the speed sensor has no impact on its functionality.
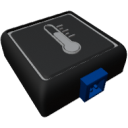
| Component | TemperatureSensor |
|---|---|
| Module | ARCHEAN_sensor1 |
| Mass | 1 kg |
| Size | 25 x 25 x 25 cm |
Description
The temperature sensor is a component that measures the temperature of the environment in which it is placed.
Usage
Once placed on your build, it can be connected to a computer, for example, to retrieve the temperature of the environment. The temperature is provided in Kelvin.
List of outputs
| Channel | Function | Value |
|---|---|---|
| 0 | Temperature (K) | number |
| Component | TiltSensor |
|---|---|
| Module | ARCHEAN_sensor1 |
| Mass | 1 kg |
| Size | 25 x 25 x 25 cm |
Description
The tilt sensor allows to send through its data port the current tilt based on the horizon.
Usage
Once placed on your build, it can be connected to a computer, for example, to retrieve your tilt between -1.0 and +1.0.
Its long axis is to be used like a level indicator.
-1.0 or +1.0 means titled at 90 degrees with one end pointing perfectly downwards and one pointing perfectly upwards, while 0.0 means level with the horizon.
Does not work in space
| Component | VehiclePhysicsSensor |
|---|---|
| Module | ARCHEAN_sensor1 |
| Mass | 1 kg |
| Size | 25 x 25 x 25 cm |
Description
The Vehicle Physics Sensor is a component that provides information about the vehicle's physics state, mass, size, center of mass, and G-force.
Usage
Once placed on your build, the sensor can be connected to a computer to retrieve information about the vehicle's physics. Here are the information you can retrieve:
- Active Physics: Indicates whether the physics is active or not.
- Mass: The mass of the vehicle.
- Size (X,Y,Z): The bounding size of the vehicle.
- Center of Mass (X,Y,Z): The position of the center of mass relative to the sensor's position.
- G-force (X,Y,Z): The G-force relative to the sensor's orientation.
List of Outputs
| Channel | Function | Value |
|---|---|---|
| 0 | Active Physics | 0 or 1 |
| 1 | Mass | kg |
| 2 | Size X | meters |
| 3 | Size Y | meters |
| 4 | Size Z | meters |
| 5 | Center of Mass X | meters |
| 6 | Center of Mass Y | meters |
| 7 | Center of Mass Z | meters |
| 8 | G-force X | G |
| 9 | G-force Y | G |
| 10 | G-force Z | G |
| Component | Container |
|---|---|
| Module | ARCHEAN_storage |
| Mass | 100 kg |
| Size | 100 x 100 x 200 cm |
| Push/Pull Item | Accept Push/Pull |
Description
The container is a storage component with a capacity of 50 slots. It is equipped with two ports for connecting item conduits to receive or send items.
The data port allows retrieving the content of the container as a string using the key-value system.
- The container does not have the ability to directly pull or push items from its ports, it is solely a storage component.
| Component | SmallContainer |
|---|---|
| Module | ARCHEAN_storage |
| Mass | 50 kg |
| Size | 100 x 100 x 100 cm |
| Push/Pull Item | Accept Push/Pull |
Description
The container is a storage component with a capacity of 25 slots. It is equipped with two ports for connecting item conduits to receive or send items.
The data port allows retrieving the content of the container as a string using the key-value system.
- The container does not have the ability to directly pull or push items from its ports, it is solely a storage component.
| Component | Aileron |
|---|---|
| Module | ARCHEAN_aileron |
| Mass | 10 kg |
| Size | 25 x 25 x 100 cm |
Description
The aileron is a device that influences the aerodynamics of a build.
Its effectiveness is closely related to the density of the medium in which it operates, whether it is in the atmosphere (aircraft...) or in water (boat...).
Usage
The aileron does not require any energy to operate, only a value between -1.0 and +1.0 through its data port.
- The ailerons don't compute occlusions like blocks do. This allows for optimizing the flight efficiency of a vehicle by hiding them in larger surfaces, such as inside the wings.
| Component | Crafter |
|---|---|
| Module | ARCHEAN_machines |
| Mass | 200 kg |
| Size | 100 x 100 x 200 cm |
| Push/Pull Fluid | Accept Push, Initiate Pull |
| Push/Pull Item | Initiate Push/Pull |
Description
The Crafter is a component that allows for the rapid crafting of items.
Usage
The Crafter requires high voltage power and consumes 500 watts when idle and 10kw when operational.
It can be manually controlled through its integrated touch screen and/or through its data port for more advanced control.
List of Inputs
| Channel | Function | Value |
|---|---|---|
| 0 | Continuous Crafting OR Container data | 0 or 1 OR key-value from Container |
| 1 | Override Craft Selection | text |
| 2 | Container output for auto-craft | key-value from Container |
List of Outputs
| Channel | Function | Value |
|---|---|---|
| 0 | Progress | -1 or 0 to 1 |
| 1 | Craft Selection | text |
| 2 | Fluid Levels | text |
Informations:
- When
progressin the output data is-1, it means that the recipe cannot be performed either due to missing resources or the requested craft does not exist in the game.- The Crafter displays a "Not enough power" alert if crafting fails due to insufficient power.
- Even though the Crafter only has two fluid ports, it can use as much fluid as needed for recipes by using Fluid Junctions, which can be connected to all necessary fluid sources. The Crafter will simply use them when needed.
Fluid Levelsis a key-value object containing values between 0 and 1 forh2,o2andh2oHints:
- You can simply use a Toggle Button to start continuous crafting as long as the button is active and there are enough resources in the connected inventory.
Go further with the crafter:
Simple Auto-Crafting Setup
The Crafter natively supports an auto-crafting behavior when properly configured.
To enable it, simply:
- Connect the Crafter's item input and item output ports to the same container.
- Connect the data port of that same container directly to the Crafter's data port (channel 0).
This setup allows the Crafter to automatically handle complex recipes with sub-crafts by picking ingredients directly from the container.
As long as the container contains all required raw materials, the Crafter will:
- Automatically craft missing sub-components.
- Then assemble the final product.
This is the simplest way to achieve an auto-crafting system without writing any custom code.
- In this configuration, since the data port is already connected to the container, you won't be able to use a Toggle Button to enable continuous crafting. Instead, you will have to use its built-in screen to start crafts, one by one.
- If you want to implement true continuous crafting in this setup, you will need to use a more advanced approach using XenonCode to control the Crafter.
Continuous Auto-Crafting from a Computer
You can control continuous auto-crafting entirely from a Computer by using channel 2:
- Channel 0: Set to
1to enable continuous crafting - Channel 1: Set the recipe name to craft
- Channel 2: Connect the Container's data output to enable auto-craft with recursive sub-crafts
This allows full programmatic control over the Crafter while still benefiting from the automatic recursive crafting logic.
Advanced Auto-Crafting with XenonCode
For more advanced auto-crafting systems, or to have complete control over the crafting process, you can use XenonCode.
The Crafter provides four XenonCode functions to retrieve information about available recipes:
get_recipes_categories("crafter"): Returns the list of available recipe categories in the Crafter.get_recipes("crafter", "PARTS"): Returns the list of available recipes in thePARTScategory.get_recipe("crafter", "Circuit"): Returns the list of ingredients required for theCircuitrecipe.get_recipe_label("ARCHEAN_parts.Circuit"): Returns the human-readable display name (e.g."Circuit").
Built-in Program
The Crafter's built-in program — the one automatically used in the Simple Auto-Crafting Setup — already implements a fully functional auto-crafting logic using these functions. You can use it as inspiration or build your own custom program to fit more advanced or specific needs.
var $cursor = 0
var $currentCraft:text
var $categories:text

var $container:text
array $autocraftList:text
array $autocraftQty:number

var $upX : number
var $upY : number
var $downX : number
var $downY : number
var $initTime : number
var $error : number
var $popup = 1
var $continuous = 0
var $dirty = 0
var $maxScroll = 0

function @screenDirty()
	$dirty = 1

function @error()
	if !$error
		@screenDirty()
	$error = 1

function @clearError()
	if $error
		@screenDirty()
	$error = 0

recursive function @autoCraft($item:text, $n:number)
	var $recipe = get_recipe("crafter", $item)
	if $recipe
		$autocraftList.append($item)
		$autocraftQty.append($n)
		$container.$item += $n
		foreach $recipe ($k,$v)
			$container.$k -= $v * $n
			if $container.$k < 0
				recurse($k, -$container.$k)
				if $error
					break
	elseif $container.$item < $n && $item != "H2" && $item != "O2" && $item != "H2O"
		$autocraftList.clear()
		$autocraftQty.clear()
		@error()

function @drawScreen()
	$dirty = 0
	blank()
	text_size(1)

	var $p = progress
	if size($autocraftList)
		$p = ($p + 1) / (size($autocraftList) + 1)

	if time < $initTime+4
		if time > $initTime+1
			write(10,10,cyan,"Initializing Crafter...")
		return

	var $dpIndex = 0
	foreach $categories ($category, $open)
		if button(0,(12*$dpIndex)-$cursor,color(10,10,10),screen_w-17,11)
			$categories.$category!!
			@screenDirty()
		write(3,((12*$dpIndex)+2)-$cursor,color(180,180,180),$category)
		$dpIndex++
		if $open
			array $craftArray:text
			$craftArray.from(get_recipes("crafter", $category), ",")
			foreach $craftArray ($index, $craft)
				if button(0,(12*$dpIndex)-$cursor,color(10,10,10),screen_w-17,11)
					if $currentCraft == $craft
						$currentCraft = ""
						cancel_craft()
						$autocraftList.clear()
						$autocraftQty.clear()
					else
						cancel_craft()
						$autocraftList.clear()
						$autocraftQty.clear()
						$currentCraft = $craft
						@clearError()
						if $container; Autocrafting when a container is connected
							@autoCraft($craft, 1)
							if size($autocraftList)
								start_craft($autocraftList.last)
						else
							start_craft($craft)
					@screenDirty()
				if $currentCraft == $craft
					if $p > 0 and $p < 1
						if $error
							draw(0,(12*$dpIndex)-$cursor,color(128,0,0,64),(screen_w-17)*$p,11)
						elseif $continuous
							draw(0,(12*$dpIndex)-$cursor,color(0,0,64,64),screen_w-17,11)
						else
							draw(0,(12*$dpIndex)-$cursor,color(0,64,64,64),(screen_w-17)*$p,11)
					elseif $p == 1
						draw(0,(12*$dpIndex)-$cursor,color(0,128,0,64),screen_w-17,11)
						@clearError()
					elseif $p < 0
						draw(0,(12*$dpIndex)-$cursor,color(30,15,15),screen_w-17,11)
					if $error
						write(10,(12*$dpIndex+2)-$cursor,color(80,40,0),get_recipe_label($craft))
					else
						write(10,(12*$dpIndex+2)-$cursor,color(20,80,0),get_recipe_label($craft))
					var $recipeInputs = get_recipe("crafter", $currentCraft)
					$dpIndex++
					foreach $recipeInputs ($item, $qty)
						write(20,(12*$dpIndex+2)-$cursor,color(100,100,100), get_recipe_label($item) & ": " & $qty)
						$dpIndex++
				else
					write(10,(12*$dpIndex+2)-$cursor,color(100,100,100),get_recipe_label($craft))
					$dpIndex++

	if button(screen_w-16,0,color(20,20,20),15,screen_h/2)
		if $cursor > 0
			$cursor -= 50
			if $cursor < 0
				$cursor = 0
		@screenDirty()
	if button(screen_w-16,screen_h/2+1,color(20,20,20),15,screen_h/2)
		$cursor = clamp($cursor + 50, 0, $maxScroll)
		@screenDirty()

	; Update max scroll limit based on content
	$maxScroll = max(0, $dpIndex*12 - screen_h/5*4)

	draw_triangle(0+$upX,0+$upY,10+$upX,0+$upY,5+$upX,-9+$upY,white,white)
	draw_triangle(0+$downX,0+$downY,10+$downX,0+$downY,5+$downX,9+$downY,white,white)

	if $popup
		draw_rect(4,5,196,195,color(150,150,150,240),color(40,40,40,240))
		text_align(top)
		write(0,10,color(0,200,225),"How to enable Auto-Crafting ?")
		text_align(top_left)
		write(7,30,color(200,200,200),"1. Connect both Item ports of")
		write(25,40,color(200,200,200),"the Crafter to the same")
		write(25,50,color(200,200,200),"Container")
		write(7,70,color(200,200,200),"2. Connect the Container's Data")
		write(25,80,color(200,200,200),"port to the Crafter's Data")
		write(25,90,color(200,200,200),"port")
		write(15,110,color(200,200,200),"The Crafter will recursively")
		write(15,120,color(200,200,200),"craft everything using items")
		write(15,130,color(200,200,200),"from the Container.")
		if button_rect(25,150,175,180,color(120,120,120),color(30,30,30))
			$popup = 0
			@screenDirty()
		text_size(2)
		write(56,157,white,"Got it!")
	if !enough_power
		text_size(2)
		text_align(center)
		draw_rect(0,0,screen_w,screen_h,color(0,0,0,220),color(0,0,0,220))
		draw_rect(25,70,175,125,color(120,0,10,230),color(80,20,20,230))
		write(0,-3,color(200,200,200),"Not enough\npower")
		@screenDirty()

init
	if $initTime == 0
		$initTime = time
	$upX = screen_w-14
	$upY = screen_h/4
	$downX = screen_w-14
	$downY = screen_h*3/4-2
	array $recipesCategories : text
	$recipesCategories.from(get_recipes_categories("crafter"), ",")
	foreach $recipesCategories ($i, $category)
		$categories.$category = 0

tick
	var $p = progress
	if $p < 0
		@error()

	; Autocrafting when a container is connected
	if $p >= 1 and size($autocraftList)
		var $qty = $autocraftQty.last - 1
		$autocraftQty.pop()
		if $qty > 0
			$autocraftQty.append($qty)
		else
			$autocraftList.pop()
		if size($autocraftList)
			start_craft($autocraftList.last)

	if ($p > 0 and $p < 1 and !$continuous) or time < $initTime+5 or $dirty
		@drawScreen()
	var $fluidLevels = ""
	$fluidLevels.h2 = text("{0.00}", fluid_level("H2"))
	$fluidLevels.h2o = text("{0.00}", fluid_level("H2O"))
	$fluidLevels.o2 = text("{0.00}", fluid_level("O2"))
	if $error
		output.0 (-1, $currentCraft, $fluidLevels)
	else
		output.0 ($p, $currentCraft, $fluidLevels)
	$container = ""

click
	@screenDirty()

scroll($scroll:number)
	; Scroll by ~1 line (12 pixels) per scroll step, respecting limits
	$cursor = clamp($cursor - $scroll * 16, 0, $maxScroll)
	@screenDirty()

input.0 ($onOrContainer:text, $craft:text, $autocraftContainer:text)
	print($onOrContainer, $craft, $autocraftContainer)

	; Autocrafting when a container is connected
	if $onOrContainer != "0" and $onOrContainer != "1"
		$container = $onOrContainer
		return

	var $on = $onOrContainer:number
	if $continuous != $on
		@screenDirty()
	$continuous = $on
	if time < $initTime+5
		return
	var $p = progress
	if $on and ($p == 0 or $p == -1 or $p == 1)
		if $craft and $currentCraft != $craft
			$currentCraft = $craft
			$autocraftList.clear()
			$autocraftQty.clear()
			@clearError()
			@screenDirty()
		if $p == 1 or $p == 0
			@clearError()
		elseif $p == -1
			@error()
		if $autocraftContainer
			$container = $autocraftContainer
			@autoCraft($currentCraft, 1)
			if size($autocraftList)
				start_craft($autocraftList.last)
		else
			start_craft($currentCraft)

	$onOrContainer = ""
	$craft = ""
	$autocraftContainer = ""
| Component | Buzzer |
|---|---|
| Module | ARCHEAN_beep |
| Mass | 5 kg |
| Size | 25 x 25 x 25 cm |
Description
The buzzer is a component that allows you to produce sound tones of type sine, square, triangle, or sawtooth while allowing you to control the frequency and amplitude of the sound.
Usage
Changing the tone type
The tone can be changed through the buzzer's configuration interface accessible with the V key.
List of inputs
| Channel | Function | Value |
|---|---|---|
| 0 | Amplitude | 0 to 1 |
| 1 | Frequency (Hz) | 0 to 20000 (default: 440Hz) |
- To play multiple frequencies simultaneously or multiple tones, you must use multiple buzzers.
| Component | GroundAnchor |
|---|---|
| Module | ARCHEAN_anchor |
| Mass | 25 kg |
| Size | 25 x 100 x 100 cm |
Description
The Ground Anchor is a device that locks a build to the ground when activated, preventing any movement.
Usage
The Ground Anchor operates without requiring external power. Its mechanism relies on a simple value, 0 for deactivated (not anchored) or 1 for activated (anchored) through its data port.
- To release a grounded build, removing the ground anchor is not enough. You must either unanchor the current ground anchor or install a new ground anchor to reactivate the build's physics, provided there are no longer any grounded anchors attached.
- If an OwnerPad is present, using the "Reset" button to move the build will NOT be prevented by the Ground Anchor.
- The Ground Anchor cannot anchor a vehicle to another vehicle, it only works on terrains.
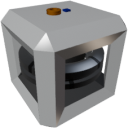
| Component | Gyroscope |
|---|---|
| Module | ARCHEAN_gyroscope |
| Mass | 200 kg |
| Size | 100 x 100 x 100 cm |
Description
The gyroscope is a component that, when powered and active, dampen its angular velocity. It is mainly used to stabilize a vehicle or stop angular momentum in zero G.
Power Supply
The Gyroscope is powered via high voltage. It consumes more power at startup then gradually reduces its consumption as it reaches the rotation speed requested via the data port.
Usage
To start the gyroscope, it must receive a value between 0.0 and 1.0 in its data port to decrease/increase its rotation speed, thereby increasing its stabilizing effect.
The gyroscope allows for manually orienting a vehicle through its data port by harnessing the induced torque of the inertial wheels inside it. It will act based on its orientation and rotation speed.
List of inputs
| Channel | Function | range |
|---|---|---|
| 0 | Speed | 0.0 to 1.0 |
| 1 | Control | -1.0 to +1.0 |
A gyroscope has a limited effect relative to the weight of the build. You can increase the number of gyroscopes to increase the stabilizing effect.
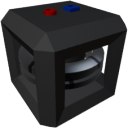
| Component | SmallGyroscope |
|---|---|
| Module | ARCHEAN_gyroscope |
| Mass | 50 kg |
| Size | 50 x 50 x 50 cm |
Description
The gyroscope is a component that, when powered and active, dampen its angular velocity. It is mainly used to stabilize a vehicle or stop angular momentum in zero G.
Power Supply
The SmallGyroscope is powered via low voltage. It consumes more power at startup then gradually reduces its consumption as it reaches the rotation speed requested via the data port.
Usage
To start the gyroscope, it must receive a value between 0.0 and 1.0 in its data port to decrease/increase its rotation speed, thereby increasing its stabilizing effect.
The gyroscope allows for manually orienting a vehicle through its data port by harnessing the induced torque of the inertial wheels inside it. It will act based on its orientation and rotation speed.
List of inputs
| Channel | Function | range |
|---|---|---|
| 0 | Speed | 0.0 to 1.0 |
| 1 | Control | -1.0 to +1.0 |
A gyroscope has a limited effect relative to the weight of the build. You can increase the number of gyroscopes to increase the stabilizing effect.
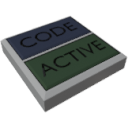
| Component | HudController |
|---|---|
| Module | ARCHEAN_hud |
| Mass | 1 kg |
| Size | 25 x 25 x 25 cm |
Description
The HUD Controller is a component that allows creating a HUD and displaying it on the player's screen when they subscribe to it. For example, it enables creating one or more custom interfaces on builds.
Usage
When you place a HUD Controller on your build, it has two buttons:
- Code:
- Opens the XenonCode IDE, where you can write the code for the HUD. Refer to the HUD section for more information on creating HUDs.
- Active:
- Allows subscribing or unsubscribing to the HUD Controller.
When the IDE is open, you are automatically subscribed to the HUD Controller as long as the IDE remains open.
Control via its data port
Usage with a Pilot Seat
Subscription to the HUD Controller can also be done via its data port using a Pilot Seat, which has the unique ability to send a unique identifier (Token) on its channel 0 (Using). You can connect a Pilot Seat directly to the HUD Controller's data port, allowing you to subscribe to the HUD Controller when seated in the Pilot Seat and unsubscribe when you leave it.
You can also use a Pilot Seat connected to a Computer to subscribe to the HUD Controller. In this case, you need to use channel 0 (Using) of the Pilot Seat to send the Token to the HUD Controller's data port.
- Make sure the
Emit user token on Channel 0setting is enabled in the Pilot Seat information window, accessible with theVkey. This ensures that the user's Token is transmitted on channel 0 of the Pilot Seat instead of a0or1.- We recommend not retrieving the Token and hardcoding things with it. The Token is regenerated each time the player connects to the server for security reasons. If a malicious player obtains another player's Token, they could use it to display anything on that player's HUD without their knowledge.
HUD Controller for server administrators
The HUD Controller can also be used to create a HUD visible to all players on the server. To do this, an administrator simply needs to place an OwnerPad on the build where the HUD Controller is located.
Then, connect the HUD Controller to a Computer and send the text * to channel 0 of the HUD Controller to instruct it to subscribe to all tokens.
Note: When a server administrator creates a HUD Controller for all players, it cannot be disabled. Therefore, care must be taken not to create a HUD Controller that could be disruptive to players.

| Component | OwnerPad |
|---|---|
| Module | ARCHEAN_ownership |
| Mass | 1 kg |
| Size | 25 x 50 x 50 cm |
Description
The OwnerPad is a versatile security device that ensures the protection of builds against potential malicious actions.
In addition to its security function, it allows you to save the state of a build or vehicle (Position, Velocity, Battery Level, switches...).
With this feature, it becomes possible to instantly revert to that state with a single click.
Usage
SAVE & RESET Button
The SAVE button saves the position of a build as well as the state of its components while the RESET button resets the build to the state it was in when last saved.
ROLES Button
Roles allow you to authorize/forbid actions on a build, as shown in the example image. They are designed to ensure the security of your builds against any malicious actions by other players. When you place an OwnerPad on a build, if no other OwnerPad is present, you become the owner of that build.
By default, all permissions are set to @Everyone, making the build completely public.
In addition to @Everyone and dksm (OWNER) in the example, the list of all connected players will be displayed, allowing you to assign roles to the players of your choice.
A Give Ownership button is present next to each connected player to transfer ownership to the player of your choice. You will then have no rights on the build until the new owner grants you roles.
Control via the data port
The OwnerPad has a data port to allow control from a computer or remotely via a beacon, for example.
You must send a text in channel 0 containing the keyword "save" or "reset" depending on the action you want to perform.
You must send an empty text "" to reset the state before you can send another command.

| Component | TrashCan |
|---|---|
| Module | ARCHEAN_storage |
| Mass | 10 kg |
| Size | 50 x 50 x 100 cm |
| Push/Pull Item | Accept Push |
Description
The TrashCan is a component that allows for instant destruction of the objects of the objets that were put in its inventory.
Usage
F to open the TrashCan inventory. Once opened, you can deposit items to destroy them.
- The TrashCan can be connected with an item conduit to automatically destroy items coming from an external source.
| Component | Step |
|---|---|
| Module | ARCHEAN_misc |
| Mass | 1 kg |
| Size | 25 x 100 x 100 cm |
Description
The stair step is a component that appears as a plate, allowing the creation of stairs.
Usage
The stair step can be placed on blocks and enables moving up or down from one block to another by utilizing its collider, which has a triangular shape (see the figure below).
This system allows for fully customizable stairs.
XenonCode - Documentation
XenonCode is a lightweight programming language designed as high level scripting within games for virtual computing devices (ie: a programmable computer within a game).
Capabilities
- Typed Variables
- Constants
- Dynamic Arrays
- Vectors and Matrices (up to 4x4) with swizzling
- Standard arithmetic operations on numeric values
- Easy string concatenation and formatting
- User-defined functions
- Device-defined functions and objects
- Trailing/member functions
- Built-in standard math functions
- Built-in IO operations between virtual devices
- Built-in key-value objects
- Synchronized interval functions (timers)
if/elseif/elseconditionalswhileloopsforeachloops for arraysrepeat nloopsforloops with first and last index
Sample code
include "my_functions.xc"

; Declare global storage
storage var $myStorageVar : number
storage array $myStorageArray : number

; Declare global variables
var $myVar = 0
var $myVar2 = "Hello World"
var $myVar3 : number
var $myVar4 : text
array $myArray : number
array $myArray2 : text

; Declare a user-defined function that changes the values of $myVar and $myVar2
function @myFunction($arg1 : number, $arg2 : text)
	$myVar = $arg1
	$myVar2 = $arg2

; Declare a user-defined function that returns a value
function @myFunction2($arg1 : number, $arg2 : text) : number
	return $arg1 + size($arg2)

init
	; Call a user-defined function
	@myFunction(1, "Hello")

	; Call a trailing function
	$myVar.@myFunction2("Hey")

	; Add values to an array
	$myArray.append(1)
	$myArray.append(5)
	$myArray.append(0)

	; Sort an array
	$myArray.sort()

	; Iterate over an array
	foreach $myArray ($index, $item)
		$myVar4 &= $index:text & ": " & $item:text & ", "

	; Output to a virtual device (ie: a console at input port 0)
	output.0 ($myVar4)
	output.0 (text("Sum of values in the array: {}", $myArray.sum))
	output.1 ($myArray.0:text)
	output.1 ($myArray.1:text)
	var $index = 2
	output.1 ($myArray.$index:text)

	; Repeat a statement three times
	repeat 3 ($i)
		output.1 ($i)

	; for loops
	for 3,8 ($i)
		; value of $i will go from 3 to 8 inclusively
Types of developer
User: The person who is using this language to write a script, typically a player in a game.Device: The implementation defining the capabilities and available functions, typically a specific type of programmable virtual device in a specific game.
Syntax
XenonCode is designed with a very basic syntax in mind and a very precise structure.
- Each statement has to be short and easy to read
- Very little special characters needed
- Less criptic than most other languages
- Indentations define the scope (tabs ONLY, no ambiguity there)
- A single instruction per line
- Array indexing, like most other programming languages, is 0-based but uses the
arr.0dot notation instead of the typicalarr[0]subscript notation - 100% Case-insensitive
- An implementation may define custom "Device" functions, objects and entry points
Types
XenonCode is a typed language, but only includes two generic types, as well as arrays of either, and implementation-defined objects.
Generic data types the user can declare:
numbertextvecN(fixed-size numeric vector, e.g.vec3)matNxM(fixed-size numeric matrix, e.g.mat4x4)
A number variable is always a 64-bit floating point internally, but may also act as a boolean when its value is either 1 or 0 (true or false), although any value other than zero is evaluated to true.
text variables contain plain unicode text, altough their maximum size depends on the implementation.
A text literal is defined within double quotes " ".
To use double quotes characters within the text, you may duplicate them.
There is no other escape sequence mechanism. A backslash \ is simply part of the string, and the implementation may decide to use it for escape sequences.
var $myText = "Say ""Hello"" to this text"
Object types are for use by the implementation and are opaque to the user, meaning their structure is not necessarily defined, however the implementation may make availalbe some member functions for those objects to the user.
Even though this is a typed language, specifying the type is not needed when it can be automatically deduced by the compiler during initialization. The type should only be specified when there is no initialization.
All user-defined words must start with a prefix character:
$for variables@for functions
Comments
Comments are lines that start with ;
A code statement may also end with a trailing comment
NOTE: // is deprecated and should NOT be used.
Limitations
This language is designed to potentially be executed Server-side in the context of a multiplayer game, hence for security and performance reasons there are limits to what users can do.
- No pointer nor reference types (except for implementation-defined objects, which must be sanitized by the implementation at runtime)
- The number of instructions per cycle may be limited, upon which an overflow may cause a virtual crash for the user
- Arrays may be limited in size at runtime, upon which an overflow may trigger a virtual crash for the user
- Recursive stack (calling a function recursively) is allowed with a specific syntax and is limited to 16 recursions
- Functions MUST be fully defined BEFORE their use, so the order of definition matters (this is what enforces the previous point)
Per-Virtual-Computer limitations
These are defined per implementation and may include multiple variants or be customizable by the user
- ROM (max compiled program size as a number of 32-bit words)
- RAM (max number of local, global and tmp variables plus all local and global arrays multiplied by their size)
- STORAGE (max number of storage variables plus all storage arrays multiplied by their size)
- Frequency (max frequency for timer functions and input read)
- Ports (max number of inputs/outputs)
- IPC (max instructions per cycle, one line of code may count as multiple instructions)
Operation on data
- All functions, including timers, are executed atomically, preventing any data-race
- Function arguments are always passed by copy, a function CANNOT modify the variables placed in its argument list
- Trailing functions DO modify the value of the leading variable
- Variable assignments always copy the value for generic types
- Implementation-defined objects are always passed by reference
- Implementation-defined objects cannot be copied unless the implementation provides that functionality through a device function
- Divisions by zero results in a runtime error. It is at the responsibility of the user to make sure to account for it.
Basic rules
- Variables may be declared using
varand optionally assigned an initial value otherwise the generic default is used (0 for number and "" for text) - Object variables must be assigned upon declaration using a constructor or a device function that returns an object of that type
- Starting a statement with a varialbe name (starting with
$) means that we are modifying its value - If the next word following a variable assignment is
=, then the following expression's result is going to be assigned as its value - If the next word following a variable assignment is a dot and a function, this function call is considered a trailing function
- Calling a trailing function DOES modify the value of the leading variable wich is also used as the function's first argument which must be omitted from the argument list when calling it
- Starting a statement with a function name (starting with
@for user-defined functions) means that we are calling this function and discarding its return value - Calling a function will NEVER modify the value of any of its generic-typed arguments passed within parenthesis, generic types are always passed by copy
- Anything in parenthesis that is not preceeded by a function name is considered a separate expression, inner left-most expressions are computed first
- Typical rules apply for mathematical precedence of operators
Valid usage
XenonCode is designed to be compiled as byteCode which is very fast to parse by the host game at runtime.
Each line must begin with one of the following first words (with examples):
Global scope
includeImports the content of another fileconstdeclare a global constantvardeclare a global variablearraydeclare a global arraystoragedeclare a storage variable or array, which will be persistent across power cyclesinitDefine the body of the init function, which will execute once when the device is powered ontickdeclare the body of the tick function that will execute at each clock cyclefunctiondeclare a user-defined functionrecursive functiondeclare a user-defined function that may call itself recursivelytimerDefine the body of a function that will execute repeatedly at a specific frequency in HzinputDefine an input function;Comments- an entry point defined by the implementation
- one or more tabs, meaning we're within a function body, then the following rules apply:
Function body / Entry point
varDeclare a new variable in this local scope (not accessible from outside of this function)arrayDeclare a new array in this local scope (not accessible from outside of this function)$To assign a new value to an existing variable@To call a user-defined functionoutputBuilt-in function to send data to another device through a specific portforeachloops through all items of an arrayrepeatloops a block of code n timeswhileloops as long as a condition evaluates to trueforloops a block of code, given a first and last indexbreakstops a loop here as if it completed all iterationscontinuestops this iteration of a loop here and run the next iteration immediatelyifruns a block of code if a condition evaluates to trueelseifafter a if, when the initial condition so far evaluates to false and a new condition evaluates to trueelseafter a if, when all conditions evaluated to falsereturnstop the execution of this function here and return a value to the caller
Reserved keywords
Since all user-defined words must start with either $ or @, there is no need for reserved words.
The implementation/device must take care of only defining function names and object types that do not conflict with built-in keywords for the version of XenonCode that they're using.
Declaring a constant
Constants are named values that should never change throughout the execution of a program. They are fixed values defined at compile-time.
Their assigned values must be explicitely given and must be expressions which the result can be determined at compile-time.
const $stuff = 5 declares a constant named $stuff with the number 5 as its value
const $stuff = "hello" declares a constant named $stuff with the text "hello" as its value
Declaring a variable
Variables are named values that can change throughout the execution of a program.
We may or may not assign them an initial value.
If we do not assign an initial value, the default generic value is used, and we must provide a type.
A variable is only accessible within the scope it has been declared in. For instance, if we declare a variable at the biginning of a function, it is available throughout the entire function. If we declare a variable within a if block, it is only available within that block, until the corresponding else, elseif or until going back to the parent scope.
A variable declared in the global scope is accessible from everywhere.
For variables declared in the global scope, when we assign it an initial value, the given expression must be determined at compile-time.
Variable names must start with a letter or underscore (a-z or _) then must contain only alphanumeric characters and underscores.
var $stuff = 5 declares a number variable with an initial value set to 5 when the program starts
var $stuff = "hello" declares a text variable with an initial value set to "hello" when the program starts
var $stuff:number declares a number variable with an initial value set to 0 when the program starts
var $stuff:text declares a text variable with an initial value set to "" when the program starts
var $stuff = position() declares an instance of an implementation-defined object of the type position (this is an example)
Implementation-defined objects cannot be declared without initialization, since they do not have a default value.
Assigning a new value to a variable
To assign a new value to a variable, we can simply start a statement with the variable name followed by a = and an expression the result of which will be the new value.
We may also use a trailing function which will inherently modify the value of said variable.
$stuff = 5 assign the value 5 to the variable named $stuff
$stuff = $other + 5 assign the result of the expression ($other + 5) to the variable named $stuff
$stuff.round() call a trailing function that rounds the value of the variable
Declaring an array
An array is a dynamic list of values of a certain type. We can append or erase values, we can access a specific value from the list, or loop through all its values.
When declaring an array, we cannot specify an initial value, and we must provide a type.
Arrays are initialized with zero size when the program starts, values may be added/erased/modified throughout the execution of the program
array $stuff:number declare an array of numbers
array $stuff:text declare an array of texts
Arrays cannot contain implementation-defined objects, just generic types.
Vectors and Matrices
Vectors and matrices are fixed-size containers of 64-bit floating point numbers, useful for positions, transforms, and linear algebra. All elements are initialized to zero.
Declaration
Use vecN for vectors (1D) and matNxM for 2D matrices, with dimensions up to 4.
var $position : vec3       ; 3-element vector (vec2, vec3, vec4 available)
var $transform : mat4x4    ; 4x4 matrix
var $rotation : mat3       ; shorthand for mat3x3
| Type | Shorthand | Description |
|---|---|---|
vec2, vec3, vec4 | -- | Vectors with 2, 3, or 4 elements |
matNxM | -- | 2D matrix with N rows and M columns (e.g. mat3x4) |
matN | matNxN | Square matrix shorthand (e.g. mat3 = mat3x3) |
Component Access
Access elements using .x, .y, .z, .w or equivalently .0, .1, .2, .3.
Vectors -- each accessor refers to a single element:
var $v : vec3
$v.x = 1       ; element 0
$v.y = 2       ; element 1
$v.z = 3       ; element 2
$v.0 = 1       ; same as .x
2D Matrices -- the first accessor selects a row, the second selects a column within that row:
var $m : mat4x4
$m.0.x = 1     ; row 0, column 0
$m.1.y = 1     ; row 1, column 1
$m.w.w = 1     ; row 3, column 3 (same as $m.3.3)
Swizzling
Combine 2-4 component names from xyzw to extract multiple elements at once into a new vector:
var $v : vec3
$v.x = 10
$v.y = 20
$v.z = 30
var $a : vec2
$a = $v.xy         ; vec2 containing (10, 20)
var $b : vec2
$b = $v.zx         ; vec2 containing (30, 10)
Swizzling always produces a copy -- modifying the result does not affect the original.
Arithmetic
Element-wise operations between vectors/matrices of the same size:
var $a : vec3
var $b : vec3
var $c : vec3
$c = $a + $b       ; element-wise addition
$c = $a - $b       ; element-wise subtraction
Scalar multiplication and division scale every element:
$c = $a * 2        ; multiply all elements by 2
$c = $a / 2        ; divide all elements by 2
Matrix multiplication with * when dimensions are compatible:
var $m : mat3x3
var $v : vec3
var $result : vec3
$result = $m * $v  ; 3x3 matrix times 3x1 vector = 3x1 vector
Compound assignment operators also work: +=, -=, *=, /=
Trailing Functions (In-Place)
These modify the vector or matrix directly and do not return a value.
| Function | Applies to | Description |
|---|---|---|
.normalize() | vectors | Scale to unit length |
.cross($other) | vec3 | Store cross product of self and $other into self |
.transpose() | square matrices | Transpose in place |
.inverse() | square matrices | Invert in place |
.identity() | square matrices | Set to the identity matrix |
.lerp($other, $t) | vectors / matrices | Interpolate toward $other by factor $t |
var $dir : vec3
$dir.x = 3
$dir.y = 4
$dir.normalize()   ; $dir is now a unit vector
Standard Functions (Return a New Value)
These do not modify their arguments. Functions returning a single number are marked scalar.
| Function | Returns | Description |
|---|---|---|
length($v) | scalar | Magnitude of a vector |
distance($a, $b) | scalar | Euclidean distance between two vectors |
dot($a, $b) | scalar | Dot product of two vectors |
angle($a, $b) | scalar | Angle between two vectors in radians |
cross($a, $b) | vec3 | Cross product of two vec3 vectors |
determinant($m) | scalar | Determinant of a square matrix |
normalize($v) | same as input | Normalized copy of a vector |
transpose($m) | same as input | Transposed copy of a square matrix |
inverse($m) | same as input | Inverted copy of a square matrix |
lerp($a, $b, $t) | same as input | Interpolated copy between $a and $b by factor $t |
Passing to Functions
Vectors and matrices can be used as function argument types and return types:
function @scale($v : vec3, $factor : number) : vec3
	return $v * $factor

var $result : vec3
$result = @scale($myVec, 2.5)
Declaring storage
Storage is used to keep some data persistent across power cycles and even through a re-compile.
We can declare storage variables and arrays of either number or text.
Storage should ONLY be declared in the global scope.
storage var $stuff:number
storage var $stuff:text
storage array $stuff:number
storage array $stuff:text
Accessing/Assigning the nth item within an array
To access or modify the value of a specific item in an array, we must use the trail operator . followed by the 0-based index of the item or a variable containing that index
$stuff.0 = 5 Assign the value 5 to the first item of the array
$stuff.$index = 5 Assign the value 5 to the item with an index defined by the value of $index
$value = $stuff.1 Assign the value of the second item of the array to the variable $value
Accessing/Assigning the nth character within a text variable
Text variables work in a very similar way to arrays. We can use the trail operator . to access or modify the value of specific charaters within a text.
$myText.0 = "a" Set "a" as the first character of $myText
Key-Value objects
XenonCode supports its own key-value type that is always stored as text.
Simply declare a text variable and assign/read its members using its key as the trailing member
var $myObject = ".a{5}.b{8}" ; you can use the serialization format like so, but you don't have to, you may simply start with an empty text and assign the members one by one
print($myObject.a) ; will print 5
$myObject.b += 2 ; adds 2 to b which was 8 and will now be 10
The Init function
The Init function's body will be executed first everytime the virtual computer is powered on.
The init function cannot be called by the user. It can only be defined, and the device will automatically call it upon virtual startup.
init
    $stuff = 5
    @func1()
    ;...
Tick function
The tick function is executed at the beginning of every clock cycle of this virtual computer.
The tick function cannot be called by the user. It can only be defined, and the device will automatically call it for each cycle.
tick
    ; This body is executed once per clock cycle at the virtual computer's frequency
Timer functions
Timer functions are executed at a specified interval or frequency, but at most once per clock cycle.
We can either specify an interval as in every N seconds or a frequency as in N times per second.
Timer functions cannot be called by the user. They can only be defined, and the device will automatically call them at their appropriate time.
timer frequency 4
    ; stuff here runs 4 times per second
timer interval 2
    ; stuff here runs once every 2 seconds
Note: If the clock speed of the virtual computer is slower than the given interval or frequency, that timer function will not correctly run at the specified interval or frequency, and may be executed at every clock cycle instead.
Input
Input entry points are a way of accessing the information that we have received from another device.
They may be executed any number of times per clock cycle, depending on how much data it has received since the previous clock cycle. The implementation may decide to only run it once per cycle using only the latest data received.
Devices may have an upper limit in the receiving buffer which defines the maximum number of times the input function may be called per clock cycle.
If that limit has been reached, only the last N values will be kept in the buffer.
Input entry points are like user-defined functions, containing arguments, but no return value, and also we must specify a port index.
The port index must be specified after the input keyword and a trail operator .
The port index may be specified via a constant as well (must be known at compile time).
Function arguments must be surrounded with parenthesis and their types must be specified.
Entry points cannot be called directly by the user. They can only be defined, then the device will automatically call them if data has been received, at the end of a clock cycle.
input.0 ($arg1:number, $arg2:text)
    $stuff = $arg1
input.$myPortIndex ($arg1:number, $arg2:text)
    $stuff = $arg1
Output
The output function is how we send data to another device. This function is meant to be called as a statement, and cannot be used in the global scope like the input functions are.
We must also pass in the port index as we do with the input function, and it can also be specified via a constant that is known at compile-time.
We must pass a list of arguments surrounded with parenthesis (or an empty set of parenthesis).
output.0 ($stuff, $moreStuff)
If Elseif Else
Like most programming languages, we can use conditionals.
if $stuff == 5
    ; then run this
elseif $stuff == 6
    ; then run that instead
else
    ; all previous conditions evaluate to false, then run this instead
Foreach loops
This loops through all items of an array.
The block of code under that loop statement will be executed for every item in the array, one by one.
foreach $stuff ($index, $item)
    ; we loop through the array $stuff, and we define $index which contains the 0-based index of this item and $item for the current item's value
    ; note that $item is a copy of its value, so modifying the value of $item will not affect the original array $stuff
    ; if we want to persist the modified $item value into the original array, we can use $index to index the element from the array like so:
    $stuff.$index = $item
    ; CAUTION: $index is a reference used internally for the loop, don't modify its value unless you actually want to affect the loop
You may also use the foreach loop with key-value objects
foreach $obj ($key, $value)
    print($key)
    print($value)
Repeat loops
This loop will repeat the execution of the following block a given number of times.
repeat 5 ($i)
    ; this block will be repeated 5 times, and $i is the 0-based index of this iteration (first time will be 0, last will be 4)
    ; CAUTION: $i is a reference used internally for the loop, don't modify its value unless you actually want to affect the loop
The number of times (above specified as 5) may also be specified via a variable or a constant, but not an expression
For loops
This loop is similar to repeat but takes in a first and last index instead of a number of repeats
for 3,8 ($i)
	; $i will start at 3, and end with 8, inclusively, for a total of 6
While loops
This loop will run the following block as long as the given condition evaluates to true.
while $stuff < 5
    $stuff++
Break
This keyword is used to stop a loop as if it completed all its iterations.
while $stuff < 5
    $stuff++
    if $stuff == 3
        break
Continue
This keyword is used to stop this iteration of a loop here and run the next iteration immediately.
while $stuff < 5
    $stuff++
    if $stuff == 2
        continue
Math Operators
+addition-subtraction*multiplication/division%modulus^power
Trailing Operators
++increment the variable's value--decrement the variable's value!!reverses the variable's value (if it's value is0, sets it to1, otherwise to0)
Assignment operators
=just assign the following value directly
The following operators will compute the appropriate math operation between the leading variable and the following expression, then assign the result back to the leading variable.
+=addition-=substraction*=multiplication/=division%=modulus^=to the power&=concatenate text
Conditional Operators
==equal to<>or!=not equal to>greater than<lesser than<=lesser or equal to>=greater or equal to&&orandconditional AND||ororconditional ORxoris also available, equivalent to (!!a != !!b)
Other operators
.(trail operator) refer to a sub-item of an array or text or call a trailing function on the leading variable, or a member of an object:(typecast operator) cast as another type&(concat operator) concatenate texts!(not operator) reverses a boolean value or expression (non-zero numbers become 0, and 0 becomes 1)
Casting (parse variables as another type)
To parse an existing variable as another type, simply add a colon and the type, like so:
$someTextValue = $someNumberValue:text
This only works with generic types number and text, not arrays or objects.
String concatenation
To concatenate texts, simply separate all text values/variables with the concat operator & in the same assignment (don't forget to cast to text if you need to).
$someTextVar = "Hello, " & $someName & "!, My age is " & $age:text & " and I have all my teeth"
Include
You may want to split your project into multiple source files.
To do this, you can put some code into another .xc file and use the include keyword in the parent file.
include "test.xc"
This is effectively the same as taking all the lines from test.xc and inserting them into the current file where the include is.
This can be done on multiple levels, just make sure that a file does not include itself, directly or indirectly, in which case the definitions within it will conflict and result in a compile error.
User-Defined Functions
Functions define a group of operations that we may call one or more times during the execution of the program.
The operations to run in a function appear within its body.
Functions may have arguments that can be used within the body so that the operations may have a variation depending on the value of some variables.
Function arguments are defined after the function name, within parenthesis and they can be of type number, text, or implementation-defined object.
Function names have the same rules as variable names.
NOTE: Functions MUST be fully defined before their use. This means that the order of function declaration matters and we can only call a function that has been declared ABOVE the caller and a function CANNOT call itself. This enforces the "no-stack-recursion" rule.
Declaration
Here are some function declaration examples
This function takes in a single number argument:
function @func0 ($var1:number)
This function takes two number arguments:
function @func1 ($var1:number, $var2:number)
This function takes a number argument and a text argument:
function @func2 ($var1:number, $var2:text)
This function takes an implementation-defined object type position argument:
function @func3 ($var1:position)
This function takes a number argument and a text argument and returns a number value:
function @func2 ($var1:number, $var2:text) : number
Body
The body of a function (the operations to be executed when calling it) must be on the following lines after the declaration, indented with one tab.
Empty lines within a body are allowed and ignored by the compiler.
Functions bodies may have a return statement optionally followed by an expression that would be used to assign a leading variable in the caller statement.
When returning a value, the return type must be provided at the end of the arguments, after the closing parenthesis and a colon.
function @func1 ($var1:number, $var2:number) : number
    return $var1 + $var2
Call
Calling a function will run the operation in its body.
To call a function, simply write the name of the function (starting with @ for user-defined functions), then its arguments within parenthesis separated by commas, like so:
@func1(4, 6)
Here we have passed two number arguments, thus this call executes the body of the declaration above.
It is of course also possible to use variables or even complex expressions instead of just literal numbers as the function arguments.
NOTE:
Omitted arguments are legal.
Their value initially takes the default empty ("" or 0) then persists with what is passed in or assigned to them for the following calls to that function.
Changing the value of an argument within that function will also be persistent for the next call to that function, if that argument is omitted.
Hence, if a concept of a default argument value is needed, they can be assigned to the argument in the body of that function after their use.
This omitted argument concept can also be thought of as a concept similar to static local variables in C++.
Return value
Functions may return a value using the return keyword.
This returned value may be assigned to a variable like so :
$value = @func1(4, 6)
Recursive functions
A recursive function is a function that calls itself.
To define a recursive function, use recursive function and recurse to call the function itself.
recursive function @recursiveFunc($myVar:number)
    if $myVar < 15
        recurse($myVar++)
This example of a recursive function will call itself as long as the value of $myVar is less than 15. Recursive functions are limited to 16 recursive calls.
Note: The recurse keyword is only available within recursive functions and is used to call the function itself. The argument list must be the same as the function definition.
Trailing functions
Any function may be called as a trailing function, even user-defined functions.
The way they work is that under the hood the leading variable is passed as the first argument to that function, and then assigned the returning value.
When calling a trailing function, we must ommit the first argument as it automatically sends the leading variable as its first argument under the hood.
If the function definition does not have any arguments, this is still valid, although we simply don't care about the current value of the leading variable, but we'll assign a new value to it.
The function definition MUST have a return type that matches that of the leading variable, if it's a generic type.
A trailing function may be called on implementation-defined objects, in which case the first argument must be of that object type, there is no return type in the function and it must NOT return any value.
Since we cannot pass Arrays as function arguments, arrays can only take their own specifically defined trailing functions.
$myVariable.round()
$myVariable.@func1(6)
$myArray.clear()
Built-in functions
Math
These functions are defined in the base language and they take one or more arguments.
Trailing math functions will use the leading variable as its first argument and modify that variable by assigning it the return value.
floor(number)ceil(number)round(number)sin(number) in radianscos(number) in radianstan(number) in radiansasin(number) in radiansacos(number) in radiansatan(number) or (number, number) in radiansabs(number)fract(number)log(number, base)sqrt(number)sign(number [, default])pow(number, exponent)clamp(number, minimum, maximum)step(edge1, edge2, number) or (edge, number)smoothstep(edge1, edge2, number)lerp(a, b, number)mod(number, divisor) the modulus operatormin(number, number)max(number, number)avg(number, number)add(number, number)sub(number, number)mul(number, number)div(number, number)
Text functions
text(inputTextWithFormatting, vars ...) See the section below for more detailssubstring($myText, start, length) returns a new stringreplace($myText, searchText, replaceText [, count]) returns a new string with all occurrences ofsearchTextreplaced byreplaceText, or up tocountoccurrences if specifiedsize($myText) returns the number of characters in $myTextlast($myText) returns the last character in $myTextlower($myText) returns the lowercase version of $myTextupper($myText) returns the uppercase version of $myText
Formatting
The text function takes a format as the first argument.
The format is basically a text that may contain enclosing braces that will be replaced by the value of some variables or expressions.
Exemple:
$formattedText = text("My name is {} and I am {} years old.", $name, $age)
Empty braces above will be replaced by the corresponding variables in the following arguments in the same order.
It is also possible to format number variables in a specific way by providing some pseudo-values within the braces like so:
{}automatically display only the necessary digits based on the value (ex:3or123.456){0}round to nearest integer value (ex:3or123){00}round to nearest integer value but also display at least two digits (ex:03or123){0e}display the rounded integral value as a scientific notation (ex:3e+00or1e+02){0e.00}display the value as a scientific notation with two digits after the decimal (ex:3.00e+00or1.23e+02){0.0}round to one digit after the decimal (ex:3.0or123.5){0000.00}display at least 4 integral digits and round to two digit after the decimal (ex:0003.00or0123.46)
Trailing functions for Arrays
These functions MUST be called as trailing functions, and they do not return anything, instead they modify the array
- $myArray.
clear() Empty an array - $myArray.
sort() Sort an array in Ascending order - $myArray.
sortd() Sort an array in Descending order - $myArray.
append(value1, value2, ...) Append one or more values to the end of an array. - $myArray.
pop() Erase the last value in an array, reducing its size by one - $myArray.
insert(index, value) Insert a new value to an array at a specific position, pushing back all following values by one - $myArray.
erase(index) Erase an element from an array at a specific index, pulling back all following values by one - $myArray.
fill(qty, value) Resize and Fill an array with a given size and the specified value for all items (this clears any values previously present in the array) - $myArray.
from(other [, separator]) Set the contents of the array to another array or text. Separator is for splitting with a specific string (only valid when other is a text). This function also works in reverse when executed on a text given an array and a separator.
Trailing members for Arrays
Using the trail operator ., we can also return a specific information about certain types of variables.
- $myArray.
sizereturns the number of elements in $myArray - $myArray.
minreturns the minimum value within a number array - $myArray.
maxreturns the maximum value within a number array - $myArray.
avgreturns the average value within a number array - $myArray.
medreturns the median value within a number array - $myArray.
sumreturns the sum of all values within a number array - $myArray.
lastreturns the value of the last item within an array, this also allows to modify that value by assigning an expression
Other useful helpers
contains($myText, "str") returns 1 if $myText contains "str", otherwise 0find($myText, "str") returns the index of the first character of the first occurance of "str" in $myText, otherwise -1 if not found These also work on arrays.isnumeric($myText) returns 1 if $myText is a number, otherwise 0
Ternary operator
The ternary operator is a shorthand conditional expression that returns a value depending on the evaluation of a condition.
$myVar = if($cond, $valTrue, $valFalse)
Device functions
An implementation should define application-specific device functions.
Here are examples of basic device functions that MAY or MAY NOT be defined:
delta() returns the time difference in seconds from the last execution of thisdeltafunction
Device functions that do not require any arguments may be used without parenthesis when called from within an expression.
Compiler Specifications
This section is intented for game developers who want to use this in their game.
XenonCode comes with its own parser/compiler/interpreter library, and a very simple cli tool.
Editor
It is encouraged that the code editor runs the following parse on the current line on each keystroke:
- Replace leading sequences of spaces with exactly one tab more than the previous non-empty line, if it starts further than it
- Autocomplete words upon pressing the space bar if that word is not an existing symbol
- Write the minimum remaining characters (common denominator) of the symbols that start with the written characters
- If this is the leading word: Only autocomplete with global scope statement words
- If preceded with tabs: Only autocomplete with function body statement words
- When the first character in the current word is a
$, autocomplete with a user variable - When the first character in the current word is a
@, autocomplete with a user function - Otherwise, Autocomplete with one of:
- Current function/foreach/repeat arguments
- Built-in functions
- Operators
- Write the minimum remaining characters (common denominator) of the symbols that start with the written characters
Runtime
Upon powering up the virtual computer:
- Execute the body of the init() function
One clock cycle, executed 'frequency' times per second:
- Execute all input functions that have received some data since the last cycle (once each per cycle)
- Execute custom events / entry points
- Execute the tick function
- Execute all timer functions sequentially if their time is due
- Sleep for Elapsed-1/Frequency Seconds
Testing XenonCode
You may want to test XenonCode or practice your coding skills.
There is an online fiddle tool at XenonCode.com
Otherwise, you may want to try running it directly on your computer.
For this, XenonCode has a cli with a -run command to test some scripts in the console.
This repository comes with the cli tool, located in build/xenoncode
Here's how you can download and run XenonCode:
# Clone this github repository
git clone https://github.com/batcholi/XenonCode.git
cd XenonCode
# Compile & Run the XC program located in test/
build/xenoncode -compile test -run test
You may edit the .xc source files in test/ then try running the last line again to compile & run.
test/storage/ directory will be created, it will contain the storage data (variables prefixed with the storage keyword).
Note that this -run command is meant to quickly test the language and will only run the init function.
Also, make sure that your editor is configured to use tabs and not spaces, for correct parsing of indentation.
If you want to integrate XenonCode into your C++ project, you can include XenonCode.hpp.
Further documentation will be coming soon for this, in the meantime you may use main.cpp as an example but its usage is still subject to change.
Archean XenonCode Documentation
This is the extended documentation related to the Archean specific implementation of XenonCode.
For the basic syntax of XenonCode, please refer to Documentation. According to the context, some features may not be available or may behave differently. Specific pages for these contexts are available for more details:
Archean Specific Features Available in All Contexts
Includes
Includes are useful to either share functionality between programs, merge multiple programs into one, or just to keep your programs clean and organized.
include "some_helper_functions.xc"
Basic Declarations
var $num_value : number
const $speed_of_light = 299792458
Storage Declarations
storage var $memorized_value : number
storage array $memorized_names : text
;Storage values are retained between reboots and program modifications. They are always default-initialized to 0 or empty.
Program Entry Points
init
; This entry point is executed once when the program is loaded.
; Only one 'init' entry point may be defined in a program.

tick
; This entry point is executed once every server tick.
; Only one 'tick' entry point may be defined in a program.

timer interval 5
; This entry point is executed every 5 seconds.
; Multiple 'timer interval' entry points may be defined in a single program and they will all be executed as their time has come, after the tick.
timer frequency 10
; This entry point is executed 10 times per second.
; Multiple 'timer frequency' entry points may be defined in a single program and they will all be executed as their time has come, after the tick.
Built-in values
$num_value = time ; the current time as decimal unix timestamp in seconds with microsecond precision
$num_value = pi ; 3.14159265.....
$num_value = 2pi ; 3.14159265 * 2
Built-in functions
; Random Generator
$num_value = random(0, 100) ; returns a random integer value between 0 and 100 inclusively
$num_value = random ; returns a random float value between 0.0 and 1.0 (hitting exactly 0.0 or 1.0 is statistically improbable)

; Game Mode
$num_value = game_mode() ; returns the current game mode (0 = Creative, 1 = Adventure)

; Crafting Recipes
var $categories = get_recipes_categories("crafter") ; returns a comma-separated list of recipe categories for the given context
var $recipes = get_recipes("crafter", "CATEGORY") ; returns a comma-separated list of recipe names in the given category (category must be uppercase)
var $recipe = get_recipe("crafter", "recipeName") ; returns a key-value text object with ingredient names and quantities
var $label = get_recipe_label("module.recipeName") ; returns the display label of a recipe (strips the module prefix)
Color
var $blue = color(0, 0, 255) ; returns an RGB color given three values between 0 and 255. This will always assume full opacity (as if 255 is passed in the a component).
var $translucentRed = color(255, 0, 0, 128) ; returns an RGBA color given four values between 0 and 255. A value of 128 in the a component will effectively be 50% opacity. 0 would mean transparent.
var $redComponent = color_r($translucentRed) ; is effectively the reverse of the previous function to get back the 255 value. Same can be done with color_g, color_b and color_a.

; Built-in colors
var $black = black
var $white = white
var $red = red
var $green = green
var $blue = blue
var $yellow = yellow
var $pink = pink
var $orange = orange
var $cyan = cyan
var $gray = gray
var $purple = purple
var $brown = brown
Computer
Specific Functions for Computers
Program Entry Points
input.0 ($value0:number, $value1:number, $value2:text)
; This entry point is executed whenever a value is received from the input with the specified IO index.
; The arguments are the values received for each channel. Any number of arguments can be provided, with their appropriate types.
; There can only be one 'input' entry point defined per IO index per program.

update
; This entry point is executed on each server tick at the end of each cycle, after the timers.
; Multiple 'update' entry points may be defined in a single program and they will all be executed in the order they are defined.

click ($x:number, $y:number)
; This entry point is executed whenever a user clicks on the screen, given an xy coordinate in pixels.
; Multiple 'click' entry points may be defined in a single program and they will all be executed in the order they are defined.

click_hold ($x:number, $y:number)
; This entry point is executed continuously while a user holds the click on the screen, given an xy coordinate in pixels.
; Useful for drag interactions or continuous input detection.
; Multiple 'click_hold' entry points may be defined in a single program and they will all be executed in the order they are defined.

scroll ($delta:number)
; This entry point is executed whenever a user scrolls with the mouse wheel while aiming at the screen.
; The $delta parameter indicates the scroll direction and amount (positive for scroll up, negative for scroll down).
; Multiple 'scroll' entry points may be defined in a single program and they will all be executed in the order they are defined.

shutdown
; This entry point is executed once when the computer is powered off or before it is rebooted (but NOT when it crashes).
; Multiple 'shutdown' entry points may be defined in a single program and they will all be executed in the order they are defined.
Built-in values
$num_value = delta_time ; the time interval between ticks in seconds (equivalent to 1.0 / system_frequency)
$num_value = tick ; the index of the current tick since the computer has started

$num_value = char_w ; the width of a character in pixels, taking into consideration the current text size
$num_value = char_h ; the height of a character in pixels, taking into consideration the current text size

$num_value = screen_w ; the width of the virtual monitor in pixels
$num_value = screen_h ; the height of the virtual monitor in pixels

$num_value = clicked ; whether the mouse button was pressed while aiming at the virtual monitor
$num_value = click_x ; the x coordinate of the mouse cursor on the virtual monitor when the mouse button was pressed
$num_value = click_y ; the y coordinate of the mouse cursor on the virtual monitor when the mouse button was pressed
$num_value = scroll ; the scroll wheel delta value (positive for scroll up, negative for scroll down)

$num_value = system_frequency ; the frequency of the system clock in hertz (ticks per second)
$num_value = programs_count ; the number of programs currently on the virtual HDD
$num_value = system_ipc ; the maximum number of instructions per cycle (IPC) of the virtual CPU
$num_value = system_ram ; the maximum number of variables in RAM
$num_value = ipc ; the number of instructions per cycle (IPC) of the virtual CPU
Built-in functions
var $programName = program_name(0) ; returns a program name, given an index between 0 and programs_count-1
load_program($programName) ; loads a program and call its init function (it first unloads the currently running program, calling shutdown on it)
reboot() ; reboots the computer (calls the shutdown entry point and loads the bios or main program)

$text_value = device_type(aliasOrIoNumber) ; returns the type of the device with the given IO index
Screen Override
A Computer can override the screen of any component connected to it. This allows you to replace the default display of a component with custom graphics rendered by your XenonCode program.
To enable screen override:
- Open the component's GetInfo menu with
V - Check the Override Screen option
- Reference the screen in your code using
screen(ioIndex, channel)and draw on it like any other screen
IO
Computers can resolve component aliases directly without needing a Router. Simply use the alias name as the first parameter in IO functions.
; input_[number|text](aliasOrIoNumber, channelIndex) ; returns the value of the input with the given alias and index
var $someNumber = input_number("", 0)
var $someText = input_text("", 0)

; output_[number|text](aliasOrIoNumber, channelIndex, value) ; sends the given value to the output with the given alias and index
output_number(0, 0, $num_value) ; send a number to output with alias computer
output_number("computer", 0, $num_value) ; send a number to output with alias computer
output_text("computer", 0, "hello") ; send text hello to output with alias computer
Screen Rendering functions (draw on a virtual screen)
blank($black) ; clears the screen with a given color

write(0, 0, green, "Hello") ; write a green Hello message in the top left corner of the screen
write(0, char_h, blue, "Hey") ; write a blue Hey message just under the first message
; Note that char_w and char_h return the size of one character in pixels + 1 additional pixel, to serve as a multiplier to jump lines or to count the width of a text.

text_size(2) ; sets text size to two times native, only valid for following writes in the current cycle until the next call to text_size()
text_align(top_left) ; sets text alignment to top_left, only valid for following writes in the current cycle until the next call to text_align()
;(top_left, top, top_right, left, center, right, bottom_left, bottom, bottom_right)
newline_spacing(3) ; sets the spacing between lines when using "\n" to make new line in write(), only valid for following writes in the current cycle until the next call to newline_spacing()


; Draw functions take positions X and Y where 0,0 = top-left, in pixels.
; draw_point(x, y, color)
draw_point(screen_w/2, screen_h/2, white) ; draw a single white pixel in the middle of the screen
; draw_line(x1, y1, x2, y2, color)
draw_line(0, 0, screen_w, screen_h, yellow) ; draw a yellow line going from top left to bottom right of the screen
; draw_rect(x1, y1, x2, y2, color [, fillcolor])
draw_rect(50, 50, 60, 60, red) ; draw a red square starting at coordinates 50,50 inclusive through 60,60 exclusive, it will effectively have a size of 10x10.
; draw_triangle(x1, y1, x2, y2, x3, y3, color [, fillcolor])
draw_triangle(screen_w/2, 0, 0, screen_h, screen_w, screen_h, blue) ; draw a blue triangle from the top middle to the bottom corners of the screen
; draw_circle(x, y, radius, color [, fillcolor])
draw_circle(screen_w/2, screen_h/2, 50, green) ; draw a green circle with a radius of 50 pixels in the middle of the screen
; draw_poly(color, x1, y1, x2, y2, x3, y3, x4, y4)
draw_poly(yellow, 0, 0, 50, 50, 100, 0) ; draw a yellow polygon with 3 points. There is no limit to the number of points, allowing for the creation of complex shapes.

; Draw functions may also be turned into Buttons. Works with rect, triangle and circle.
if button_rect(0, 0, 40, 10, gray) ; draw a gray rectangle button in the top left corner of the screen. Evaluates to true if clicked.
    if user == owner
        print("The owner of this computer clicked the button")
    else
        print("The button was clicked by " & user) ; prints a message to the console (when the button was clicked, in this case)
; Here we also happen to use the built-ins 'user', 'username' and 'owner'
; 'user' returns the user token (text) of the player who clicked
; 'username' returns the username (text) of the player who clicked
; 'owner' returns the user token (text) of the computer's owner

; Legacy draw|button function with width/height parameters (still supported)
; draw(x, y, color, width, height)
draw(0, 0, red, 50, 70) ; draw a red rectangle at coordinates 0,0 with a width of 50 and a height of 70
if button(10, 10, red, 30, 30) ; draw a red button at coordinates 10,10 with a width of 30 and a height of 30. Evaluates to true if clicked.
    print("The button was clicked")


var $somePixelColor = pixel(10, 10) ; get the current color of the pixel at coordinates 10,10

; Copy a zone from one screen to another screen
screen_copy($sprites, $dash, $src_x, $src_y, $dst_x, $dst_y, $width, $height, $color, $rotation, $bilinear)
; The arguments $color, $rotation, and $bilinear are optional.
; $color    : Applies a tint to the copied area. Use -1 to apply no tint.
; $rotation : Rotates the copied area (in degrees, clockwise).
; $bilinear : Enables bilinear interpolation. Set to 1 to enable
Virtual Screen Function
Allows the creation of a virtual screen with XenonCode. This screen, defined by code, is not physical and mainly serves to store visual data. You can then copy this data to a physical screen using the screen_copy() function, which is faster than redrawing.
Typical use: store sprites in a virtual screen to copy them all at once to a physical screen. For example, create a complex background and copy it in one go rather than redrawing it each time.
Avoid drawing on the virtual screen in a loop, as this would be as slow as drawing directly on a physical screen. Even though this can be useful in some use cases, we recommend using it in a static manner.
var $vScreen = virtualscreen(100, 200) ;virtualscreen(width, height)
;The maximum size of a virtual screen is 10000x10000 pixels.

init
    $vScreen.blank(black); clear the virtual screen with black
    $vScreen.write(0, 0, white, "Hello World") ; write a white "Hello World" message in the top left corner of the virtual screen
Dashboard
Introduction
When using the dashboard tool, various elements such as screens and labels can be used to display information, just like the screen of an AIO computer. However, as an external screen, its operation may slightly differ in certain situations.
First Use of a Dashboard Screen/Label
Communication with Dashboard Elements
Dashboards, unlike most components available in the game, use a single data port to access all elements available on the dashboard. Each element has a unique communication channel and can be used to send and receive data. You can retrieve the channel by pressing the V key while aiming at the dashboard element you wish to interact with.
Note: Channels are assigned incrementally, meaning the first element added to a dashboard will have channel 0, the second will have channel 1, and so on. If you remove an element, the channel will be reassigned to the next element added.
Creating and Using a Dashboard Screen/Label
When using the integrated screen of a computer, you can simply perform actions on it, such as coloring the screen red or displaying the text "Hello World".
init
    blank(red)
    write(0, 0, white, "Hello World")
In the context of a dashboard, you must first define the screen in a variable to be able to perform actions on it.
var $screen = screen(0,3) ;screen(aliasOrIoNumber, channelIndex)

init
    $screen.blank(red)
    $screen.write(0, 0, white, "Hello World")
List of Specific Functions for Dashboards
Assuming we have assigned the variable $screen to our dashboard screen, here is the list of functions you can use to interact with it.
Program Entry Points
click.$screen ($x:number, $y:number)
; This entry point is executed whenever a user clicks on the screen, given an xy coordinate in pixels.
; Multiple 'click' entry points may be defined in a single program and they will all be executed in the order they are defined.
Built-in values
$num_value = $screen.char_w ; the width of a character in pixels, taking into consideration the current text size
$num_value = $screen.char_h ; the height of a character in pixels, taking into consideration the current text size

$num_value = $screen.width ; the width of the virtual monitor in pixels
$num_value = $screen.height ; the height of the virtual monitor in pixels

$num_value = $screen.clicked ; whether the mouse button was pressed while aiming at the virtual monitor
$num_value = $screen.click_x ; the x coordinate of the mouse cursor on the virtual monitor when the mouse button was pressed
$num_value = $screen.click_y ; the y coordinate of the mouse cursor on the virtual monitor when the mouse button was pressed
Screen Rendering functions
$screen.blank($black) ; clears the screen with a given color

$screen.write(0, 0, green, "Hello") ; write a green Hello message in the top left corner of the screen
$screen.write(0, $screen.char_h, blue, "Hey") ; write a blue Hey message just under the first message
; Note that char_w and char_h return the size of one character in pixels + 1 additional pixel, to serve as a multiplier to jump lines or to count the width of a text.

$screen.text_size(2) ; sets text size to two times native, only valid for following writes in the current cycle until the next call to text_size()
$screen.text_align(top_left) ; sets text alignment to top_left, only valid for following writes in the current cycle until the next call to text_align()
;(top_left, top, top_right, left, center, right, bottom_left, bottom, bottom_right)
$screen.newline_spacing(3) ; sets the spacing between lines when using "\n" to make new line in write(), only valid for following writes in the current cycle until the next call to newline_spacing()


; Draw functions take positions X and Y where 0,0 = top-left, in pixels.
; draw_point(x, y, color)
$screen.draw_point($screen.width/2, $screen.height/2, white) ; draw a single white pixel in the middle of the screen
; draw_line(x1, y1, x2, y2, color)
$screen.draw_line(0, 0, $screen.width, $screen.height, yellow) ; draw a yellow line going from top left to bottom right of the screen
; draw_rect(x1, y1, x2, y2, color [, fillcolor])
$screen.draw_rect(50, 50, 60, 60, red) ; draw a red square starting at coordinates 50,50 inclusive through 60,60 exclusive, it will effectively have a size of 10x10.
; draw_triangle(x1, y1, x2, y2, x3, y3, color [, fillcolor])
$screen.draw_triangle($screen.width/2, 0, 0, $screen.height, $screen.width, $screen.height, blue) ; draw a blue triangle from the top middle to the bottom corners of the screen
; draw_circle(x, y, radius, color [, fillcolor])
$screen.draw_circle($screen.width/2, $screen.height/2, 50, green) ; draw a green circle with a radius of 50 pixels in the middle of the screen
; draw_poly(color, x1, y1, x2, y2, x3, y3, x4, y4)
$screen.draw_poly(yellow, 0, 0, 50, 50, 100, 0) ; draw a yellow polygon with 3 points. There is no limit to the number of points, allowing for the creation of complex shapes.

; Draw functions may also be turned into Buttons. Works with rect, triangle and circle.
if $screen.button_rect(0, 0, 40, 10, gray) ; draw a gray rectangle button in the top left corner of the screen. Evaluates to true if clicked.
    if user == owner
        print("The owner of this computer clicked the button")
    else
        print("The button was clicked by " & user) ; prints a message to the console (when the button was clicked, in this case)
; Here we also happen to use the built-ins 'user' and 'owner' which are player usernames

; Legacy draw|button function with width/height parameters (still supported)
; draw(x, y, color, width, height)
$screen.draw(0, 0, red, 50, 70) ; draw a red rectangle at coordinates 0,0 with a width of 50 and a height of 70
if $screen.button(10, 10, red, 30, 30) ; draw a red button at coordinates 10,10 with a width of 30 and a height of 30. Evaluates to true if clicked.
    print("The button was clicked")


var $somePixelColor = $screen.pixel(10, 10) ; get the current color of the pixel at coordinates 10,10
HUD Management in Archean
Introduction
The HUD (Heads-Up Display) system allows players to create their own graphical interfaces to display information on the screen such as texts, buttons, drawings... using XenonCode.
HUDs are entirely managed by the client, which means that each player has their own HUDs and other players cannot see them. However, they can communicate with Beacon or other players through an integrated system that allows sending and receiving data on frequencies.
It is important to note that since HUDs are completely client-side, they will be available on all servers/worlds you connect to. You cannot set them for a specific server/world except manually as indicated in the next section.
Additional Information:
- When using a button or any other interaction on a HUD, the
right clickis preferred to avoid grabbing the mouse look.
Creating a HUD
Since HUDs are a completely client-side feature, they do not have items directly associated with them in the game. To create a HUD, you need to go through the game settings menu F1 and go to the HUD tab.
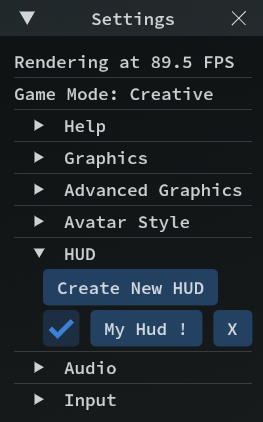
From this menu, you can create as many HUDs as you want and activate/deactivate them at your convenience using the checkbox. It is important to know that each HUD is a unique instance and does not natively communicate with other HUDs, although communication is possible through a feature that will be explained later on this page.
Once your HUD is created, you can open its IDE to code your features.
Creating your first graphical interface
HUDs use panels to display content on the screen. A panel can contain graphical elements such as texts, buttons, drawings...
You can create as many panels as you want and position them on the screen as you see fit. To create a panel, the syntax is similar to what you might find on a dashboard screen.
var $panel = panel(center, sizeX, sizeY)
Example of a HUD displaying "Hello World" in the center of the screen in a gray box of 100x50 pixels
var $panel = panel(center, 100, 50)

init
    $panel.blank(gray)
    $panel.write(1, 1, cyan, "Hello World")
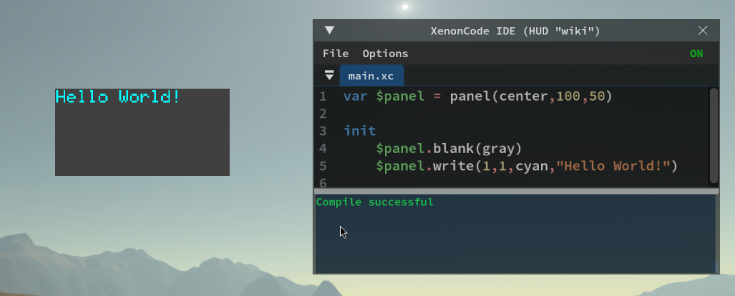
List of functions specific to HUDs
Functions related to the game window
screen_w ; returns the width of the game window
screen_h ; returns the height of the game window
screen_ratio ; returns the aspect ratio of the screen (width/height)
fov ; returns the player's camera field of view (radians)
aim_distance ; returns the distance of whatever the player is aiming at in meters

mouse_x ; returns the x position of the mouse on the game window
mouse_y ; returns the y position of the mouse on the game window

set_resolution_scale($scale)
; Sets the internal resolution of the HUD, from 1 (full resolution) to 8 (lower resolution).
; Default is 2. The HUD is rendered at screen resolution divided by $scale.
; Final display size is affected by ($scale * ui_scaling).
It is important to remember that the UI Scaling configured in the game settings influences the values returned by these functions.
Functions related to panels
var $myPanel = panel(center, $width, $height) ; creates a panel centered on the screen of size width, height
; 'Center' can be replaced by 'Top', 'top_left', 'top_right', 'bottom', 'bottom_left'...

$myPanel.set_position($x, $y) ; moves the panel to position x, y
$myPanel.set_size($width, $height) ; resizes the panel to size width, height

$myPanel.width ; returns the width of the panel
$myPanel.height ; returns the height of the panel
$myPanel.x ; returns the x position of the panel
$myPanel.y ; returns the y position of the panel
$myPanel.scroll ; returns the mouse scroll value (-1, 0, or 1)

; ENTRY POINT
click.$myPanel ($x:number, $y:number) ; returns the click position within the panel
Note: The way to draw on the panel is similar to the dashboard screen
Functions related to the integrated computer
set_cps(25) ; sets the number of HUD cycles per second
tick ; returns the current tick index
language ; returns the player's current language code (e.g., "en", "fr")
mouse_look() ; returns 1 if mouse look is active, 0 otherwise
Functions related to communication
var $beacon = beacon($transmitFreq, $receiveFreq) ; Allows sending/receiving data

var $data = $beacon.data ; returns the data received by the beacon
var $distance = $beacon.distance ; returns the distance between the player and the remote beacon
var $dir_x = $beacon.direction_x ; returns the x direction between the player and the remote beacon
var $dir_y = $beacon.direction_y ; returns the y direction between the player and the remote beacon
var $dir_z = $beacon.direction_z ; returns the z direction between the player and the remote beacon
var $is_recv = $beacon.is_receiving ; whether this beacon is receiving data on the receiving frequency

$beacon.transmit($data) ; sends data on the transmission frequency
Shared Values
Shared values is a feature that allows retrieving and setting information in the player's client.
A list of shared values is natively available to allow you to retrieve information about the player's environment.
var $comp = get("avatar_sensor_environment_composition") ; returns the composition of the player's environment
var $density = get("avatar_sensor_density") ; returns the density of the player's environment
var $temp = get("avatar_sensor_temperature") ; returns the temperature of the player's environment in Kelvin
var $gravity = get("avatar_sensor_gravity") ; returns the gravity of the player's environment
var $speed = get("avatar_sensor_speed") ; returns the player's speed in m/s
var $alt = get("avatar_sensor_altitude") ; returns the player's altitude in meters
var $alt = get("avatar_sensor_altitude_absolute") ; returns the player's absolute altitude in meters
var $view = get("avatar_is_3rd_person") ; returns whether the player is in third person view

var $inv = get("avatar_inventory") ; returns the player's inventory as a string of key values
var $belt = get("avatar_belt") ; returns the content of the belt as a string of key values
var $mass = get("avatar_mass") ; returns the mass of the avatar including inventory in kg (Avatar base mass is 100kg)
var $water = get("avatar_water_level") ; returns the player's water level
var $o2 = get("avatar_oxygen_level") ; returns the player's oxygen level
var $h2 = get("avatar_hydrogen_level") ; returns the player's hydrogen level
Creating your own shared values
It is possible to create your own shared values to transmit/receive, for example, information between HUDs.
set("mySharedValue", "Hello World") ; sets a shared value identified by "mySharedValue" with the value "Hello World"
get("mySharedValue") ; returns the value of the shared value "mySharedValue"
Virtual screen and screencopy
These functions are available in HUDs and work the same way as on computers. Refer to the documentation for the virtualscreen and screen_copy.
Examples
HUD that displays the player's speed
var $panel = panel(top,100,12)

tick
	$panel.blank()
	$panel.text_align(top)
	$panel.write(1,1,cyan,text("Speed: {0} km/h", get("avatar_sensor_speed")*3.6))
HUD that targets a beacon and displays the distance
var $panel = panel(center, 50,50)
var $beacon = beacon("", "target")

function @target_beacon($b:beacon, $p:panel, $width:number, $height:number, $color:number)
    if $b.direction_z > 0
        var $f = screen_w / (2 * tan(fov / 2))
        var $rz = $b.direction_z * (screen_w / screen_h)
        var $x_proj = ($b.direction_x * $f) / $rz
        var $y_proj = ($b.direction_y * $f) / $rz
        var $x = screen_w / 2 + $x_proj - $width / 2
        var $y = screen_h / 2 - $y_proj - $height / 2
        $p.set_position($x, $y)
        $p.set_size($width, $height)
        $p.blank()
        $p.draw_rect(0, 0, $width, $height, $color)
        $p.text_align(center)
        $p.write(text("{0.0} m", $b.distance))

tick
    @target_beacon($beacon, $panel, 50, 50, green)
XenonCode IDE
The XenonCode IDE is an interface that allows you to create/edit scripts and programs to control components and systems. It is based on the XenonCode programming language, which has been written especially for this game.
Features
- Text Editor: A text editor with syntax highlighting for writing scripts/programs.
- Node Editor: An alternative programming system based on visual nodes for creating scripts in a visual and intuitive way.
- Console: A console for displaying information, debugging and error messages.
- Toolbar: A toolbar for creating/deleting scripts/programs, restarting the system, and accessing the documentation available on the Archean page.
Using the IDE on computers
The CODE button on computers allows access to the IDE. From there, you can start writing scripts and programs to control components and systems.
IDE Library
The IDE includes a Library feature that allows you to locally save and reuse XenonCode files across different computers. This is useful for sharing common functions, utility scripts, or templates between multiple in-game computers without having to copy-paste code manually.
Additional information specific to computers
Computer
The computer has an integrated touch screen and a UI BIOS that displays system information and available programs on the hard drive at startup. You can select a program to execute by aiming at it and pressing the F key.
Mini Computer
The MiniComputer is smaller than the Computer and does not have a touch screen or a visual BIOS. It will natively execute the first program created on the hard drive.
Interface
The XenonCode IDE's interface works a lot like a normal IDE that programmers use, except that instead of having a file hierarchy, all the files in that virtual computer's HDD will always be opened as Tabs.
Tabs can be moved around and docker in and out of the IDE, put side-to-side, top-down, etc.
You may have multiple IDEs (meaning from multiple in-game computers) open at the same time in the game, althought they cannot be docker/snapped together.
Creating a custom BIOS
It is possible to customize the computer's BIOS by creating a file named main.xc. This file is the first to be executed when a computer starts up. You can use it to modify the appearance of the BIOS or to automatically load a program or directly execute any type of code.
Programs vs Files
A Program is a file that can be loaded using load_program(), and its name will end in *.main.xc (you don't have to add that in the name, just write the prefix).
A File is to be included within a program, cannot be loaded as a standalone program, but can be a custom bios when named exactly main.xc without any prefix.
Programs can be written with either the Node system or pure Code, whereas normal files can only be written in pure Code.
Programs may include() files or other programs, as long as there's no naming conflict in their contents, and only one init entry point is defined.
Switching between modes (visual nodes / code)
When you create a program, it will start with the Visual Nodes mode and a few initial IO nodes as an example which you may delete.
The Visual Nodes system will always automatically generate code in the background as you make modifications.
You may "Switch To Code" at any time, however it won't be editable right away.
To make it editable, you can "Convert to Code", which will simply comment out the first #NODES line that defines the nodes, and you will be able to edit the code.
After editing in code, if you want to switch back to nodes, your code will be overridden by the nodes that you had before you initially switched to code.
This means that typically, when converting to code, it's permanent, unless you want to revert it back to how it was.
Running the code
The in-game computers will always auto-reboot whenever a change has been saved in the current file (CTRL+S).
Saving without making any change won't do anything, but you can force it to reboot using CTRL+SHIFT+S, which will also force-save ALL open files.
Upon rebooting after saving a change, the computer will immediately load the previous program if there was one runnin, without going through the BIOS.
If an error occured, either from a syntax error or a runtime error (like a division by zero or bad indexing), the computer will freeze and blank the screen, and the error will appear in the console. At this point, you will need to fix the issue and reboot it by saving the changed file.
Persistency
In-game computers all run on the server-side, and they will keep running when you log out, if you're playing on a dedicated server.
Files are saved on the server's HDD in plain text, including a temporary file for unsaved changes, which is updated at every single change, so you won't lose your code.
Even if you had not saved your file, if your game crashes, whether you're playing solo or remotely, you will recover it when you log back in.
If you prefer using an IDE external to the game, like vscode, you can also edit the files directly on the server, if you're hosting it yourself or playing solo.
The virtual HDDs are stored in Archean-data/server/worlds/<WORLD_NAME>/ARCHEAN_computer/HDD-* and they contain the .xc files as you've created them, as well as the storage subdirectory which will contain storage variables in their own individual files with their values in plain text, newline-separated for arrays.
When editing a file externally, the game will detect any changes made to the currently running program and will automatically reboot the computer.
Editing a storage file however, won't cause a reboot, and the values won't be used immediately, as they are cached in the computer's memory upon load.
The storage files will be updated immediately on the server's hdd upon modifying the value though.
Collaboration
The IDE is collaborative, meaning multiple players are able to at least view the contents, while a single player at a time can edit the code.
Whenever the editor player makes a change, even if not saved, other players will see the change happen in realtime, whether it's in Code or Nodes mode.
Non-editor players are read-only, they cannot edit the code or nodes, until they click on Edit, in which case they will become the current editor and the previous editor will become a read-only viewer.
Shortcut keys
CTRL+SSave the current file and reboot the computerCTRL+SHIFT+SSave all files and reboot the computerCTRL+DSelect the next occurance in the code, or Dupplicate the selected node(s) when using Nodes modeCTRL+CCopy selected code or nodesCTRL+VPaste code or nodesCTRL+NCreate a new FileCTRL+SHIFT+NCreate a new ProgramCTRL+QClose the IDE
VSCode
We have made available a vscode extension to support XenonCode syntax highlighting as well as some linting, if you wish to use it.
Visual Nodes Editor
The XenonCode IDE's node editor offers a wide range of nodes to help you create scripts and programs.
It is comprehensive enough to handle complex tasks and is also easier to grasp for beginners. For even more advanced possibilities, you can also use XenonCode in text mode (code).
Code generation
The Visual Nodes system will always automatically generate code in the background as you make modifications.
The code is generated whenever an output, print, or execute endpoint node is added, and it will back-propagate through input dependencies.
This means adding an input node won't generated any code, but adding an output node will generate the code for both nodes when you connect them together.
List of nodes
Here is a list of the different types of nodes available in the editor, along with their descriptions if necessary:
Constant Number Defines a constant numerical value.
Constant Text Defines a constant textual value.
Variable Number Defines a variable numerical value that can be defined and reset by another node.
Variable Text Defines a variable textual value that can be defined and reset by another node.
Comment Allows you to display a comment block in your script.
Input
By Alias Use an output node of a component using its alias when communicating through a Router.
0,1,2,3... Use an output node of a component that is currently connected to a port on the computer. When you connect a component to a port, it is automatically detected by the computer.
Output
Print (Console log) Displays a number/text in the computer console.
By Alias Use an input node of a component using its alias when communicating through a Router.
0,1,2,3... Use an input node of a component that is currently connected to a port on the computer. When you connect a component to a port, it is automatically detected by the computer.
Math
Math nodes can have more than two inputs, allowing you to chain multiple values in a single operation.
Add Returns the addition of two or more values.
Subtract Returns the subtraction of two or more values.
Multiply Returns the multiple of two or more values.
Divide Returns the division of two or more values.
Absolute Returns the absolute value of a number.
Negative Returns the negative value of a number.
Modulo Returns the remainder of the division of two numbers.
Floor Returns the value rounded down to the nearest integer.
Ceil Returns the value rounded up to the nearest integer.
Round Returns the value rounded to the nearest integer.
Fract Returns the decimal part of a number.
Sign Returns the sign of a number.
Pow Returns the power of two numbers.
Log Returns the logarithm of a number.
Sqrt Returns the square root of a number.
Clamp Returns the value of a number clamped between a minimum and a maximum.
Step Returns 0 if the value is less than a threshold and 1 if it is greater.
Smoothstep Returns an clamped smooth interpolation between two values based on a ratio.
Lerp Returns a linear interpolation between two values based on a ratio.
Sin Returns the sine of an angle (given in radians).
Cos Returns the cosine of an angle (given in radians).
Tan Returns the tangent of an angle (given in radians).
Asin Returns the arcsine angle in radians of a number.
Acos Returns the arccosine angle in radians of a number.
Atan Returns the arctangent angle in radians of a number.
Boolean
Boolean values are represented as numerical values. 0 means False, anything else means True. Boolean nodes can have more than two inputs, allowing you to chain multiple conditions in a single operation.
And Returns 1 if all values evaluate to True.
Or Returns 1 if any of the values evaluate to True.
Xor Returns 1 if an odd number of the values evaluate to True.
Not Returns the opposite of a given boolean value.
Compare
Equal Compares if two values are equal and returns a boolean (0 or 1).
Greater Compares if one value is greater than another and returns a boolean (0 or 1).
Lesser Compares if one value is less than another and returns a boolean (0 or 1).
Functions
Expression Allows you to write a more advanced mathematical expression using XenonCode functions and/or algebra.
Switch Returns different values depending on the input value.
Counter Returns a counter that increments with each call. The initial value, minimum, and maximum can be defined.
Pulse Returns 1 when its input value has changed.
PulseToggle Returns a boolean that toggles between True/False each time its input value has changed.
Text Allows you to write a more advanced textual expression.
PID Controller Returns a PID control value based on the error, integral of the error, and derivative of the error.
Unit Converter Converts a value between common physical units of the same category. Supported categories: Angle (Radians, Degrees), Rotation (RPS, RPM), Speed (m/s, km/h, mph, ft/s, knots), Temperature (Kelvin, Celsius, Fahrenheit), Pressure (Pascal, bar, psi, atm), Force (Newton, lbf, kgf).
Execution
Statement Allows you to write a pure XenonCode statement like a function call. Must output to either a Conditional or an Execute node.
Conditional Consider the given statement only if the given condition evaluates to True. Can be chained with other conditionals.
Execute Executes the connected statements in top-down order.
Include Includes another XenonCode script in the current script. Make sure your variables and constants nodes have unique names.
Timing
Time Returns the current Unix Timestamp in units of seconds, having decimals with microsecond precision.
Delay Returns a boolean 1 after a given delay in seconds after the Set input has received a change from 1 to 0.
Blinker Returns an alternating boolean between 0 and 1 changing at each defined time interval in seconds.
Smooth Returns a value interpolating from the previous target (or 0) to the current target value with a given duration in seconds after the Start input has received a change from 1 to 0.
Getting Started
Creating a Mod
Mods are created from within the game, in the Mods tab under Local Mods.
1. Reserve a Vendor Name
Click Reserve Vendor Name to choose a unique vendor identifier. This name must be 3 to 12 alphanumeric characters and is automatically converted to UPPERCASE. This name is permanent and cannot be changed later.
2. Create a New Mod
Once your vendor name is reserved, enter a mod name in the Create New Mod field. The mod name must be 3 to 12 alphanumeric characters and is automatically converted to lowercase. Click Create New Mod to generate the mod folder.
Mod Folder Structure
After creating a mod, the following folder structure is generated:
Archean/Archean-data/mods/
└── MYVENDOR_mymod/
    ├── config.yaml              <- Crafting recipes (optional)
    ├── components/
    │   ├── MyComponent1/
    │   │   ├── MyComponent1 (.bin, .gltf, etc.)  <- 3D model
    │   │   ├── main.xc (optional)                <- XenonCode script
    │   │   └── MyComponent1.png                  <- Thumbnail
    │   └── MyComponent2/
    │       ├── ...
Each component lives in its own subfolder inside components/. The subfolder name must match the Entity Root name defined in Blender.
A mod can contain multiple components.
Creating a Component
A component requires at minimum a 3D model exported from Blender. XenonCode scripting and crafting recipes are optional.
| Step | Description | Page |
|---|---|---|
| 3D Model (required) | Create and export the 3D model using the Archean Blender plugin | 3D modeling with Blender |
| XenonCode Script (optional) | Add behavior with a main.xc script: screens, animations, physics, audio, ports... | Functionality with XenonCode |
| Crafting Recipes (optional) | Define how your component is crafted, recycled, or processed via config.yaml | Crafting Recipes |
Publishing
Once your mod is ready, you can publish it to the Steam Workshop directly from the Local Mods tab by clicking Publish on your mod. The mod's vendor prefix must match your reserved vendor name.
3D modeling with Blender
Plugin Installation
Here are two ways to install the plugin in Blender.
Method 1: Install from ZIP
-
Go to the plugin repository Archean Blender Plugin
-
Click the green "Code" button and choose "Download ZIP"
-
Open Blender
-
In Blender, go to Edit > Preferences > Add-ons
-
Choose "Install from Disk," then select the ZIP file you downloaded
-
After the installation finishes, enable the plugin in the add-ons list.
Method 2: Install by cloning the repository
- Open a terminal on your system.
- Clone the plugin repository into Blender's add-ons folder by running:
git clone https://github.com/batcholi/archean_blender_plugin <addons_path> - Launch Blender and confirm the plugin appears in the add-ons list.
- Enable the plugin if needed.
For Windows users: Install Git and use Git Bash to clone the repository. In the command prompt (CMD), Git won't be recognized if the executable path hasn't been added to the environment variable.
Plugin Overview
The plugin adds two new elements to Blender:
-
In the "Add" menu while in Object mode, a new object type Archean Entity, which adds a base structure for creating a new component.
-
In the viewport, an Archean menu appears with various settings.
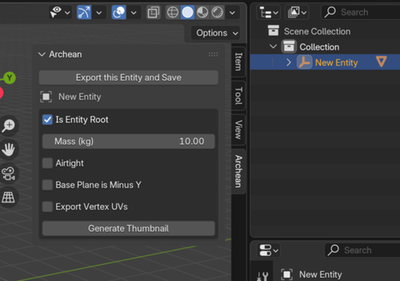
Using the plugin
An Archean entity is always made up of a specific structure. Here are its elements:
Items marked in green are required, those in orange are optional.
- Entity Root: The root object of the entity. It's crucial for export and must always be present.
- Renderable: A child object of the Entity Root. This is the object that's visible in-game. You can have several, but we recommend optimizing to keep as few as possible.
- Collider: A child of the Entity Root that defines the collision area. A collider can contain 6 to 8 vertices. You can place several colliders in an entity, but we encourage keeping that number low for performance reasons.
- Adapter: A child of the Entity Root, usually combined with a Single Arrow, that defines connection points used for data, power, fluid, or item cables.
- Joint: A child object of the Entity Root that, usually combined with a Single Arrow, defines articulation points to animate parts of the entity through translation or rotation. A joint becomes the parent of any object included inside it, including other joints.
- Target: A child object of the Entity Root that, often combined with a Single Arrow, defines a position and direction that can be used for adding functionality with XenonCode.
Parameter overview
Depending on whether you've selected the Entity Root or one of its children, the list of available settings changes.
Entity Root menu buttons
- Export this Entity and Save: Exports the entity to the folder where the .blend file is saved and then saves the file.
- Generate Thumbnail: Generates a thumbnail of the entity, which is used as its icon in the game.
Entity Root parameters
- Is Entity Root: Check this box to mark the object as the Entity Root. This unlocks entity-specific features.
- Mass (kg): The entity's mass in kilograms.
- Airtight: Defines whether the entity will be airtight within Archean's building system. Remember that the volume considered is that of the collider, not the renderable. If no collider is present during export, the game automatically creates one encompassing the entity.
- Base Plane is Minus Y: By default, the entity's base plane aligns with the -Z axis. Check this box to align it with the -Y axis instead.
- Export Vertex UVs: Check this to export UV coordinates. It's particularly important when using screens, textures..
Child object menu button
- Create Default Materials: Archean uses a specific palette for entities, ports, and more. Click this button to generate the default materials automatically.
Child object parameters
- Is Renderable: Marks that this object will be rendered in-game. A sub-parameter Export Sharp Edges appears, allowing you to export edges marked as "Sharp" in Blender so that they appear as wireframe in holograms in the game.
- Is Joint: Marks the object as a joint. A list of sub-parameters appears to enable rotation and translation constraints.
- Is Target: Marks the object as a target usable for functionality. Its position and direction matter depending on usage.
- Is Collider: Marks the object as a collider. Colliders must be simple and contain between 6 and 8 vertices. A sub-parameter Is Build Block appears so the collider can also act as a build block, allowing entities or blocks to snap onto it while staying aligned with the Archean grid.
- Is Adapter: Marks the object as a connection point for data, power, fluid, or item cables. A dropdown sub-parameter and a Create Mesh button let you generate the connector mesh directly.
The Archean development team usually relies on Single Arrow objects for adapters, joints, and targets because they're simply a position and a direction.
Creating your first entity
The first important step is to orient yourself properly in 3D space. In Archean, the Y-axis is forward/back, the X-axis is left/right, and the Z-axis is up/down.
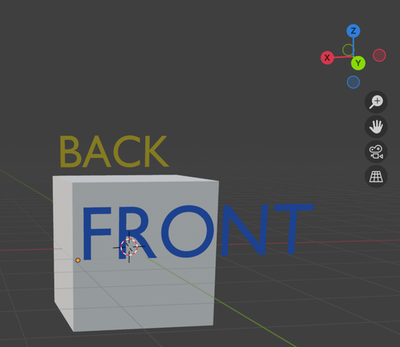
-
Open Blender and create a new scene.
-
Delete everything currently in the scene (by default a cube, a camera, and a light).
-
In the "Add" menu in Object mode, add a new Archean Entity.
This initial object contains an Entity Root and a simple cube marked as Renderable. The Entity Root's name is the entity name used for export and in-game.
The Entity Root name must not contain spaces or special characters—only alphanumeric characters.
-
Scale the cube to
0.5 x 0.5 x 0.5, i.e.,50 x 50 x 50 cm, because the default cube is too large. (That's 2 x 2 x 2 meters in-game.) -
Save the project in a folder before going further so you can export the entity later.
- Save the project to your component folder:
Archean/Archean-data/mods/MYVENDOR_mymod/components/MyComponentName/ - See Getting Started for how to create a mod and set up this folder structure.
- A mod can contain multiple components, each in its own folder.
- /!\ The component folder name must match the Entity Root name.
- Save the project to your component folder:
Adding the data port
Add a Single Arrow object on one face of the cube to create a data port. Generate its mesh, assign the correct material, and join it to the main object to avoid creating a separate renderable. Because ports often use smooth shading, apply an "Edge Split" modifier to the main object to prevent visual artifacts.
Adding a joint to rotate Suzanne
Add a Single Arrow object on top of the cube to define an articulation point. Mark it as Is Joint and enable rotation around the Z-axis only. Then parent the joint's child objects—Suzanne (Blender's monkey head) and a cylinder for the base.
Since Suzanne can rotate fully, set -360 as the Low value, 0 as Neutral (default position), and 360 as High.
Adding a screen
For the example, create an object that will serve as the base for the screen. First assign a material that looks like a display, then unwrap the UV by selecting the screen face so it fills the entire UV editor.
Make sure to enable Export Vertex UVs on the Entity Root so UV coordinates are exported. The screen material's look is up to you; for instance, you can turn a glass surface into a screen.
Adding a collider
To finish, add a collider that defines the entity's collision area. Add a cube, scale it to enclose the entire entity, and position it correctly. Mark it as Is Collider and hide it in the viewport.
Port Management for XenonCode
Port naming follows a specific convention to make them easy to identify within XenonCode. Here’s how it works:
-
Data Ports must be named data using the format
data.index, or simplydataif there is only one. This naming is required so they can be accessed usinginput.indexandoutput.indexin XenonCode.
Example with two data ports: Name themdata.0anddata.1. In XenonCode, you would access them usinginput.0andinput.1.
Example with a single data port: Simply name itdata. In XenonCode, you would access it usinginput.0andoutput.0. -
All other port types (Power, Fluid, Item, etc.) have no specific naming requirements. Their declared name is used directly in XenonCode.
Generating the thumbnail and exporting
Once everything is configured, generate the thumbnail and export the entity.
- Rename the Entity Root properly.
- Make sure Suzanne is marked as a Renderable.
Frequently Asked Questions
Why do I sometimes see a "Fix now" message in the plugin menu?
Objects need to have their scale applied to avoid export issues. The "Fix now" button applies the scale to every object in the scene at once. Usually you can prevent the message by applying an object's scale with Ctrl + A and choosing Apply > Scale.
The thumbnail orientation doesn't suit me. How do I change it?
Rotate the Entity Root to change how the thumbnail is framed. We recommend never applying that rotation so you can return the entity to its original orientation easily. You only need to regenerate the thumbnail when the visuals change.
Why should I avoid creating too many Renderables?
Archean's rendering engine is 100% ray tracing, so the number of vertices matters little. The number of objects, however, has a direct impact on performance. Keep in mind that Number of Renderables = renderables per entity * number of entities within a radius of roughly 100 km, depending on the entity's final size. (The larger the entity, the larger the render radius.)
Is it better to display text as a texture or as a mesh?
Thanks to ray tracing, mesh text is often more performant and looks better because it offers higher visual quality and consumes little VRAM compared to textures.
I'm used to making low-poly assets for games. Should I do the same for Archean?
Not at all—you can create very detailed models. Ray tracing delivers extremely high visual quality. Fun fact: Blender will probably crash before Archean does. Have fun with those vertices!
What colors do official components use?
When you generate materials using Create Default Materials, Color1 is the white used on most components, Color2 is the metallic gray, and Body is the black. The other materials have self-explanatory names.
Functionality with XenonCode
Introduction
Adding a XenonCode script to a component is optional. If your component doesn't need any behavior (no screens, animations, physics, or ports), you can skip this entirely.
To add scripting, create a main.xc file in your component folder (e.g. mods/MYVENDOR_mymod/components/MyComponent/main.xc). This file contains the XenonCode script that drives the component's behavior in the game. The XenonCode used for modding reuses the in-game syntax while exposing additional APIs specific to integrating with and interacting with the engine.
See Getting Started for how to create a mod and set up the folder structure.
Console output
XenonCode logs, whether errors or print() output, appear in the information window (V by default). This window displays the last 25 log lines and clears its contents each time the XenonCode script reloads. For compilation or runtime errors, only a single line is shown with the error message, just like the in-game IDE.
Macros
Modding through XenonCode introduces the concept of macros, which lets you declare the existence of some functionality that will be used inside the script. These macros must be placed at the top of the file before any other instruction and are prefixed with the # character.
Screens
#SCREEN "screen1" 80 40
; Create an 80x40-pixel screen from the material "screen1".
Naming I/O Channels
When using native components via the node system, input and output channels are named to facilitate their identification. This macro allows you to define the names of the input and output channels.
#DATAPORT input "data" 0 "Speed (km/h)"
; Defines the name of input channel 0 of the data port "data" as "Speed (km/h)"
#DATAPORT output "data" 3 "Velocity (m/s)"
; Defines the name of output channel 3 of the data port "data" as "Velocity (m/s)"
The data port name is the one defined in Blender.
Information Menu (V)
#INFO text_info "Text1" "OK" "MyText"
; Add a text info identified by "Text1" with the label "MyText" and default value "OK".
; If the label is omitted, only the value is shown with no colon.

#INFO numeric_info "Num1" 10 "MyNumber"
; Add a numeric info identified by "Num1" with the label "MyNumber" and default value 10.

#INFO text "Text2" "This is the text" "This is the text label"
; Add a text field identified by "Text2" with the label "This is the text label" and value "This is the text".

; --------------------------------------------------------------------------------------------------------------------------

#INFO checkbox "Check1" 0 "MyCheckbox"
; Add a checkbox identified by "Check1" with the label "MyCheckbox" and default value 0 (unchecked).

#INFO slider "Slider1" 20 0 100 "MySlider"
; Add a slider identified by "Slider1" with the label "MySlider" with a default value of 20, a minimum value of 0, and a maximum value of 100.

#INFO drag "Drag1" 0 1 10 0.25 "MyDrag"
; Add a drag field identified by "Drag1" with the label "MyDrag", a default value of 0, a minimum value of 1, a maximum value of 10, and a step value of 0.25.

#INFO button "Button1" "MyButton"
; Add a button identified by "Button1" with the label "MyButton".

; --------------------------------------------------------------------------------------------------------------------------

#INFO colorpicker "Color1" "MyCustomColor"
; Add a color picker identified by "Color1" with the label "MyCustomColor".
Note: Identifiers like Text1, Num1, etc.. are converted to lowercase. When calling them through a function like get_info(), always use lowercase.
Information Menu functions
get_info($name); Returns the value of a numeric element in the information menu.
get_info_text($name); Returns the value of a text element in the information menu.
set_info($name, $value); Sets the value of an element in the information menu.
Entry points
#SCREEN screen1 80 40
var $screen = screen("screen1")

; Retrieve the click coordinates of a screen if the screen has been assigned to a variable:
click.$screen($x:number, $y:number)
	print($x, $y) ; Displays the click coordinates

; Retrieve the click coordinates on a screen that isn't necessarily assigned to a variable, or on any material present in the component:
click($x:number, $y:number, $material:text)
	if $material == "screen1"
		print($x, $y) ; Displays the click coordinates
; If the material has been declared as a screen with the #SCREEN macro, the XY coordinates will be in pixels; otherwise, they will be in the range 0.0 to 1.0 according to the UV mapping of the material.

; click_hold works like click but triggers continuously while the button is held:
click_hold.$screen($x:number, $y:number)
click_hold($x:number, $y:number, $material:text)

; scroll entry point for mouse wheel events:
scroll.$screen($scroll:number) ; $scroll is -1 or 1
scroll($scroll:number, $x:number, $y:number, $material:text)
; If the material has been declared as a screen with the #SCREEN macro, the XY coordinates will be in pixels; otherwise, they will be in the range 0.0 to 1.0 according to the UV mapping of the material.
Built-in values
$num_value = delta_time ; the time interval between ticks in seconds (equivalent to 1.0 / system_frequency)
Function list
Screens
screen($materialName); Returns a screen object based on the material name.
$screen.scroll ; Returns the scroll value (-1, 0, or 1)
;virtualscreen() & screen_copy() are available and behave like they do on a [Computer](../xenoncode/computer.md)/[Dashboard](../xenoncode/dashboard.md).
Animations
animate($jointName, $axis, $speed [, $targetValue]); Animates a joint.
get_joint($jointName, $axis); Returns the current value of a joint.
; $axis is an enumeration — use one of the following values directly (no quotes):
; linear_x | linear_y | linear_z | angular_x | angular_y | angular_z
For more information on creating joints and targets in Blender, see 3D modeling with Blender.
Visual effects
set_emissive($renderableName, $materialName, $color, $power); Set the emissiveness of a material.
set_light($target, $radius, $color, $power, $angle); Create a light source.
set_plasma($target, $radius, $depth, $temperature); Define a plasma effect.
toggle_renderable($renderableName, $active); Enable or disable a mesh.
Audio effects
play_tone_once($target, $toneMode, $frequency, $amplitude, $duration);
; Generated one-shot tone
play_tone($target, $toneMode, $frequency, $amplitude);
; Generated looping tone

; $toneMode is an enumeration — use one of the following values directly (no quotes)
; sine_wave | square_wave | triangle_wave | sawtooth_wave;


play_sound_once($target, $audioFilePath[, $volume, $pitch, $innerRadius, $outerRadius, $begin, $end]);
; One-shot .wav playback
play_sound($target, $audioFilePath[, $volume, $pitch, $innerRadius, $outerRadius, $begin, $end]);
; Looping .wav playback

; $volume: 0.0 to 1.0 (Default: 0.5)
; $pitch: 0.1 to 4.0 (Default: 1.0)
; $inner/outer radius define the distance attenuation of the sound. (Default: innerRadius=1, outerRadius=25)
; $begin/$end: slice in seconds within the file (Default: begin=0, end=-1 to play to the end)

sound_info($audioFilePath)
; Returns a KV object with information about the audio file:
;   - duration (seconds)
;   - sample_rate (Hertz)
;   - channels (number of channels)
;   - size (bytes)
You can play multiple audio entries on the same target at the same time, but only if each entry has a different key.
The key is built as$target+$audioFilePath.
This means that if you trigger the same audio file on the same target multiple times with different parameters, it will replace any currently playing instance with the same key.Tested and guaranteed formats: .wav, .ogg, .mp3
FMOD audio engine can decode many additional file types, but they are not officially tested or supported in ArcheanCalling _once versions from a tick or tight loop will retrigger them every tick (spoiler: that's probably not what you want).
Physics
apply_force($target, $force [, $applyAtCenterOfMass]); Applies a force along the Up axis of the target node.
apply_torque($target, $torque); Applies torque around the Up axis of the target node.
set_mass($mass); Sets the mass of the parent entity.
toggle_collider($colliderName, $active); Enables or disables a collider.
Physical and environmental informations
get_linear_velocity($target); Returns the linear velocity along the Up axis of the target node.
get_angular_velocity($target); Returns the angular velocity around the Up axis of the target node.
get_speed(); Returns the absolute linear speed of the parent entity.

get_environment($target, $includeTerrain); Returns the environmental properties at the target node.
; List of properties returned in a KV:
;   - Composition of the atmosphere (.molecule{mole fraction}).
;   - Gravity (m/s²).
;   - Temperature (Kelvin).
;   - Pressure (Pascals).
;   - Density (kg/m³).
;   - Viscosity (Pa·s).
;   - Altitude (meters).
;   if $includeTerrain is true, also includes:
;   - Altitude above terrain (meters).
Port management
Energy
push_power($port, $voltage, $availablePower); Offers power to a port and returns the power consumed.
pull_power($port, $minimumVoltage, $consumedPower); Pulls power from a port. Returns the available power.
Fluids
FUNCTIONS
push_fluid($port:text, $molecule:text, $mass:number, $temperature:number)
; Pushes a given fluid to the device connected to $port and returns the mass actually accepted. Returns 0 if no connection or if $mass <= 0.

pull_fluid($port:text, $maxMass:number)
; Requests up to $maxMass of fluid from the connected device. Returns a KV object with the pulled composition and temperature. Returns an empty object if nothing is connected.

push_fluid_potential($port:text)
; Queries how much fluid the connected device can currently accept from a push, clamped between 0 and 1. Relies on the device implementing accept_push_fluid/accept_push_fluid_potential; returns 0 if the port cannot handle push entry points.

pull_fluid_potential($port:text)
; Queries how much fluid the connected device can currently provide when pulled, clamped between 0 and 1. Uses accept_pull_fluid/accept_pull_fluid_potential on the other device; returns 0 if the port cannot serve pull entry points.
ENTRY POINT
When another device calls that function on this component.
accept_push_fluid($port:text, $molecule:text, $mass:number, $temperature:number)
; Called when another device tries to push fluid into this component. Decrease $mass to reflect the unaccepted remainder (the server computes accepted mass as input minus leftover).

accept_pull_fluid($port:text, $maxMass:number, $compositionOut:text, $temperatureOut:number)
; Called when another device wants to pull fluid. Populate $compositionOut with the exported molecules and set $temperatureOut. Respect $maxMass and your own storage limits so the consumer receives only what you can supply.

accept_pull_fluid_potential($port:text, $potentialOut:number)
; Report the ratio of the requested fluid you can provide on this port right now (0–1). Leave $potentialOut at 0 when the port cannot serve pulls or storage is empty.

accept_push_fluid_potential($port:text, $potentialOut:number)
; Report the ratio of incoming fluid you can accept on this port right now (0–1).
You can find a list of XenonCode script examples for fluid management on the Fluid Snippets page.
Items
push_item($port, $itemName, $itemProperties, $count); Pushes items to a port. Returns the number of items accepted.
pull_item($port, $itemName, $maxCount, $maxMass); Pulls items from a port. Returns a KV of itemName, count, and properties.
Miscellaneous
is_connected($port); Returns 1 if the specified port is connected, 0 otherwise.
Fluid Snippets
Here are some example XenonCode scripts demonstrating fluid usage in modding with XenonCode.
In the following examples, we use a Slider macro to control the components. This can be kept as-is in the user interface or replaced with another input source (for example, a Throttle component, switch button, etc.).
#INFO slider "slider" 0 -1 1 "throttle"
The component used to create these examples has a fluid input port named "fluid-in" and a fluid output port named "fluid-out". These examples are provided for reference and can be adapted to your needs.
Bridge
push_fluid($port:text, $molecule:text, $mass:number, $temperature:number)
    if $port == "fluid-in"
        $mass -= push_fluid("fluid-out", $molecule, $mass, $temperature)
    elseif $port == "fluid-out"
        $mass -= push_fluid("fluid-in", $molecule, $mass, $temperature)
Infinite source
pull_fluid($port:text, $maxMass:number, $compositionOut:text, $temperatureOut:number)
    if $port == "fluid-in"
        $compositionOut.O2 = $maxMass
        $temperatureOut = 300
Tank
const $tankCapacity = 50 ; kilograms
const $tankBasePushRate = 1 ; kilograms per second
const $tankEmptyWeight = 20 ; kilograms

storage var $tankComposition = ""
storage var $tankTemperature = 0 ; Kelvin
storage var $tankContentMass = 0 ; kilograms

accept_push_fluid($port:text, $molecule:text, $mass:number, $temperature:number)
    var $availableCapacity = max(0, $tankCapacity - $tankContentMass)
    var $pushed = min($mass, $availableCapacity)
    if $port == "fluid-in" && $pushed > 0
        $tankComposition.$molecule += $pushed
        $tankTemperature = ($tankTemperature * $tankContentMass + $temperature * $pushed) / ($tankContentMass + $pushed)
        $tankContentMass += $pushed
        $mass -= $pushed

accept_pull_fluid($port:text, $maxMass:number, $compositionOut:text, $temperatureOut:number)
    if $port == "fluid-out" && $tankContentMass > 0
        foreach $tankComposition ($molecule ,$mass)
            var $massRatio = $mass / $tankContentMass
            var $pushed = min($massRatio * $maxMass, $mass)
            $compositionOut.$molecule += $pushed
            $tankComposition.$molecule -= $pushed
            $tankContentMass -= $pushed
        $temperatureOut = $tankTemperature

accept_pull_fluid_potential($port:text, $potential:number)
    if $port == "fluid-out"
        $potential = if($tankContentMass > 0, 1, 0)

accept_push_fluid_potential($port:text, $potential:number)
    if $port == "fluid-in"
        $potential = if($tankContentMass < $tankCapacity, 1, 0)

tick
    if $tankContentMass > 0
        foreach $tankComposition ($molecule ,$mass)
            var $massRatio = $mass / $tankContentMass
            var $consume = min($massRatio * $tankBasePushRate * delta_time, $mass)
            var $pushed = push_fluid("fluid-out", $molecule, $consume, $tankTemperature)
            $tankComposition.$molecule -= $pushed
            $tankContentMass -= $pushed
    set_mass($tankContentMass + $tankEmptyWeight)
Pump (100kg/s)
tick
    var $throttle = get_info("slider")
    if $throttle > 0
        var $potential = pull_fluid_potential("fluid-in")
        var $pulled = pull_fluid("fluid-in", 100 * $throttle * $potential * delta_time)
        var $composition = $pulled.composition
        var $temperature = $pulled.temperature
        foreach $composition ($molecule ,$mass)
            push_fluid("fluid-out", $molecule, $mass:number, $temperature:number)
    elseif $throttle < 0
        var $potential = pull_fluid_potential("fluid-out")
        var $pulled = pull_fluid("fluid-out", -100 * $throttle * $potential * delta_time)
        var $composition = $pulled.composition
        var $temperature = $pulled.temperature
        foreach $composition ($molecule ,$mass)
            push_fluid("fluid-in", $molecule, $mass:number, $temperature:number)
Valve
accept_push_fluid($port:text, $molecule:text, $mass:number, $temperature:number)
    var $open = get_info("slider")
    if $open <= 0
        return
    if $port == "fluid-in"
        var $requested = $mass * $open
        var $pushed = push_fluid("fluid-out", $molecule, $requested, $temperature)
        $mass -= $pushed
    elseif $port == "fluid-out"
        var $requested = $mass * $open
        var $pushed = push_fluid("fluid-in", $molecule, $requested, $temperature)
        $mass -= $pushed

accept_pull_fluid_potential($port:text, $potential:number)
    var $open = get_info("slider")
    if $port == "fluid-out"
        $potential = pull_fluid_potential("fluid-in") * $open
    elseif $port == "fluid-in"
        $potential = pull_fluid_potential("fluid-out") * $open

accept_push_fluid_potential($port:text, $potential:number)
    var $open = get_info("slider")
    if $port == "fluid-in"
        $potential = push_fluid_potential("fluid-out") * $open
    elseif $port == "fluid-out"
        $potential = push_fluid_potential("fluid-in") * $open

accept_pull_fluid($port:text, $maxMass:number, $compositionOut:text, $temperatureOut:number)
    var $open = get_info("slider")
    if $open <= 0
        return
    var $requested = $maxMass * $open
    if $port == "fluid-out"
        var $pulled = pull_fluid("fluid-in", $requested)
        $compositionOut = $pulled.composition
        $temperatureOut = $pulled.temperature
    elseif $port == "fluid-in"
        var $pulled = pull_fluid("fluid-out", $requested)
        $compositionOut = $pulled.composition
        $temperatureOut = $pulled.temperature
One way Valve
accept_push_fluid($port:text, $molecule:text, $mass:number, $temperature:number)
    var $open = get_info("slider")
    if $open <= 0
        return
    if $port == "fluid-in"
        var $requested = $mass * $open
        var $pushed = push_fluid("fluid-out", $molecule, $requested, $temperature)
        $mass -= $pushed

accept_pull_fluid_potential($port:text, $potential:number)
    var $open = get_info("slider")
    if $port == "fluid-out"
        $potential = 0
    elseif $port == "fluid-in"
        $potential = pull_fluid_potential("fluid-out") * $open

accept_push_fluid_potential($port:text, $potential:number)
    var $open = get_info("slider")
    if $port == "fluid-in"
        $potential = push_fluid_potential("fluid-out") * $open
    elseif $port == "fluid-out"
        $potential = 0

accept_pull_fluid($port:text, $maxMass:number, $compositionOut:text, $temperatureOut:number)
    var $open = get_info("slider")
    if $open <= 0
        return
    var $requested = $maxMass * $open
    if $port == "fluid-in"
        var $pulled = pull_fluid("fluid-out", $requested)
        $compositionOut = $pulled.composition
        $temperatureOut = $pulled.temperature
Crafting Recipes
Introduction
To make your modded components craftable in the game, you need to create a config.yaml file at the root of your mod folder. This file defines:
- Items: The maximum stack size for each item
- Recipes: How to craft (Crafter), recycle (Crusher), or chemically process (Chemical Furnace) your items
- Creative Inventory: Items that appear in the player's inventory when resetting in Creative mode
Mod Folder Structure
A mod is a folder containing all your custom components. Here's the expected structure:
Archean/Archean-data/mods/
└── MYVENDORNAME_mymod/
    ├── config.yaml              <- Crafting recipes (this page)
    ├── components/
    │   ├── MyComponent1/
    │   │   ├── MyComponent1 (.bin, .gltf, etc.)  <- 3D model
    │   │   ├── main.xc (optional)                <- XenonCode script
    │   │   └── MyComponent1.png                  <- Thumbnail
    │   └── MyComponent2/
    │       ├── MyComponent2 (.bin, .gltf, etc.)
    │       ├── main.xc (optional)
    │       └── MyComponent2.png
Important: The
config.yamlfile must be placed at the root of your mod folder, not inside thecomponentssubfolder.
File Structure
The config.yaml file has the following sections:
items:
  # Define max stack sizes for your items

recipes:
  # Define crafting, recycling, and chemistry recipes

inventory_creative_backpack:
  # Items added to backpack when resetting in Creative mode
Items Section
The items section defines the maximum stack size for each of your modded items. The item name must follow the format ModName.ComponentName.
items:
  MYVENDORNAME_mymod.MyComponent1:
    max_stack: 64
  MYVENDORNAME_mymod.MyComponent2:
    max_stack: 256
Common max_stack Values
| Value | Typical Mass Range | Examples |
|---|---|---|
| 1 | Unique items | Tools (RockRake, OreScanner), UraniumRod |
| 8 | 400-1000 kg | Crusher, SteamTurbine, FissionReactor, MiningDrill |
| 64 | 50-200 kg | Crafter, Container, Gyroscope, RTG, PilotSeat |
| 256 | 1-50 kg | Battery, Sensors, Junctions, FluidPort |
| 1024 | < 1 kg | Parts (Screw, Wire, Diode, Circuit) |
| 10000000 | Grams | Raw materials (Iron, Copper, etc.) |
As a general rule, the total mass of recipe inputs should approximately match the component's mass. For example, a 100 kg component should require roughly 100 kg of materials to craft.
Recipes Section
The recipes section is a list of recipe entries. There are three types:
- Crafter recipes: For crafting new items in the Crafter
- Crusher recipes: For recycling items back into raw materials
- Chemistry recipes: For chemical reactions in the Chemical Furnace
Crafter Recipes
A crafter recipe defines how to craft an item. These recipes work both in the Crafter machine and in the avatar's built-in crafting menu.
recipes:
  - label: MyComponent
    context: crafter
    time: 10
    input:
      ARCHEAN_parts.Casing: 50
      ARCHEAN_parts.Circuit: 1
      ARCHEAN_parts.Connector: 4
    output:
      MYVENDORNAME_mymod.MyComponent: 1
| Field | Description |
|---|---|
label | Display name in the Crafter UI |
context | Must be crafter |
time | Crafting time in seconds |
input | Required materials (item: quantity) |
output | Produced items (item: quantity) |
Crusher Recipes
A crusher recipe defines what raw materials are returned when an item is put in the Crusher.
recipes:
  - context: crusher
    input: MYVENDORNAME_mymod.MyComponent
    output:
      ARCHEAN_celestial.Iron: 5000
      ARCHEAN_celestial.Silicon: 1000
| Field | Description |
|---|---|
context | Must be crusher |
input | Single item name to recycle |
output | Recovered materials (item: quantity) |
- Crusher recipes are optional. By default, the Crusher automatically decomposes items into 100% of their raw crafting materials. Only add a crusher recipe if you want to override this default behavior.
- The
inputis a single item name (not a mapping).
Chemistry Recipes
Chemistry recipes define reactions that occur in the Chemical Furnace when specific temperature conditions are met.
recipes:
  - context: chemistry
    temperature_min: 750
    temperature_max: 950
    input:
      O2: 0.128
      H2: 0.004
    output:
      H2O: 0.036
      MYVENDORNAME_mymod.MyCompound:
        stack: 100
| Field | Description |
|---|---|
context | Must be chemistry |
temperature_min | Minimum temperature (Kelvin) for the reaction |
temperature_max | Maximum temperature (Kelvin) for the reaction |
exothermic_energy | (Optional) Energy released by the reaction (J/mol) |
input | Required fluids/materials |
output | Produced fluids/materials |
Complete Example
items:
  MYVENDORNAME_mymod.MyComponent:
    max_stack: 64

recipes:
  - label: MyComponent
    context: crafter
    time: 10
    input:
      ARCHEAN_parts.Casing: 10
      ARCHEAN_parts.Circuit: 1
    output:
      MYVENDORNAME_mymod.MyComponent: 1

inventory_creative_backpack:
  - MYVENDORNAME_mymod.MyComponent
Available Base Game Items
Raw Materials (ARCHEAN_celestial)
These can be used as recipe inputs:
ARCHEAN_celestial.AluminiumARCHEAN_celestial.CarbonARCHEAN_celestial.ChromeARCHEAN_celestial.CopperARCHEAN_celestial.GoldARCHEAN_celestial.IronARCHEAN_celestial.LeadARCHEAN_celestial.NickelARCHEAN_celestial.SiliconARCHEAN_celestial.SilverARCHEAN_celestial.SulfurARCHEAN_celestial.TinARCHEAN_celestial.TitaniumARCHEAN_celestial.TungstenARCHEAN_celestial.UraniumARCHEAN_celestial.Fluorite
Parts (ARCHEAN_parts)
These are intermediate items commonly used in recipes:
ARCHEAN_parts.ScrewARCHEAN_parts.PlasticARCHEAN_parts.WireARCHEAN_parts.ConnectorARCHEAN_parts.MagnetARCHEAN_parts.DiodeARCHEAN_parts.CapacitorARCHEAN_parts.PanelARCHEAN_parts.DiskARCHEAN_parts.CasingARCHEAN_parts.CircuitARCHEAN_parts.GoldPlatedCircuitARCHEAN_parts.MotorARCHEAN_parts.LED
Fluids
The chemistry system supports chemical formulas. Here are the commonly used fluids in the game:
| Formula | Name | Used In |
|---|---|---|
O2 | Oxygen | Electrolyser, Thrusters, Crafting |
H2 | Hydrogen | Electrolyser, Thrusters, Crafting |
H2O | Water | Electrolyser, Chemistry |
CH4 | Methane | Thrusters (fuel), Sabatier Reactor |
CO2 | Carbon Dioxide | Sabatier Reactor |
HF | Hydrogen Fluoride | Uranium processing |
F2 | Fluorine | Uranium processing |
You can define custom molecules using standard chemical formulas (e.g., NH3, C2H6). Molecular mass is calculated correctly from atomic masses, but liquid density for custom molecules is approximated.
Creative Inventory
You can make your modded items appear in the player's inventory when they reset in Creative mode. This is useful for testing or for items that don't need crafting recipes.
Backpack Items
Add items to the player's backpack on reset:
inventory_creative_backpack:
  - MYVENDORNAME_mymod.MyComponent
Archean offers a multiplayer experience, allowing you to open your single-player games to other players or set up a dedicated server.
Hardware Requirements
To ensure the proper functioning of an Archean server in multiplayer mode, the following minimum configuration is recommended:
- Processor: Prioritize high power per core (i7, Ryzen...)
- Memory: Minimum of 8 GB of RAM
This setup may change depending on the platform used (Windows, Linux, etc.) and future game updates.
Network
Regardless of the operating system choice, you must ensure that port 8881 is open for both UDP & TCP.
Note: When playing solo without
accept_remote_connections = yes, if port 8881 is already in use, the game will automatically use a random available port.
Setting Up a Server
SteamCMD (Recommended)
Archean Server is available via SteamCMD. This is the recommended method for dedicated servers as it allows easy updates.
steamcmd +login anonymous +app_update 3557220 +quit
Once downloaded, run the server executable as described in Manual Installation below.
Manual Installation
For both Linux and Windows, a standalone executable is available to run an Archean server.
To start the server, simply run the Archean_server[.exe] file located in the Archean-game folder. The server will launch in console mode and will ask you for a series of information to configure it. This information will no longer be requested once the server_public_name value is set in the server.ini file.
Docker
To set up a dedicated server on a Linux server, you will need curl as well as Docker in order to execute the automatic installation script.
Installing Docker can significantly vary depending on the distribution used. We recommend consulting the Wiki of your distribution for guidance on successful installation.
To install the server with the official script, here are the steps to follow:
# Download the install script
curl -s -o install_archean_server.sh https://archean.space/assets/user_scripts/run_server_with_docker.sh

# Make it executable
chmod +x install_archean_server.sh

# Run this script to Install or Update the server
./install_archean_server.sh
Note: It is possible to use this method on Windows using WSL (Windows Subsystem for Linux), but some users have encountered potential performance issues.
Allow Access to Your Single-Player Game
You can allow access to your single-player game if you manually configure the server.ini file with the following parameters:
server_online = yesserver_public_name = <Any name you want>accept_remote_connections = yes
Then, each time you press Play in the launcher, a public server will be listed and other players will be able to join you.
- Don't forget to open your port 8881 (or any other port you have configured in
listen_port).- You do not have to set the
server_onlineparameter toyesto allow other players to join your game. You can also invite them by giving them your IP address and the port of your server, which they will need to enter manually in the game launcher. You only need to setaccept_remote_connections = yes.
Installing Mods on a Dedicated Server
On a dedicated server, you need to manually download mods using SteamCMD and configure the server to find them.
1. Download mods with SteamCMD
Use SteamCMD to download Workshop mods. You can install SteamCMD anywhere on your system.
# Download a mod by its Workshop ID (replace WORKSHOP_ID with the actual ID)
steamcmd +login anonymous +workshop_download_item 2941660 WORKSHOP_ID +quit
where 2941660 is Archean's Steam AppID and WORKSHOP_ID is the mod's Workshop ID (found in the mod's Workshop URL).
By default, SteamCMD downloads Workshop content to:
- Linux:
~/.local/share/Steam/steamapps/workshop/content/2941660/ - Windows:
<SteamCMD_install_path>/steamapps/workshop/content/2941660/
You can also specify a custom download directory with the +force_install_dir option.
2. Configure external_mods_dir
In your server.ini, set external_mods_dir to point to the directory containing your downloaded mods:
[server]
external_mods_dir = /path/to/steamcmd/steamapps/workshop/content/2941660/
The server will scan this directory for mod folders containing a repository file.
3. Enable mods for your world
Edit the mods.txt file in your world folder:
Archean-data/server/worlds/<world_name>/mods.txt
Add one mod name per line. The mod name is defined in the mod's repository file (not the folder name).
Example mods.txt:
MYVENDOR_mymod
OTHERVENDOR_anothermod
- If a mod listed in
mods.txtis not found, the server will prompt you to continue without it or abort.- The mod name (VENDOR_modname format) is usually displayed on the mod's Steam Workshop page.
Server Configuration (server.ini)
The server.ini file contains all server settings. Here is a complete list of available parameters:
Server Settings
| Parameter | Default | Description |
|---|---|---|
server_online | no | Whether the server is listed publicly |
server_public_name | (empty) | Name displayed in the server list |
accept_remote_connections | no | Allow players to connect remotely |
max_simultaneous_players | 16 | Maximum number of concurrent players |
password | (empty) | Password for private servers (leave empty for public) |
external_mods_dir | (empty) | Path to external mods directory |
Game Settings
| Parameter | Default | Description |
|---|---|---|
world | (empty) | World save name |
spawn | earth | Spawn location (celestial body) |
spawn_x, spawn_y, spawn_z | Earth coordinates | Spawn position coordinates |
Networking Settings
| Parameter | Default | Description |
|---|---|---|
listen_port | 8881 | Port to listen on |
listen_new_connection_timeout_ms | 500 | Connection timeout in milliseconds |
automatic_blacklist | no | Automatically blacklist problematic connections |
Performance Settings
| Parameter | Default | Description |
|---|---|---|
updates_per_second | 25 | Server tick rate (updates per second) |
physics_steps_per_update | 8 | Number of physics simulation steps per server tick |
auto_save_interval_seconds | 30 | Auto-save interval in seconds |
screens_compression_level | 2 | Screen compression level (0-9). Lower = faster CPU but more bandwidth. Higher = slower CPU but less bandwidth |
server_loop_thread_cpu_affinity | -1 | CPU core affinity for the server loop thread (-1 = automatic) |
Tip: If your server has high CPU load from screens/dashboards, try lowering
screens_compression_levelto 0 or 1 for better performance at the cost of more network bandwidth.
Managing Administrators
Administration Panel (F4)
An administration panel is accessible in the game with the F4 key.
It displays the server load and its speed in ticks per second. (25 ticks/s being the default maximum tick rate guaranteeing optimal performance)
A checkbox Admin Privileges allows, among other things, to spawn blueprints for free when the game mode is set to Adventure.
The panel offers two tabs:
- Players: Allows you to see the list of connected players, teleport to them, and/or kick them.
- Entities: Allows you to see the list of entities present on the server (with owner and alias), delete them, and/or teleport to them. Also shows the total entity count.
Adding/Removing an Administrator
To add an administrator, simply modify the file /Archean-data/server/admins.txt.
This file should contain a list of player IDs, one per line.
If the player uses Steam, their Steam64 ID should be used.
Admin Commands
Administrators have access to special chat commands. See Chat & Commands for the full list, including the /ban command.
Chat & Commands
Chat System
The chat allows players to communicate with each other. To chat with other players, press Enter to open the chat, then type your message and press Enter again to send it.
- You have the option to copy a message by simply clicking on it with the
left mouse button. Multiline messages are fully supported.- The maximum length of a message is limited to 800 characters.
- Chat conversations are logged to the server's log file.
Command History
When the chat is open, use the Up/Down arrow keys to browse through previously entered commands. A visual popup appears above the input box showing up to 20 recent entries. You can also click on any entry to select it.
Note: If command suggestions are visible (auto-completion), the arrow keys navigate the suggestions instead. History browsing resumes when no suggestions are shown.
Commands
Commands allow you to perform specific actions by typing them in the chat, preceded by a /. There are several commands available, some of which are reserved for administrators.
List of commands available to all players:
/clear- Clears the messages displayed in the chat./help- Displays the list of available commands and their effects./list- Displays the list of connected players./info- Displays information about the server. (Server name, CPU load, ticks per second (25 ticks/s being the ideal value for a stable server))
List of commands available to administrators:
/save- Saves the current state of the game./setspawn <username>- Sets the spawn point for a specific user./give [<stack>] [<moduleName>.]<itemType> [<inventoryAlias|username>]- Gives items to a player. If no username is specified, the items are given to yourself./kick <username|id>- Kicks a player from the server./ban <username|id>- Bans a player from the server./timeadd [-]<hours>- Adds or subtracts time in the game.